
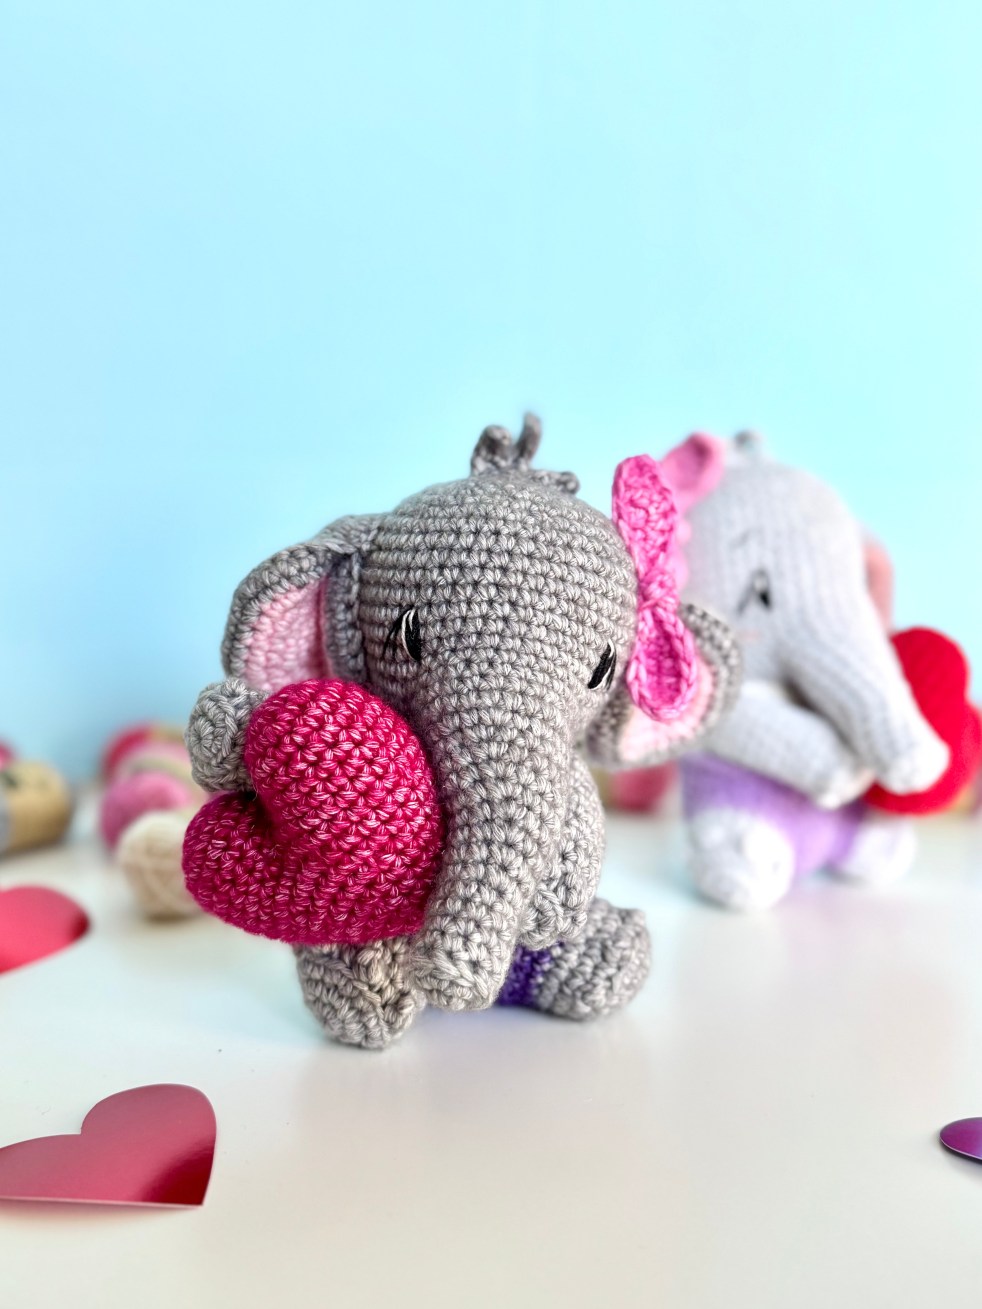
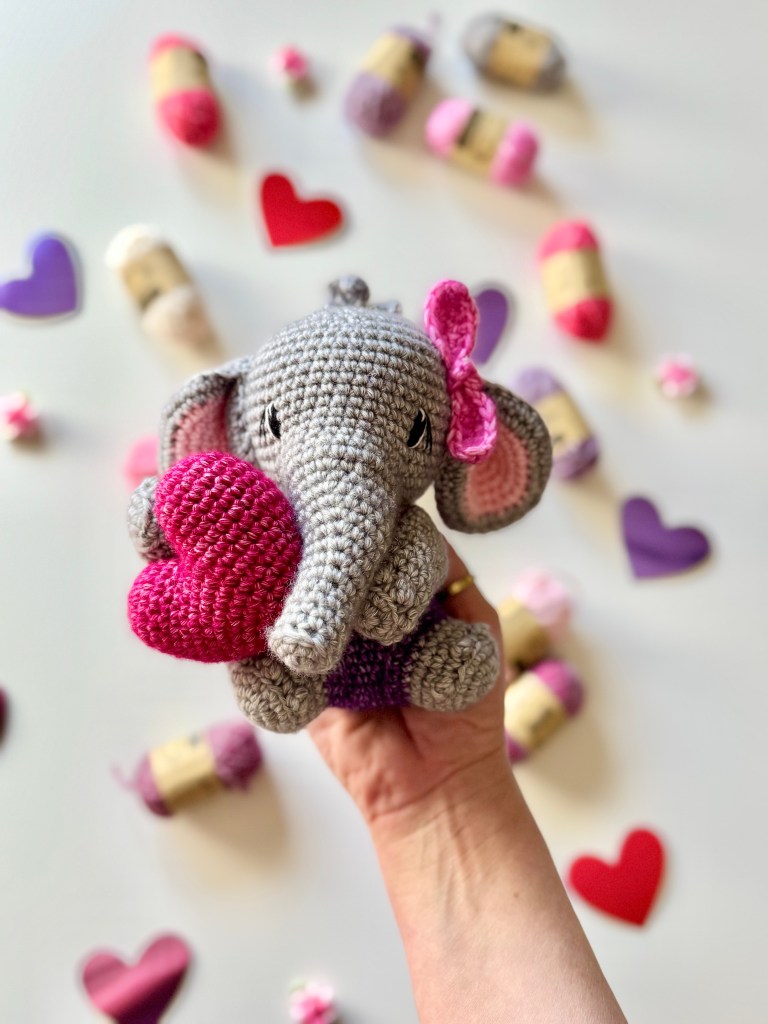
Sweet Pea is a little Valentine elephant that came together quickly, and with a whole lot of heart. ♥️
She’s the kind of project you sit down to make “just for fun”… and suddenly you’re already planning who you’re going to gift her to! I personally LOVE gifting projects like this for Galentine’s Day because I adore my female friends!
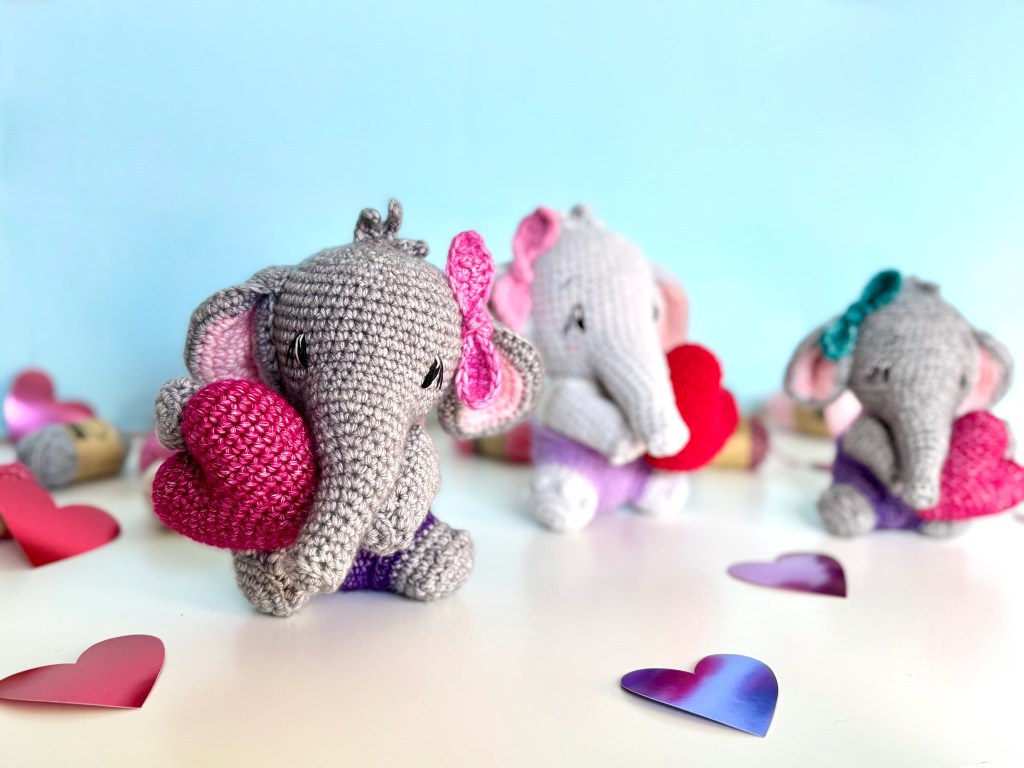
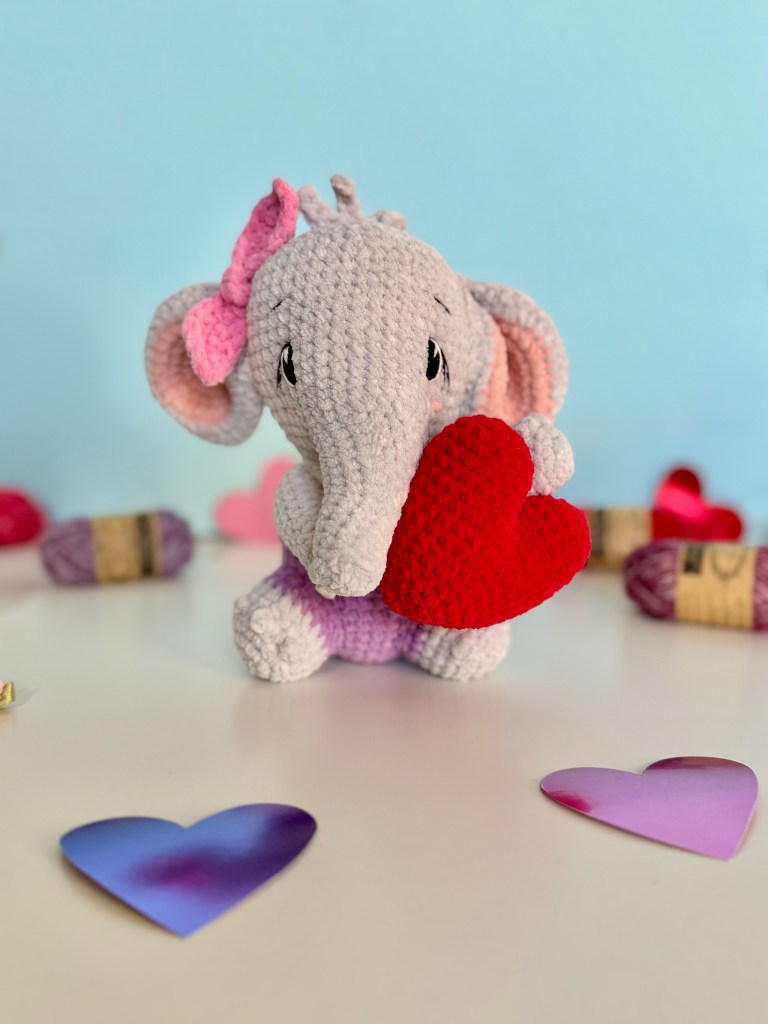
The main sample is made using Scheepjes Stonewashed XL, which gives Sweet Pea a soft, slightly weighted feel and really lovely stitch definition. I’ve also included additional samples made with Little Darling and Stonewashed Sport to show how easily this pattern adapts to different yarn weights and textures.
Sweet Pea is holding a big heart, because of course she is, and she’s finished with a small hair bow for a little extra personality. Her eyes are embroidered, which lets you fine-tune her expression and makes her a great option for gifting to younger children, too! At the end of the post you will find a YouTube video to help embroider your eyes just like mine!
The pattern is written to be clear and approachable, with clean shaping and gentle details—nothing fussy or too overwhelming (hopefully!). Don’t be afraid to play around with colors. Sweet Pea is a sweet reminder of why we love making handmade things, not just during Valentine’s Day!
Grab your hook, get comfy, and enjoy stitching up Sweet Pea.
Happy crocheting, friend!
Don’t forget to use the hashtag #sarahdeecrochet and #scheepjes to join the awesome gallery of projects.
Materials
- 3.25mm hook
- Stitch marker or scrap yarn for running stitch marker. See Specialty Techniques below.
- Scissors
- Weaving needle
- T-Pins
- Yarn
- Polyfill
- Black and white embroidery thread
Yarn Used
Scheepjes Stonewashed XL
Smokey Quartz(68g)
Rose Quartz(8g)
Rich Charoite(18g)
Moonstone(5g)
Tourmaline(8g)
Eudialyte(14g)
The photo below features three different yarns. From left to right: Stonewashed XL, Little Darling, Stonewashed Sport.
Learn more about some of my favorite Scheepjes yarn
- Stonewashed Sport
- Stonewashed XL
- Little Darling – I had the privilege of helping curate Scheepjes’ first chenille yarn. Find more information as well as patterns I specifically designed for Little Darling color packs here!
- Big Darling
Did you know that Scheepjes is now on Amazon? You can find your favorite yarns here!
You can also visit the Scheepjes website to find a store closest to you!
Abbreviations
Rnd – round
ch(s) – chain(s)
MR – magic adjustable ring
st(s) – stitch(es)
sl st – slip stitch
sc – single crochet
hdc – half double crochet
bpsc – back post single crochet
dec – invisible decrease
inc – increase
3scpopcorn – Place 3 sc in the next st, pull up a loop and remove hook from working yarn, insert hook from front to back in first sc made, grab the working loop and pull through to cinch the popcorn. See Speciality Stitches below.
BLO – back loop only
FLO – front loop only
FO – fasten off
Notes
The pattern is in US terminology and is made in continuous rounds. Take care to always move the stitch marker up to the last stitch at the end of each round. Stitch count is in ( ) at the end of each round. Make sure to have the correct number of stitches before moving on.
Safety Reminder
If you are using safety eyes or small embellishments, please note they are not recommended for children under 3 years old. For younger children, embroider the eyes and details, or add a safety note for precaution.
Legal
This pattern is for personal use only. You may sell the items that you make from this pattern, but I ask that you please refer back to ©️SarahDeeCrochet as the designer. Altering, reproducing, or selling this pattern, online or in print is strictly prohibited. This pattern is protected by international copyright laws.
Specialty Stitches & Techniques
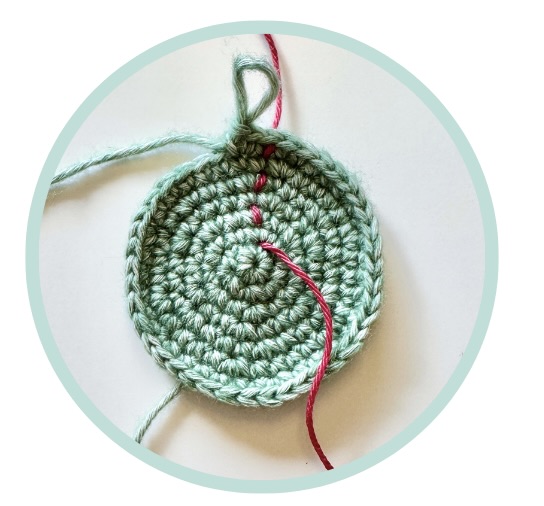
Using a running stitch marker
Using a running st marker when making amigurumi can be a game changer. It helps you keep track of your progress, rnd by rnd. By providing a visual cue to mark the end of each rnd, we can help reduce the likelihood of mistakes, especially in more complex patterns or with yarn that can be a bit fiddly to work with.
I prefer to use a scrap piece of cotton yarn, in a contrasting color, for my running stitch marker so there are no fiber transfers. (Using a fuzzy yarn can leave behind an unwanted trail.) Simply use your crochet hook to weave the piece of cotton in and out of the last st of the round, creating a woven st marker that can be easily removed when we are finished with our project. Just pull on one end and it will come right out!
3scpopcorn
Place 3 sc in the next st, pull up a loop and remove hook from working yarn, insert hook from front to back in first sc made, grab the working loop and pull through to cinch the popcorn.
Pattern
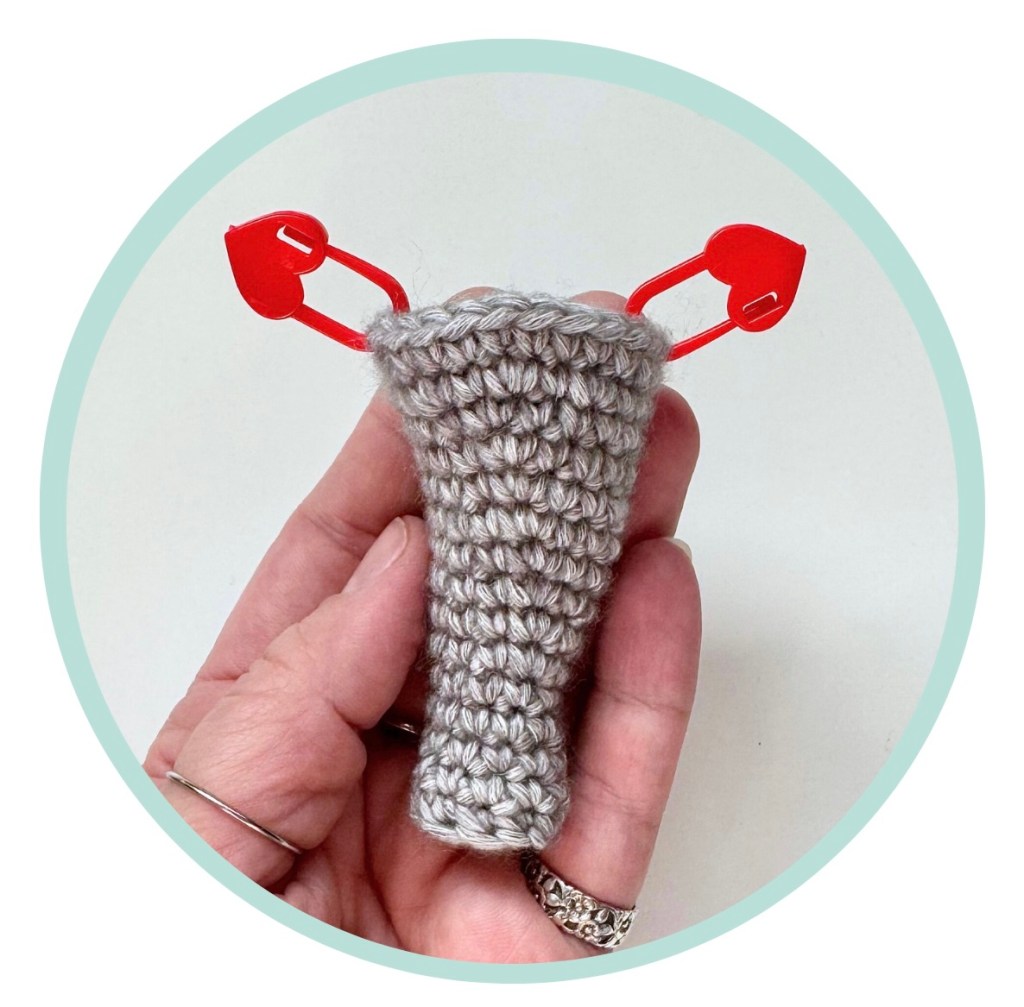
Trunk
Using Smokey Quartz
Rnd 1: 5sc in a MR (5)
Rnd 2: inc x 5 (10)
Rnd 3: bpsc in each st(10)
Rnd 4-7: sc in each st (10)
Rnd 8: 4sc, inc, 5sc (11)
Rnd 9: 5sc, inc, 5sc (12)
Rnd 10: 6sc, inc, 5sc (13)
Rnd 11: 7sc, inc, 5sc (14)
Rnd 12: 8sc, inc, 5sc (15)
Rnd 13: 9sc, inc, 5sc (16)
Rnd 14: 10sc, inc, 5sc (17)
Rnd 15: 11sc, inc, 5sc (18)
Rnd 16: 9sc, [inc, sc] x 3, 3sc (21)
Rnd 17: sc in each st (21)
Sl st into the next st to FO and cut yarn. Leave a 6-inch tail. Stuff the trunk. The increases on Rnd 16 will indicate the front center of the trunk. Find the center 12 sts and PM in the 1st and 12th st. Do not remove PM until instructed.
Arms x 2
Using Smokey Quartz
Rnd 1: 7sc in a MR (7)
Rnd 2: inc x 7 (14)
Rnd 3: Working through BLO – 3sc, [sc, 3scpopcorn] x 4, 3sc (14)
Rnd 4-6: sc in each st (14)
Rnd 7: [dec, 5sc] x 2 (12)
Rnd 8-13: sc in each st (12)
Add stuffing to the first 10 rnds.
Rnd 14: 6sc across to close. Make sure the toe-beans are parallel with the closure. Adjust accordingly.
FO and cut yarn, leaving a long tail for sewing.
Inner Ears x 2
Starting with Rose Quartz
Rnd 1: 6sc in a MR (6)
Rnd 2: inc x 6 (12)
Rnd 3: [sc, inc] x 6 (18)
Rnd 4: [sc, inc, sc] x 6 (24)
Rnd 5: [3sc, inc] x 6 (30)
Rnd 6: [2sc, inc, 2sc] x 6 (36)
Change to Smokey Quartz
Rnd 7: [5sc, inc] x 6 (42)
Sl st in the next st to FO and cut yarn.
Outer Ears x 2
Using Smokey Quartz
Rnd 1: 6sc in a MR (6)
Rnd 2: inc x 6 (12)
Rnd 3: [sc, inc] x 6 (18)
Rnd 4: [sc, inc, sc] x 6 (24)
Rnd 5: [3sc, inc] x 6 (30)
Rnd 6: [2sc, inc, 2sc] x 6 (36)
Rnd 7: [5sc, inc] x 6 (42)
Hold the inner ear with WS facing each other, work through the outer ear and the inner ear for Rnd 8, attaching them together. Place your first sc in the sl st from Rnd 7 of the inner ear.
Rnd 8: [3sc, inc, 3sc] x 6 (48)
Rnd 9: sc in each st (48)
Rnd 10: Fold the ear in half, place 5sc then a sl st through both sides of the ear. (6)
FO and cut yarn. Leave a long tail for sewing.
Legs x 2
Using Smokey Quartz
Rnd 1: 7sc in a MR (7)
Rnd 2: inc x 7 (14)
Rnd 3: [inc, sc] x 7 (21)
Rnd 4: Working through BLO – 4sc, [2sc, 3scpopcorn] x 4, 5sc (21)
Rnd 5-6: sc in each st (21)
Change to Rich Chariote
Rnd 7-8: sc in each st (21)
Sl st in the next st to FO and cut yarn. Leave a long tail for sewing. Add stuffing at assembly.
Pants
Using Rich Chariote
Rnd 1: 6sc in a MR (6)
Rnd 2: inc x 6 (12)
Rnd 3: [sc, inc] x 6 (18)
Rnd 4: [sc, inc, sc] x 6 (24)
Rnd 5: [3sc, inc] x 6 (30)
Rnd 6: [2sc, inc, 2sc] x 6 (36)
Rnd 7-14: sc in each st (36)
Rnd 15: sc in each st through FLO (36)
FO and cut yarn. Sew in end.
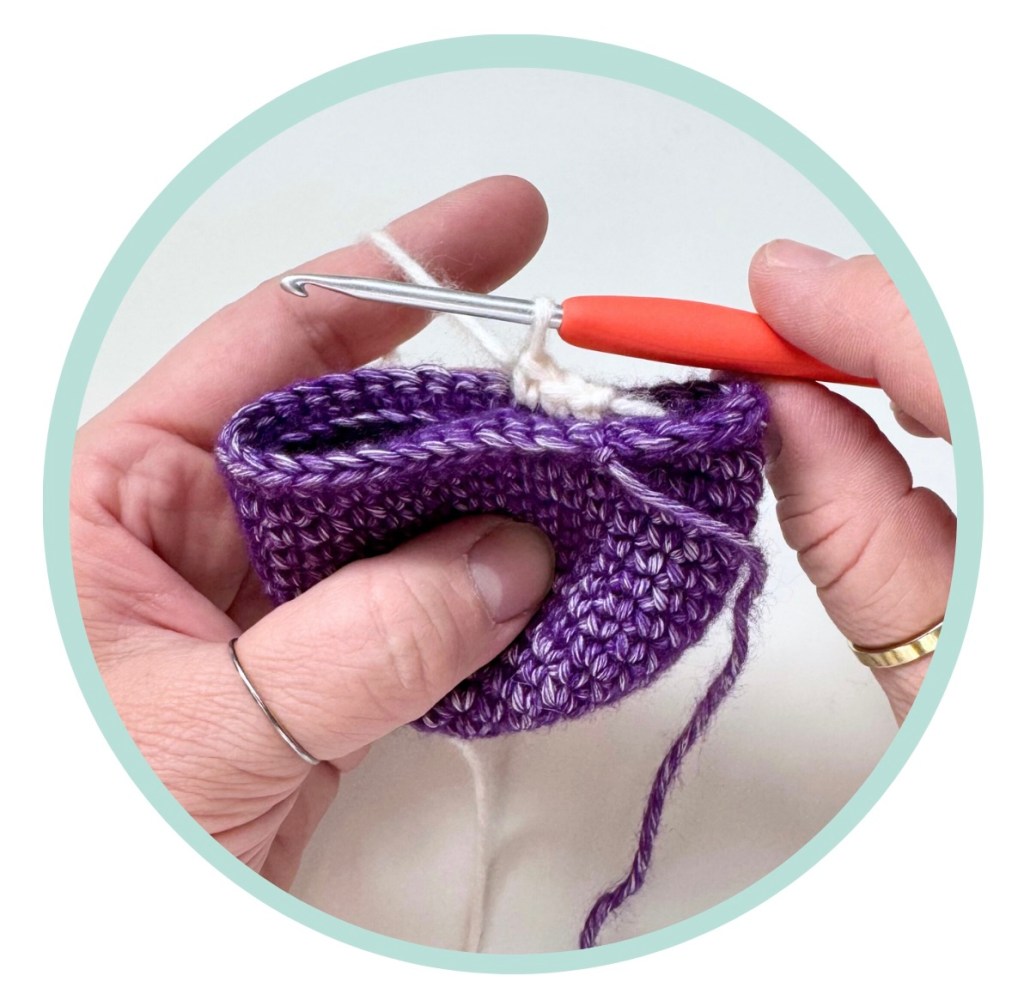
Body
Starting with Moonstone
Rnd 1: With a sl st on your hook, start in the first BLO st from Rnd 14 of the pants, sc in each st through BLO (36)
Change to Tourmaline
Rnd 2: [5sc, dec, 5sc] x 3 (33)
Change to Moonstone
Rnd 3: [9sc, dec] x 3 (30)
Change to Tourmaline
Rnd 4: sc in each st (30)
Change to Moonstone
Rnd 5: [3sc, dec] x 6 (24)
Change to Tourmaline
Rnd 6: sc in each st (24)
Change to Moonstone
Rnd 7: [sc, dec, sc] x 6 (18)
Stuff the body firm.
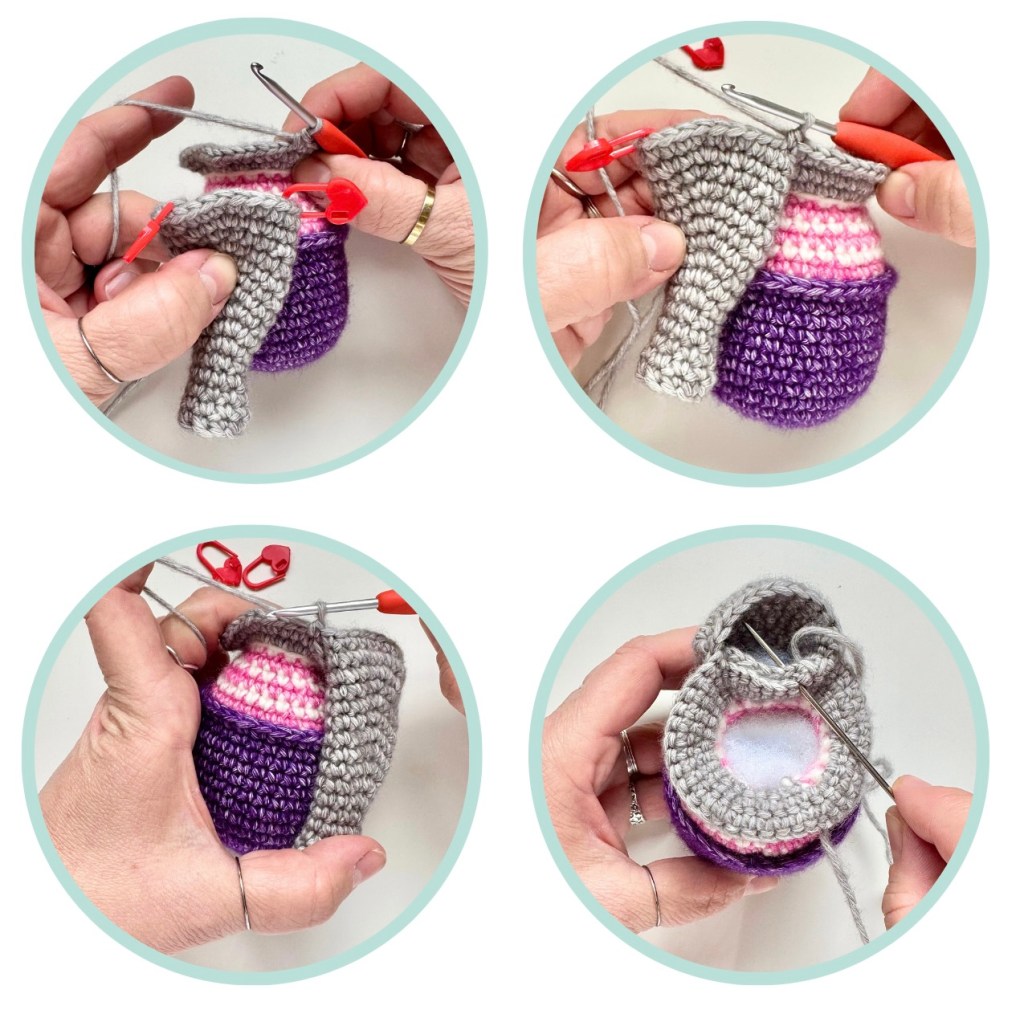
Starting the Head
Change to Smokey Quartz
Rnd 1: Working through BLO – inc x 18 (36)
Rnd 2: [5sc, inc] x 6 (42)
Attaching the trunk – There will be 9 sts left unworked, between the head and the trunk. Hold the trunk with the front facing you, your first sc will be placed into the st with the first PM, the last should land in the st with the second PM.
Rnd 3: 19sc, removing the PM as we work, 12sc across the top of the trunk, skip 9 sts on the head, 14sc (45)
Use the tail from the trunk to sew the gap closed from the back of the trunk to the head.
Rnd 4: 2sc, inc, 10sc, inc, 22sc, inc, 8sc (48)
Rnd 5-14: sc in each st (48)
Rnd 15: [3sc, dec, 3sc] x 6 (42)
Rnd 16: [5sc, dec] x 6 (36)
Add stuffing, continue stuffing until last rnd.
Rnd 17: [2sc, dec, 2sc] x 6 (30)
Rnd 18: [3sc, dec] x 6 (24)
Rnd 19: [sc, dec, sc] x 6 (18)
Rnd 20: [sc, dec] x 6 (12)
Rnd 21: dec x 6 (6)
Sl st into the next st to FO and cut yarn. Weave your tail through FLO of the remaining 6 sts, pull to close. Hide the end inside of the head.
Adding the Hair Tuft
Using Smokey Quartz
Pull up a loop on the top of the head over Rnd 20. We will be starting in the 2nd ch from the hook, each time we make the chs. When we sl st into the head it does not need to be over a specific rnd as long as you center the tuft on the top of the head.
Ch 5, 4sl st, sl st into the next st available on the head, ch 6, 5sl st, sl st into the next available st on the head, ch 5, 4sl st, sl st into the next available st on the head.
FO and cut yarn. Tie the two ends together and hide the tails on the inside of the head.
Bow
Using Tourmaline
Ch 25
Starting in the 2nd ch from hook. sc, hdc, 3dc, hdc, sc, 10sl st, sc, hdc, 3dc, hdc, sc, ch 2, now we will be working on the opposite side of the ch, sc, hdc, 3dc, hdc, sc, 10sl st, sc, hdc, 3dc, hdc, sc, ch 2 sl st into the first sc made.
FO and cut yarn. Leave a long tail for sewing to the head. Sew in starting tail.
Tie the bow in the center.
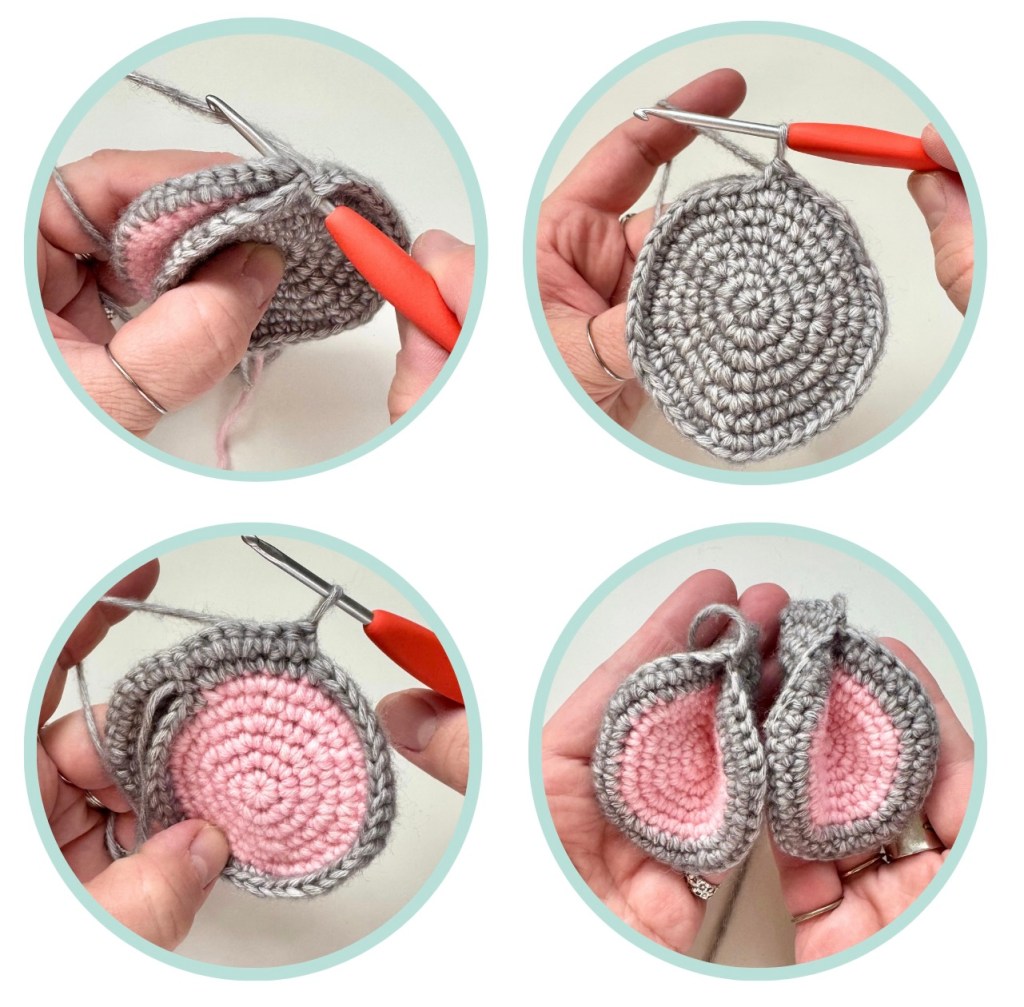
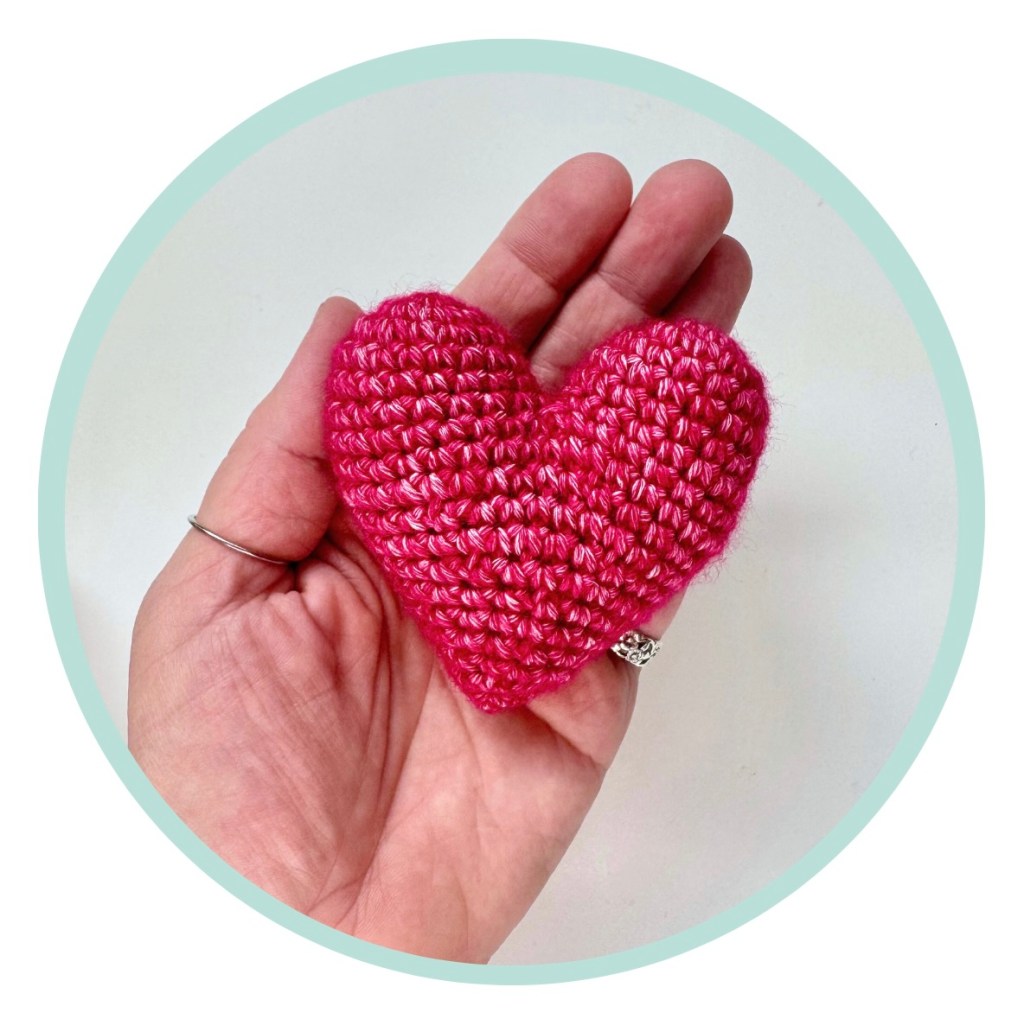
Heart
The heart is made of 2 parts.
Using Rose Quartz
Rnd 1: 6sc in a MR (6)
Rnd 2: inc x 6 (12)
Rnd 3: [sc, inc] x 6 (18)
Rnd 4-6: sc in each st (18)
Sl st into the next st to FO part one. Leave a tail for sewing the gap between parts one and two.
Repeat Rnds 1-6 do not FO part two, continue working.
Rnd 7: sc in the sl stitch from part one, 17sc, 18sc around part two (36)
Rnd 8-9: sc in each st (36)
Sew the gap closed using the tail from part one.
Rnd 10: [2sc, dec, 2sc] x 6 (30)
Rnd 11: sc in each st (30)
Rnd 12: [3sc, dec] x 6 (24)
Rnd 13: sc in each st (24)
Rnd 14: [sc, dec, sc] x 6 (18)
Rnd 15: sc in each st (18)
Rnd 16: [sc, dec] x 6 (12)
Stuff firm, continue stuffing until the last rnd.
Rnd 17: sc in each st (12)
Rnd 18: [dec] x 6 (6)
Sl st into the next st to FO and cut yarn. Weave your tail through FLO of the remaining 6 sts, pull to close.
Assembly
Use straight pins to hold all pieces together while you sew. Use the trunk for placement reference.
- Sew the ears to either side of the head. The top of the ears will line up with Rnd 15, then angle the ears slightly forward. Play around until you are happy with the placement.
- Sew arms between Rnds 1-6 on either side of the body. Use the ears to ensure proper alignment.
- Sew the legs to the front of the pants, over Rnds 6-12 with about 4 sts between them. Make sure the toe-beans are at the top of the legs while sewing.
- Sew the bow to the head, covering the top of one ear. (The opposite side that you plan to sew the heart.)
- Sew the heart to the arms and side of the trunk, off to the side of the body, so the trunk is on the side of the heart.
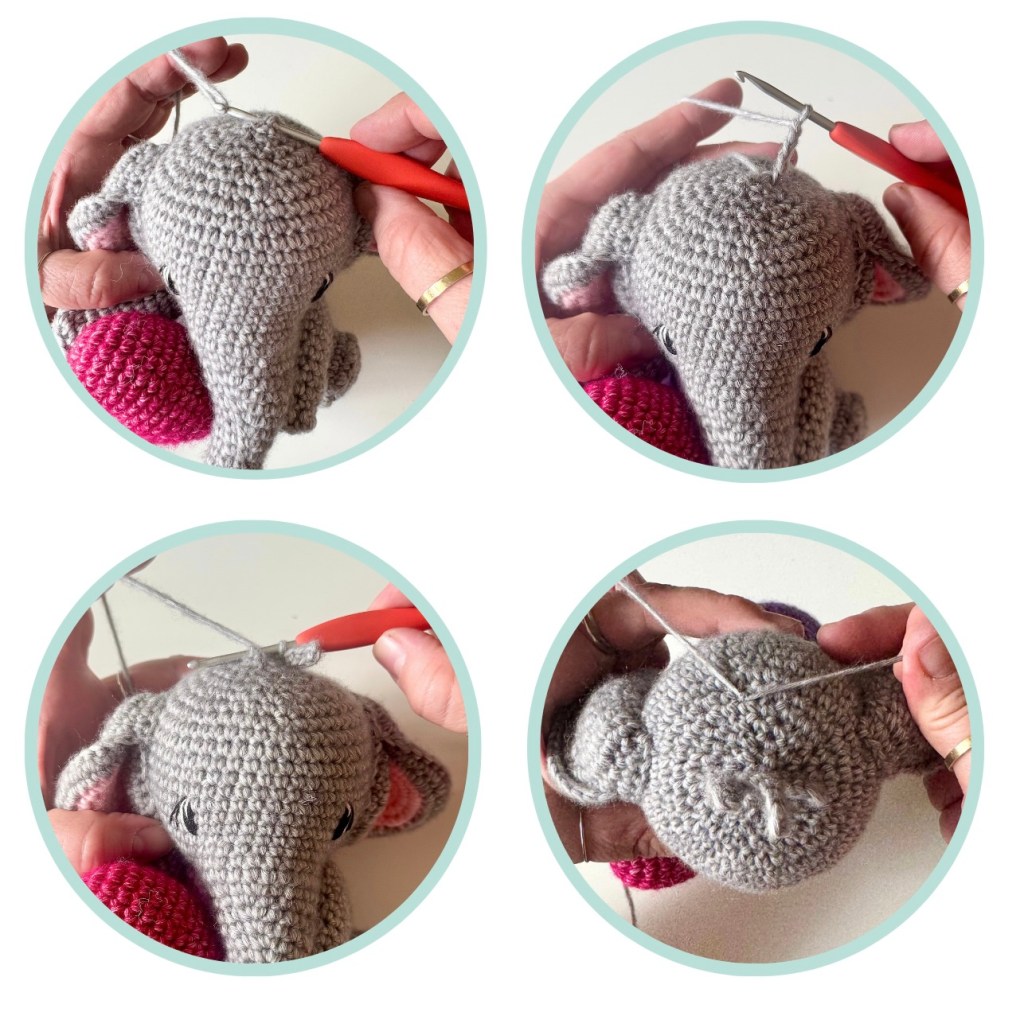
Embroidery
- Embroider the eyes over Rnd 6-8, approximately 9 sts apart.
- *Optional* Embroider the eyebrows over Rnd 11. Use the eyes for proper alignment.
Please don’t forget to tag SarahDeeCrochet and Scheepjes, as well as use #sarahdeecrochet and #scheepjes when you share your projects! ©️SarahDeeCrochet2026 All Rights Reserved.
This post may contain affiliate links that help me support my family, and bring you more free patterns like this, at no extra cost to you!
Discover more from SarahDee Crochet
Subscribe to get the latest posts sent to your email.

