
By Krissy Linderman of Loopsy Daisy Crafts

Hello, I’m Krissy, the creative mind behind Loopsy Daisy Crafts + Designs. My crafty journey began when I was a little girl. Scrapbooking and calligraphy were two of my first hobbies. College lead me to graphic design. I am now a wife and homeschooling mom of two boys. When I became a mom in 2014, it was the best feeling, but I missed being creative. That’s when I picked up a crochet hook for the first time. I was hooked (pun intended). Once again, I found the freedom to express myself through art! I love to design fun heirloom pieces that brings joy and lots of memories.

Follow Krissy!
Instagram
Facebook
TikTok
Etsy
Ravelry
You can also find an ad-free PDF of this pattern available in Krissy’s shops!
Materials
- 4mm Crochet Hook
- 5.50mm Crochet Hook for cowl & sled
- Worsted Weight Yarn
- Stitch Marker
- Tapestry Needle
- Polyfil Stuffing
- Scissors
- Black Thread or Yarn for eyes & nostrils
Yarn Used
Lion Brand Heartland
Sequoia (75g) main color (Color A)
Indiana Dunes (15g) sled (Color B)
Acadia (15g) marshmallows (Color C)
Grand Canyon (10g) horns (Color D)
Bryce Canyon (10g) cowl (Color E)
Abbreviations
Rnd – Round
MC – Magic Circle
Dec – Invisible Decrease
Inc – 2 sc in same st
SC – Single Crochet
Sl St – Slip Stitch
F/O – Fasten Off
St(s) – Stitch(es)
BLO – Back Loop Only
FLO – Front Loop Only
HDC – Half Double Crochet
Notes
Although this is an advanced beginner pattern, some amigurumi experience would be helpful. However, reach out with any questions or concerns. Please read through the entire pattern before starting your design. This pattern is written in US terminology. It is made in continuous rounds. Do not ch1 or sl st at the end of each round unless instructed to do so. Place a stitch marker in the first stitch of each round. Stitch count is in ( ) at the end of each row. Make sure your count is correct before moving to the next round. The legs, tail and arms are attached as you go on the body as well as the hair on the head.
Graham is approximately 7″ tall x 5″ wide x 6″ long.
Legal
This pattern is for personal use only. Please do not copy, share, translate or reproduce this pattern. You are welcome to sell finished items from this pattern, but please give me credit (Krissy of Loopsy Daisy Crafts + Designs). I would love to see your finished pieces. Please tag me with @loopsydaisycrafts and #loopsydaisycrafts on social media.
Pattern
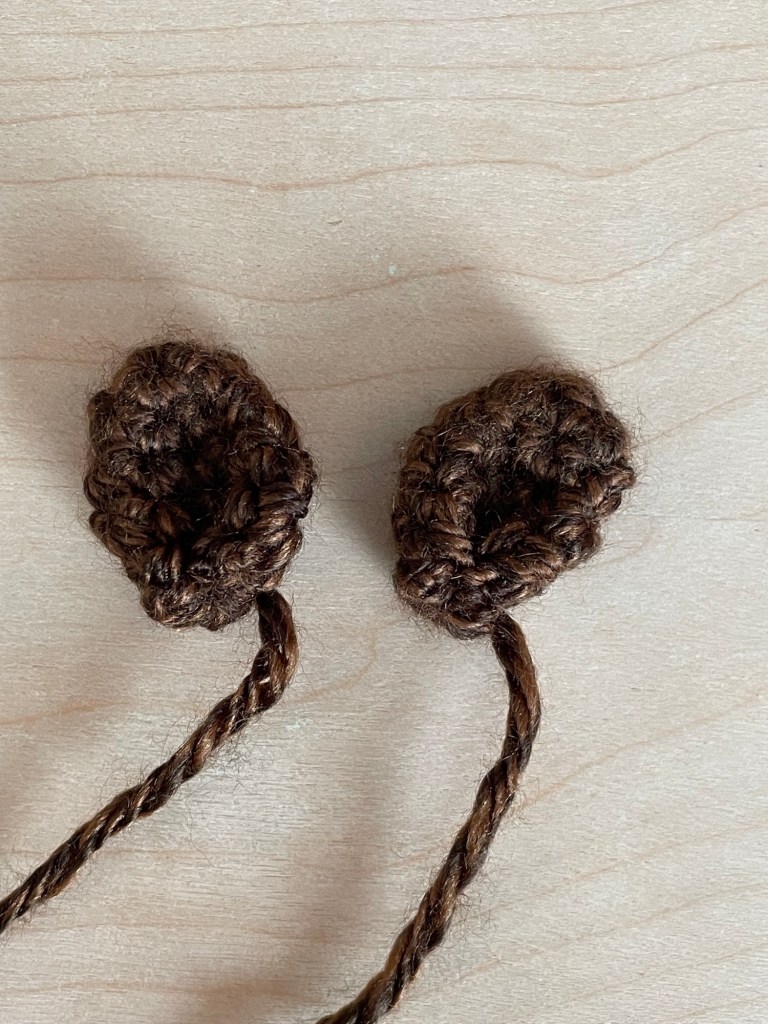
Ears
Color A | Make 2
Rnd 1: sc 6 in mc (6 sts)
Rnd 2: [2 sc, inc] x 2 (8 sts)
Rnd 3: [3 sc, inc] x 2 (10 sts)
Rnd 4-5: sc in each st (10 sts) ••2 rnds••
F/O & fold the ear in half and use a whip stitch to sew closed. Leave a long tail for sewing.
Arms
Color A | Make 2
Rnd 1: sc 6 in mc (6 sts)
Rnd 2: inc x 6 (12 sts)
Rnd 3: [3 sc, inc] x 3 (15 sts)
Rnd 4-6: sc in each st (15 sts) •• 3 rnds ••
Rnd 7: [3 sc, dec] x 3 (12 sts)
Rnd 8-21: sc in each st (12 sts) •• 14 rnds ••
Lightly stuff the bottom through rnd 10. Close the top with 6 sc.
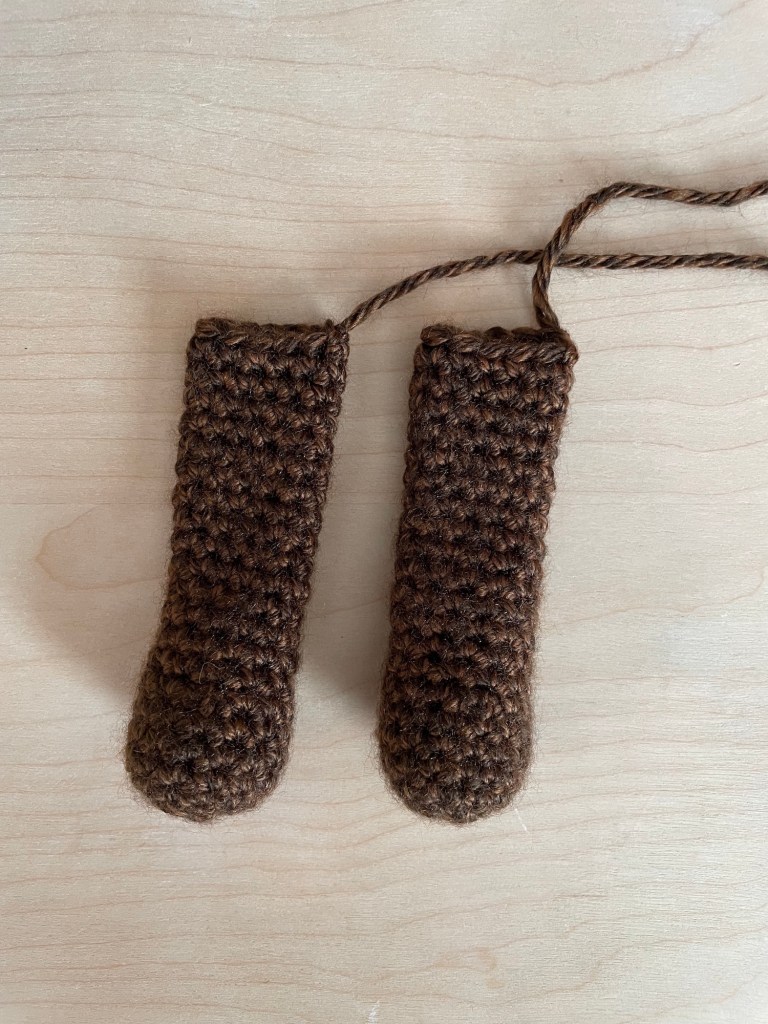
Legs
Color A | Make 2
Rnd 1: sc 6 in mc (6 sts)
Rnd 2: inc x 6 (12 sts)
Rnd 3: [sc, inc] x 6 (18 sts)
Rnd 4-6: sc in each st (18 sts) •• 3 rnds ••
Rnd 7: [sc, dec] x 6 (12 sts)
Rnd 8-19: sc in each st (12 sts) •• 12 rnds ••
Lightly stuff the bottom through rnd 10. Close the top with 6 sc.

Horns
Color D | Make 2
Rnd 1: sc 4 in mc (4 sts)
Rnd 2: [sc, inc] x 2 (6 sts)
Rnd 3: sc in each st (6 sts)
Rnd 4: [2 sc, inc] x 2 (8 sts)
**lightly stuff as you go
Rnd 5-8: sc in each st (8 sts) •• 4 rnds ••
Rnd 9: [3 sc, inc] x 2 (10 sts)
Rnd 10-14: sc in each st (10 sts) •• 5 rnds ••
F/O & leave a long tail for sewing.

Graham Cracker Sled
Color B and 5.50 mm hook
Approximate size: 6.75″ long x 3.5″ wide. To begin, ch 22.
Rnd 1: in the 2nd ch from hook, HDC. HDC in each st across (21 HDC)
Rnd 2-9: ch 2 turn. HDC in each st. (21 HDC) •• 8 rnds ••
Turn. In rnd 10, ch sts will be created along the short side of the sled for the handle.
Rnd 10: ch 12, sl st into the opposite corner to create a handle.
F/O and leave a long tail (about 30″) for sewing the sled to the body. Weave in short tail.

Head
Color A
Rnd 1: sc 6 in mc (6 sts)
Rnd 2: inc x 6 (12 sts)
Rnd 3: [sc, inc] x 6 (18 sts)
Rnd 4: [2 sc, inc] x 6 (24 sts)
Rnd 5-8: sc in each st (24 sts) •• 4 rnds ••
Rnd 9: [3 sc, inc] x 6 (30 sts)
Rnd 10-12: sc in each st (30 sts) •• 3 rnds ••
Rnd 13: [4 sc, inc] x 6 (36 sts)
The hair (loops) will be created on the next few rounds. The hair should grow outward by one on each side. Placement may vary slightly depending on tension and the type of yarn used. Adjust stitch marker as needed to be sure the hair is even. Do not count ch 3 in st counts.
Rnd 14: 10 sc, [FLO sc, ch 3] x 5, 21 sc (36 sts) ••5 loops••
Rnd 15: 10 sc, 5 sc in each of the BLO sts from rnd 14, 21 sc (36 sts)
Rnd 16: 9 sc, [FLO sc, ch 3] x 7, 20 sc (36 sts) ••7 loops••
Rnd 17: 5 sc, inc, 3 sc, 2 sc in BLO from rnd 16, BLO inc, 4 sc in BLO from rnd 16, sc, inc, [5 sc, inc] x 3 (42 sts)
Rnd 18: 10 sc, [FLO sc, ch 3] x 9, 23 sc (42 sts) ••9 loops••
Rnd 19: 10 sc, 9 sc in BLO from rnd 18, 23 sc (42 sts)
Rnd 20-21: sc in each st (42 sts) •• 2 rnds ••
Rnd 22: [5 sc, dec] x 6 (36 sts)
Rnd 23: [4 sc, dec] x 6 (30 sts)
Rnd 24: [3 sc, dec] x 6 (24 sts)
Rnd 25: [2 sc, dec] x 6 (18 sts)
**start stuffing
Rnd 26: [sc, dec] x 6 (12 sts)
Rnd 27: dec x 6 (6 sts)
Stuff, F/O and close.

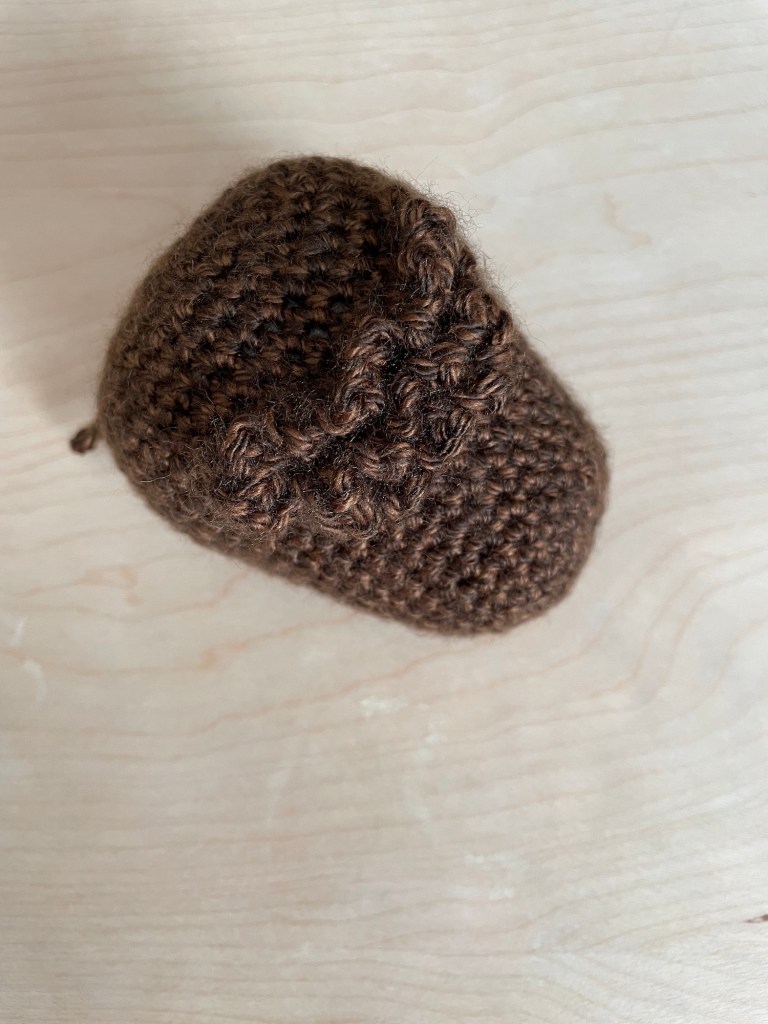
Body
Color A
Rnd 1: sc 6 in mc (6 sts)
Rnd 2: inc x 6 (12 sts)
Rnd 3: [sc, inc] x 6 (18 sts)
Rnd 4: [2 sc, inc] x 6 (24 sts)
Rnd 5: [3 sc, inc] x 6 (30 sts)
Rnd 6: [4 sc, inc] x 6 (36 sts)
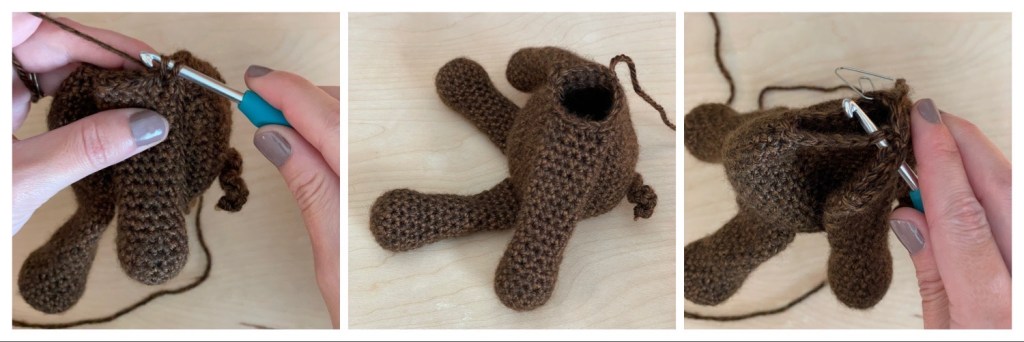
**the legs will be attached in the next rnd. Make sure the legs are on the right side of the body. The legs should hang down in front of the body with the working round at the top.
Rnd 7: 11 sc, attach leg 1 with 6 sc through the leg and body, 2 sc, attach leg 2 with 6 sc through the leg and body, 11 sc (36 sts)
Rnd 8: [5 sc, inc] x 6 (42 sts)
Rnd 9: sc in each st (42 sts)
**fold the body in half to find the center of the body for the tail. This will be the first st of the rnd. Move your stitch marker if needed.
Rnd 10: FLO sl st, ch 10, starting in the 2nd ch from hook, sc in each ch st, FLO sl st back into the original sc; 41 sc (42 sts)
Rnd 11: work 1 sc in the BLO from rnd 10 for the 1st only, 41 sc (42 sts)
Rnd 12-14: sc in each st (42 sts) •• 3 rnds ••
Rnd 15: [5 sc, dec] x 6 (36 sts)
Rnd 16-18: sc in each st (36 sts) •• 3 rnds ••
Rnd 19: [4 sc, dec] x 6 (30 sts)
Rnd 20: [3 sc, dec] x 6 (24 sts)
Rnd 21: [4 sc, dec] x 4 (20 sts)
**the arms will be attached in the next rnd. Make sure the arms are even on each side of the body. You may have to move your stitch marker over a few spaces.
Rnd 22: 5 sc, attach arm 1 with 6 sc through the arm and body, 3 sc, attach arm 2 with 6 sc through the arm and body (20 sts)
Stuff, F/O. Leave a long tail for sewing.
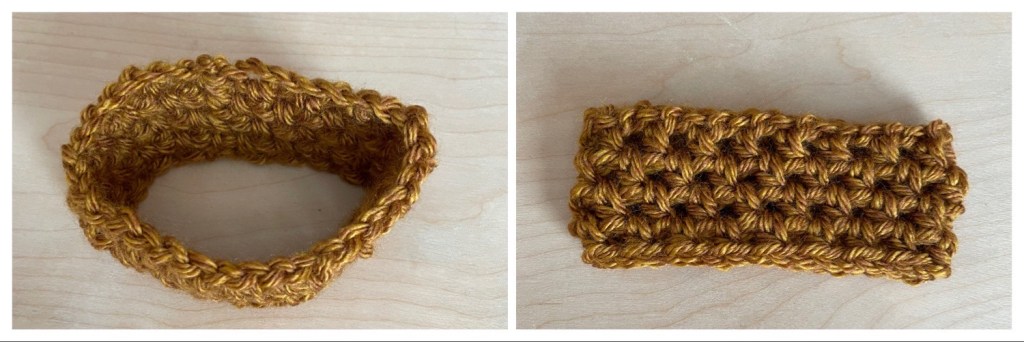
Cowl
Color E and 5.50 mm hook
Approximate Size: 9″ circumference | 1.75″ wide
The cowl will be worked in the round. Each rnd will be joined with a sl st and ch 2. The ch 2 does not count as the first st.
Rnd 1: ch 34. Join with a sl st to first ch. Take care not to twist the chain.
Rnd 2: Ch 2, [hdc in the first st, ch 1, skip the next st] x 17. Join with a sl st to first hdc. (17 hdc)
Rnd 3-5: Ch 2, [hdc in the first ch 1 space from previous rnd, ch 1, skip the next st] x 17. Join with a sl st to first hdc. (17 hdc)
F/O and weave in loose ends.
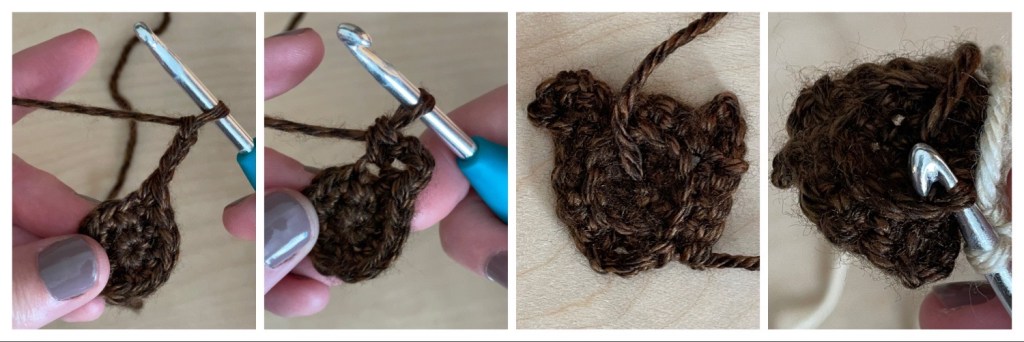
Marshmallows
Starting with Color A | make 3
Rnd 1: sc 6 in mc (6 sts)
Rnd 2: inc x 6 (12 sts)
The dripping chocolate on the marshmallow will be crocheted on the next rnd. Crochet in the FLO for each st.
Rnd 3: FLO [sc, ch 3, sc all in the same st]; 3 sc, [sc, ch 4, sc all in the same st]; 3 sc, [sc, ch 3, sc all in the same st]; 3 sc (12 sts)
**F/O and leave a long tail for sewing. Attach Color C to BLO from rnd 3.
Rnd 4: sc in the BLO of each st from rnd 3 (12 sts)
Rnd 5-7: sc in each st (12 sts) •• 3 rnds ••
Rnd 8: sc in BLO in each st (12 sts)
**Stuff very lightly, be careful not to add too much stuffing.
Rnd 9: dec x 6 (6 sts)
F/O and close. Leave a long tail for sewing.

Fold the ch sts down onto the marshmallow. Using the tail from Color A, tack the ch sts down to create a dripping chocolate look. Then, tie the tail to the marshmallow tail to secure. Only cut the brown tail. Shape the marshmallow by pushing up on the bottom.
Assembly
- Put the cowl on the Bison.
- Pin the horns to the head on rnds 17-21 with 9 sts between. Sew the horns in place.
- Pin the ears beside the horns and sew.
- Pin the head to the body and make sure all parts are lined up. Sew the body to the head.
- Place the marshmallows between the horns. Sew them to the head and horns through the BLO of the marshmallows.
- Using black thread or yarn, sew the nostrils over rnds 5-7 with 5 sts between the top of the nostrils and 2 sts between the bottom part of the nostrils.
- Using black thread or yarn, sew the eyes over rnd 12 with 6 sts between.
- Add fringe to the tail.
- Using the long tail on the sled, weave the end through the handle to attach to hand 1, then weave the tail back through the handle and attach to hand 2. Continue to weave the end through the handle. Then, start to tack down the sled to the body.

Graham the Bison is Finished!
Thank you for your support! I hope you enjoyed making Graham the Bison. I would love to see your makes. Please tag me on social media @loopsydaisycrafts and use #loopsydaisycrafts.

