
Crochet Pattern by BissyCrowechet
Level – Adventurous Beginner/Intermediate
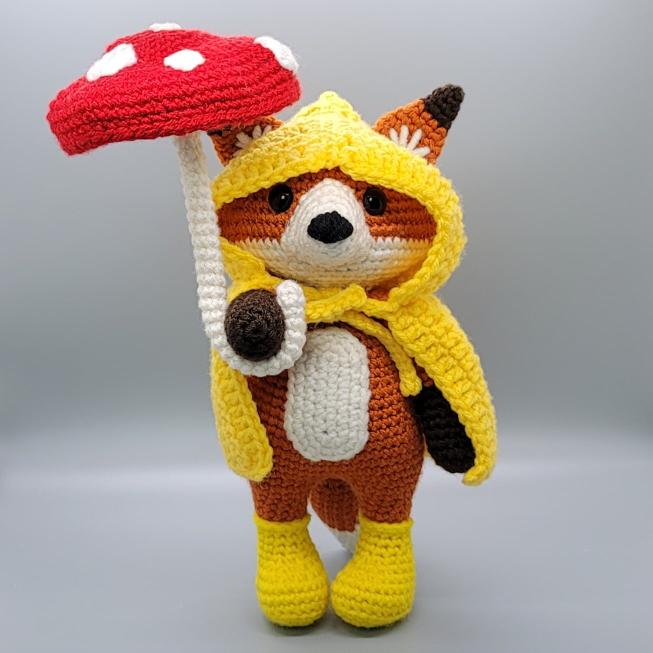
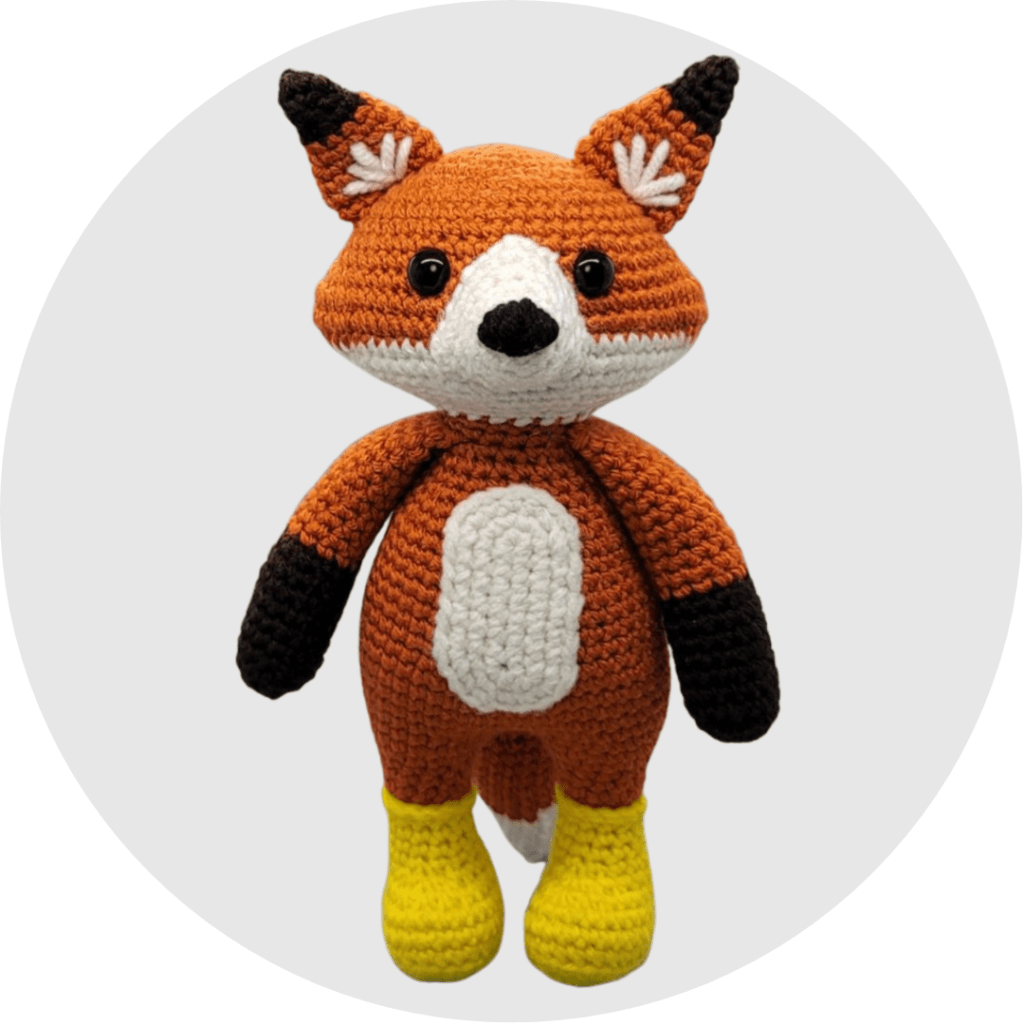
Let’s create a sweet fox together!
Hi there! I am Elizabeth of bissycrowechet, crocheter, designer, pattern tester, wife, and mama of 2. My crochet journey started in May of 2015. I started with hats and blankets, but I knew that was not what I wanted to do. I wanted to make toys. Late 2015 I completed my very first amigurumi and was hooked, I knew, this was it! My passion! July of 2017 I designed my very first pattern, Riley the Stegosaurus, all because I could not find a pattern I liked for my sons first birthday. From that I knew I wanted to continue designing. I enjoy how it feels like we are sculpting, shaping every piece of our amigurumi to make our final outcome. My heart soars each time a child or even an adult has the happiest smile on their faces because of one of my creations. I love that I can call myself a toy maker.

Follow Elizabeth!
You can also find an ad-free PDF of this pattern in Elizabeth’s shops!
MATERIALS
- 3.5mm E and 4.0mm G Hooks
- Yarn – Worsted Weight 4 – I used 7 colors in Hobby Lobby’s I Love This Yarn
- Burnt Pumpkin
- Brown
- Ivory
- White
- Red
- Yellow
- Small amount of Black
- Safety Eyes – 12mm
- Polyfil
- Yarn needle
- Scissors
- Stitch Marker
Of course, you are always welcome to change the yarn you would like to use. However, you may need to adjust your hook, eyes, and nose sizes, due to the possibility of your yarn choice changing the size of your finished Forest.
ABBREVIATIONS
- ch: chain
- sl st: slip stitch
- sc: single crochet
- dc: double crochet
- inc: increase – sc two stitches in the same stitch
- dec: decrease – sc two stitches together
- fo: fasten off
- mr: magic ring
- BLO: back loop only
- st/sts – stitch/stitches
PARTS OF FOREST AND HIS ACCESSORIES
- Head
- Feet and Body
- 2 Arms
- 2 Ears
- Snout
- Tummy
- Tail
- Poncho
- Umbrella Top
- Umbrella Handle
NOTES
Forest is worked in continuous rounds. It is highly recommended you use a stitch marker to keep track of where each round starts.
- Size – Forest stands about 10 inches tail from the bottom of his feet to the tips of his ears.
- Hook – Everything will be crocheted in a 3.5mm E hook unless specified.
- Gauge – gauge is not important with Forest. Just make sure to keep your tension the same throughout.
- Color change – when getting ready to change colors, work a sc like normal but before finishing off the stitch grab the color you are changing to and pull it through the two loops, finishing off the sc.
- Stitch Count – at the end of each round the number in the ( ) is the number of stitches in the round.
- Invisible decrease – this method of decreasing is optional. I use this method due to it making the decrease virtually undetectable, making it look like a regular sc. You will be using the front loops only to do the decrease. Start off the decrease by inserting your hook into the front loop of the first stitch and now insert your hook into the front loop of the second stitch. You should now have three loops on your hook. Yarn over and pull through the first two loops on your hook. Now you have two loops on your hook. Yarn over once more and pull through the last two loops. Now you have one loop on your hook! Continue as normal.
AND NOW THE MOMENT YOU HAVE BEEN WAITING FOR! LET’S MAKE FOREST!
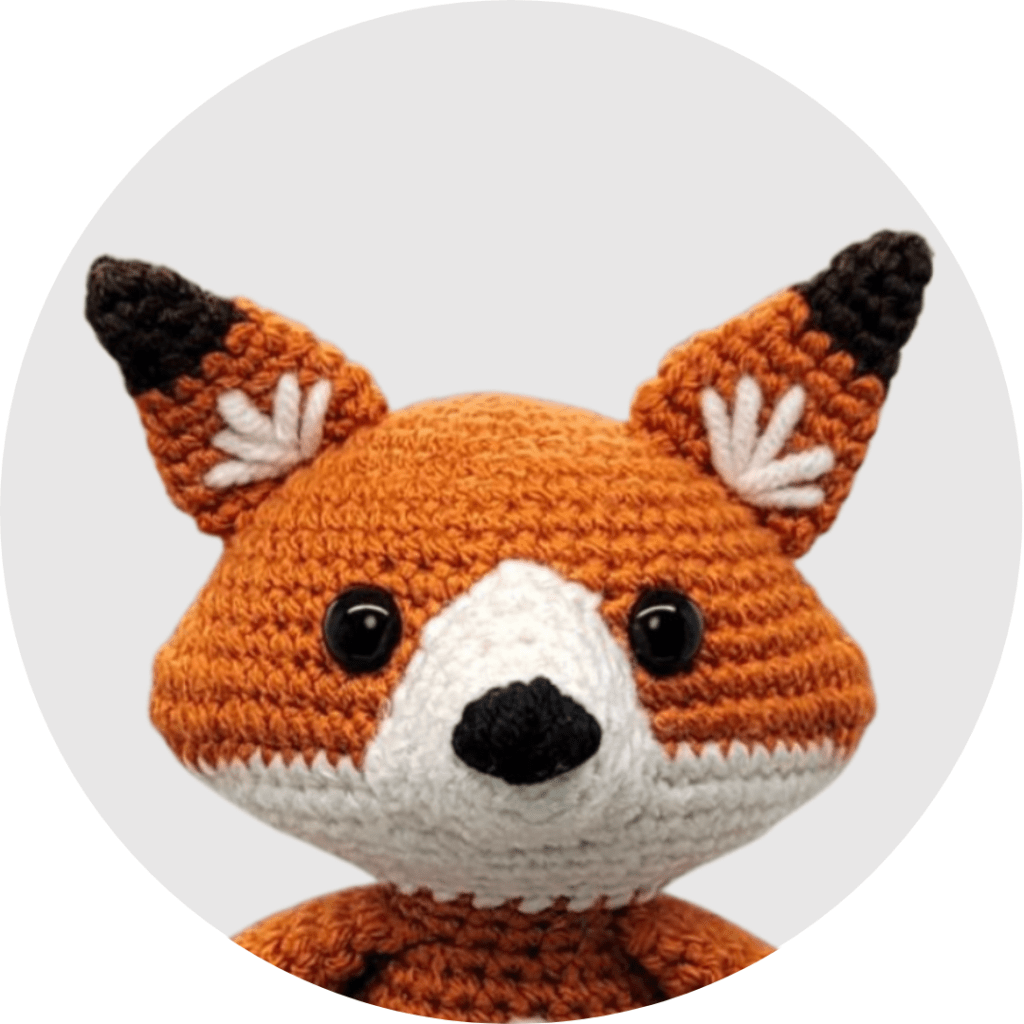
HEAD
Start with Burnt Pumpkin. Stuff firmly as you go. Make sure to stuff the cheeks very well. Remember to trust the process.
Rnd 1 – MR, 6 sc (6)
Rnd 2 – inc in each st (12)
Rnd 3 – (sc, inc) x6 (18)
Rnd 4 – (2 sc, inc) x6 (24)
Rnd 5 – (sc, inc, 2 sc) x6 (30)
Rnd 6 – (4 sc, inc) x6 (36)
Rnd 7 – (2 sc, inc, 3 sc) x6 (42)
Rnd 8 – 9 – sc around (42) (2 rounds total)
Rnd 10 – (6 sc, inc) x6 (48)
Rnd 11 – (3 sc, inc, 4 sc) x6 (54)
Rnd 12 – 12 sc, inc x4, 23 sc, inc x4, 11 sc (62)
Rnd 13 – 12 sc, inc x8, 23 sc, inc x8, 11 sc (78)
Rnd 14 – sc around (78) Change to Ivory
Rnd 15 – 13 sc, dec x8, 23 sc, dec x8, 10 sc (62)
Rnd 16 – 13 sc, dec x4, 23 sc, dec x4, 10 sc (54)
Rnd 17 – (4 sc, dec) x9 (45)
Rnd 18 – (sc, dec, 2 sc) x9 (36)
Time to add the eyes. Place the eyes between Rounds 11 and 12. I placed them with 8 sts between them. Make sure to place them centered between the cheek points, with the color change on Round 14 in the back.
Rnd 19 – (4 sc, dec) x6 (30)
Rnd 20 – (sc, dec, 2 sc) x6 (24)
Rnd 21 – (2 sc, dec) x6 (18)
Sl st into the next st. FO, leave a long tail for sewing his head to his body. Stuff head firmly. Make sure to stuff Forest’s cheek points so they are more pronounced and not wonky.
SNOUT
Using Ivory
Rnd 1 – MR, 6 sc (6)
Rnd 2 – inc in each st (12)
Rnd 3 – 4 – sc around (12) (2 rounds total)
Rnd 5 – (3 sc, 3 sc in the next st) x3 (18)
Rnd 6 – 4 sc, 3 sc in the next st, (5 sc, 3 sc in the next st) x2, sc (24)
Sl st into the next st. FO, leave a long tail to sew the snout to the head. Using black, embroider his nose onto his snout, making sure there is a point at the top.
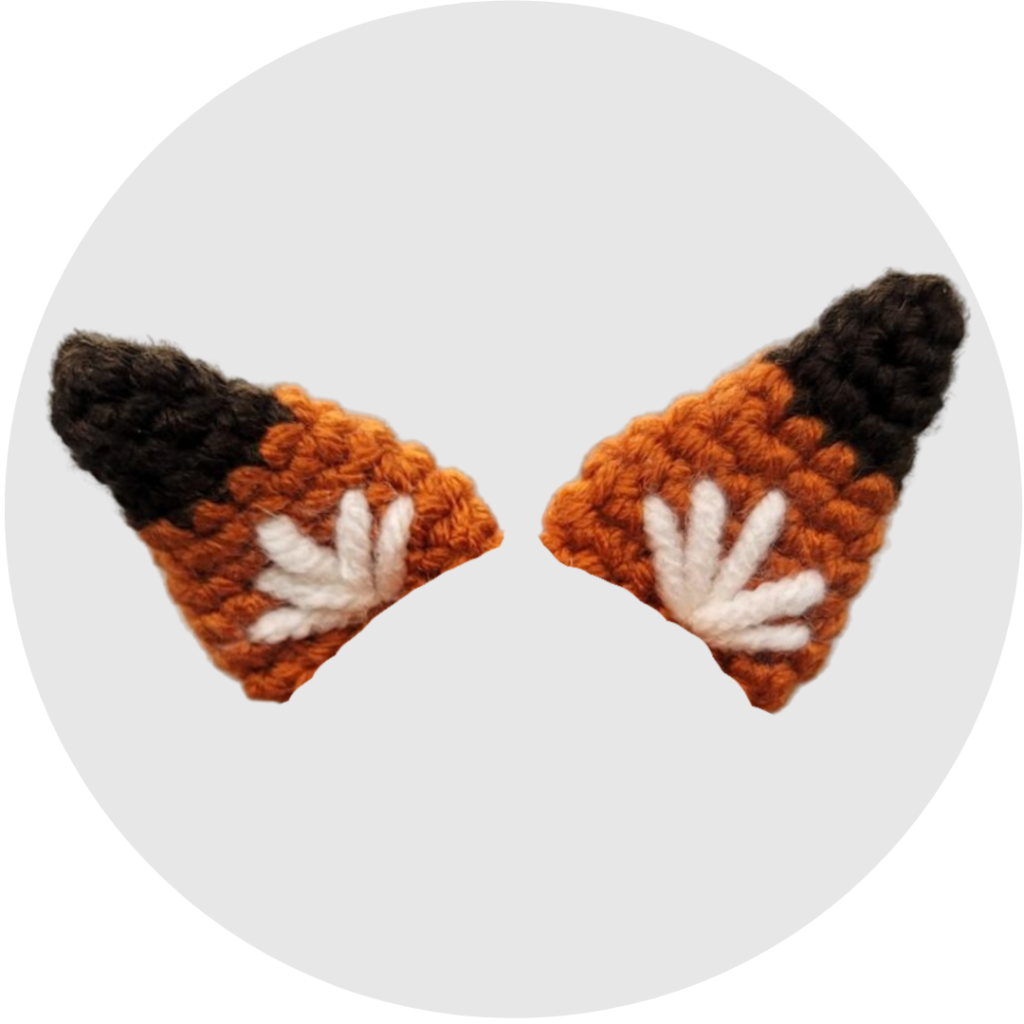
EARS
Start with Dark Brown. Do not stuff the ears.
Rnd 1 – MR, 4 sc (4)
Rnd 2 – (sc, inc) x2 (6)
Rnd 3 – sc around (6)
Rnd 4 – (sc, inc) x3 (9) Change to Burnt Pumpkin
Rnd 5 – sc around (9)
Rnd 6 – (2 sc, inc) x3 (12)
Rnd 7 – sc around (12)
Rnd 8 – (3 sc, inc) x3 (15)
Rnd 9 – (4 sc, inc) x3 (18)
Rnd 10 – (sc, dec) x6 (12)
Sl st into the next st. FO, leave a long tail for sewing the ears onto the head.
Using Ivory embroider his ear fluff onto his ears.
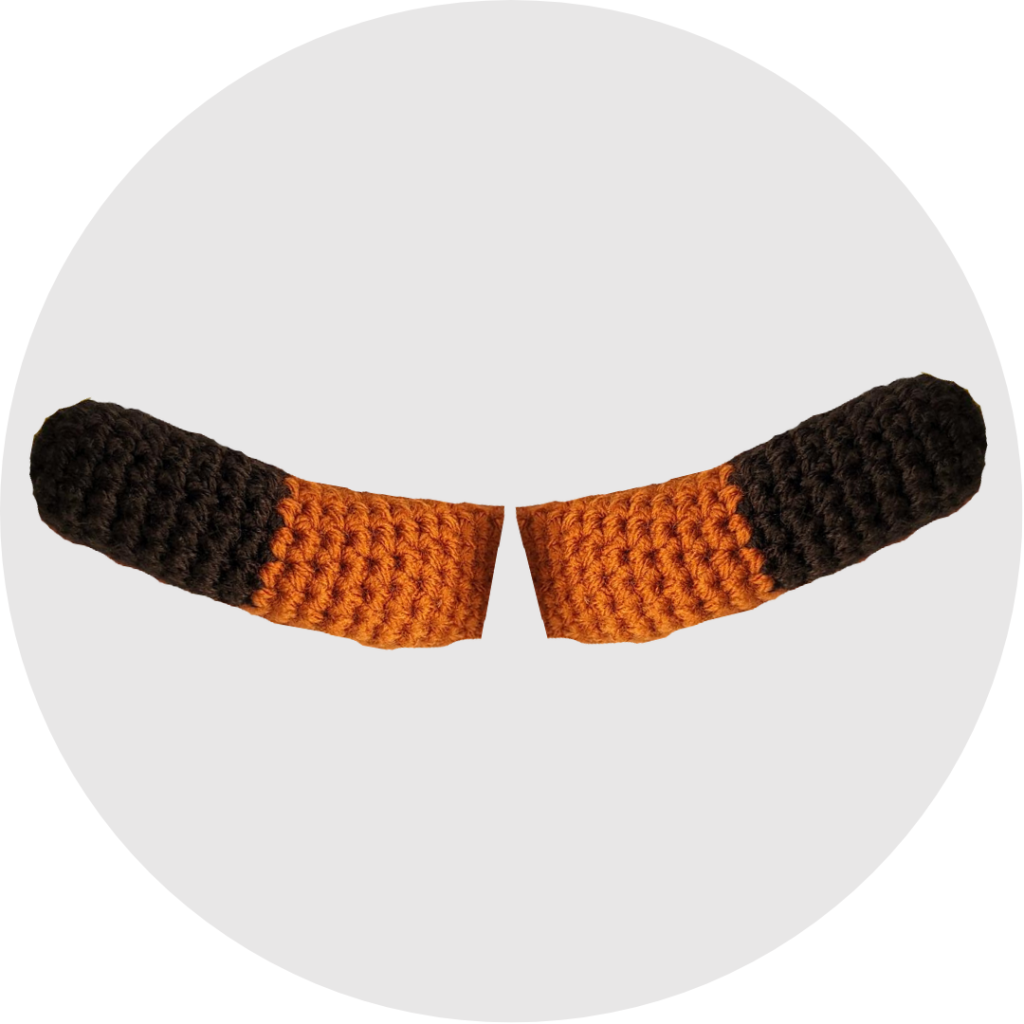
ARMS
Stuff firmly as you go. Starting with Brown.
Rnd 1 – MR, 6 sc (6)
Rnd 2 – inc in each st (12)
Rnd 3 – (3 sc, inc) x3 (15)
Rnd 4 – 9 – sc around (15) (6 rounds total)
Rnd 10 – (3 sc, dec) x3 (12) Change to Burnt Pumpkin
Rnd 11 – 15 – sc around (12) (5 rounds total) Stop stuffing.
Rnd 16 – 20 – sc around (12) (5 rounds total)
FO, no need to leave a long tail, we will be crocheting his arms onto him.
TAIL
Start with Ivory. Stuff his tail as you go.
Rnd 1 – MR, 6 sc (6)
Rnd 2 – sc around (6)
Rnd 3 – (sc, inc) x3 (9)
Rnd 4 – sc around (9)
Rnd 5 – (2 sc, inc) x3 (12)
Rnd 6 – sc around (12)
Rnd 7 – (3 sc, inc) x3 (15)
Rnd 8 – (4 sc, inc) x3 (18) Change to Burnt Pumpkin
Rnd 9 – sc around (18)
Rnd 10 – (5 sc, inc) x3 (21)
Rnd 11 – (6 sc, inc) x3 (24)
Rnd 12 – 16 – sc around (24) (5 rounds total)
Rnd 17 – (2 sc, dec) x6 (18)
Rnd 18 – 19 – sc around (18) (2 rounds total)
Rnd 20 – (sc, dec) x6 (12) Stop stuffing
Rnd 21 – 23 – sc around (12) (3 rounds total)
Sl st into the next st. FO, no need to leave a long tail. We will be crocheting his tail onto him.
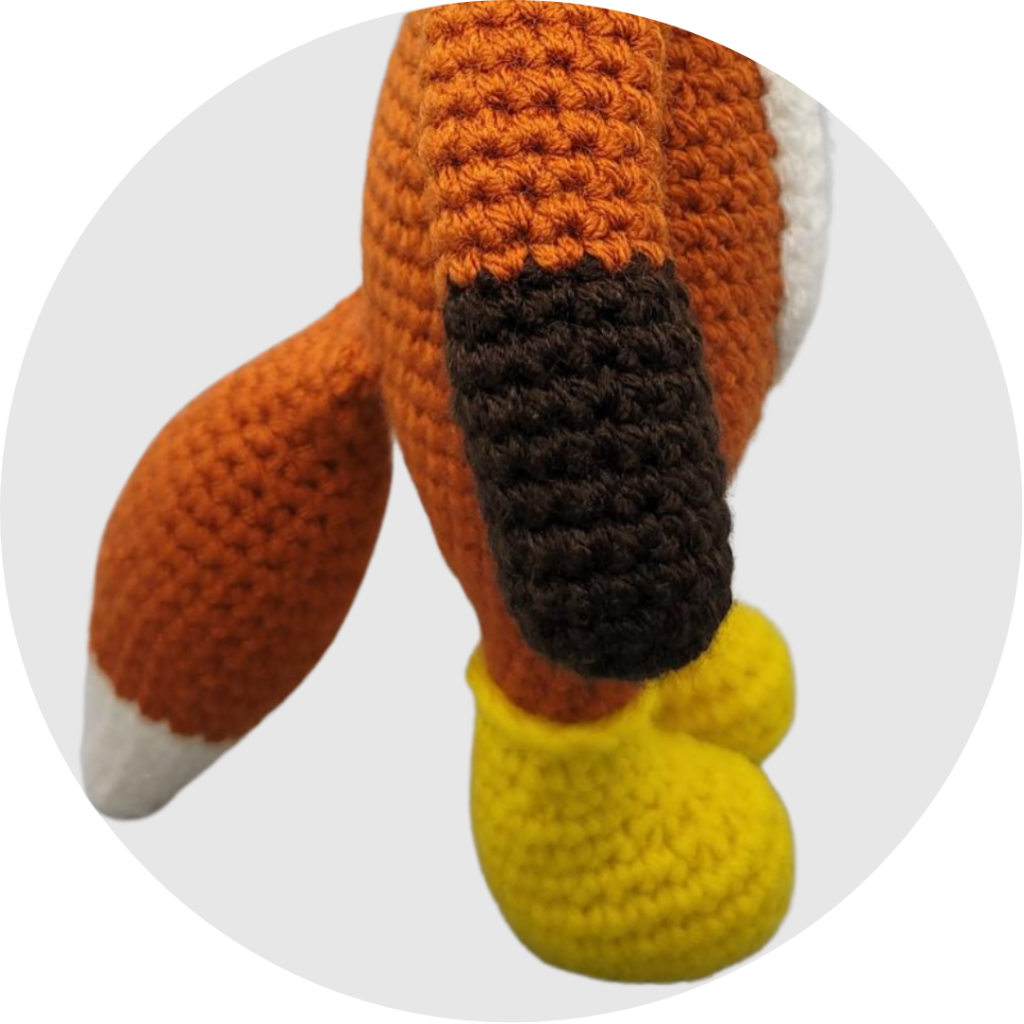
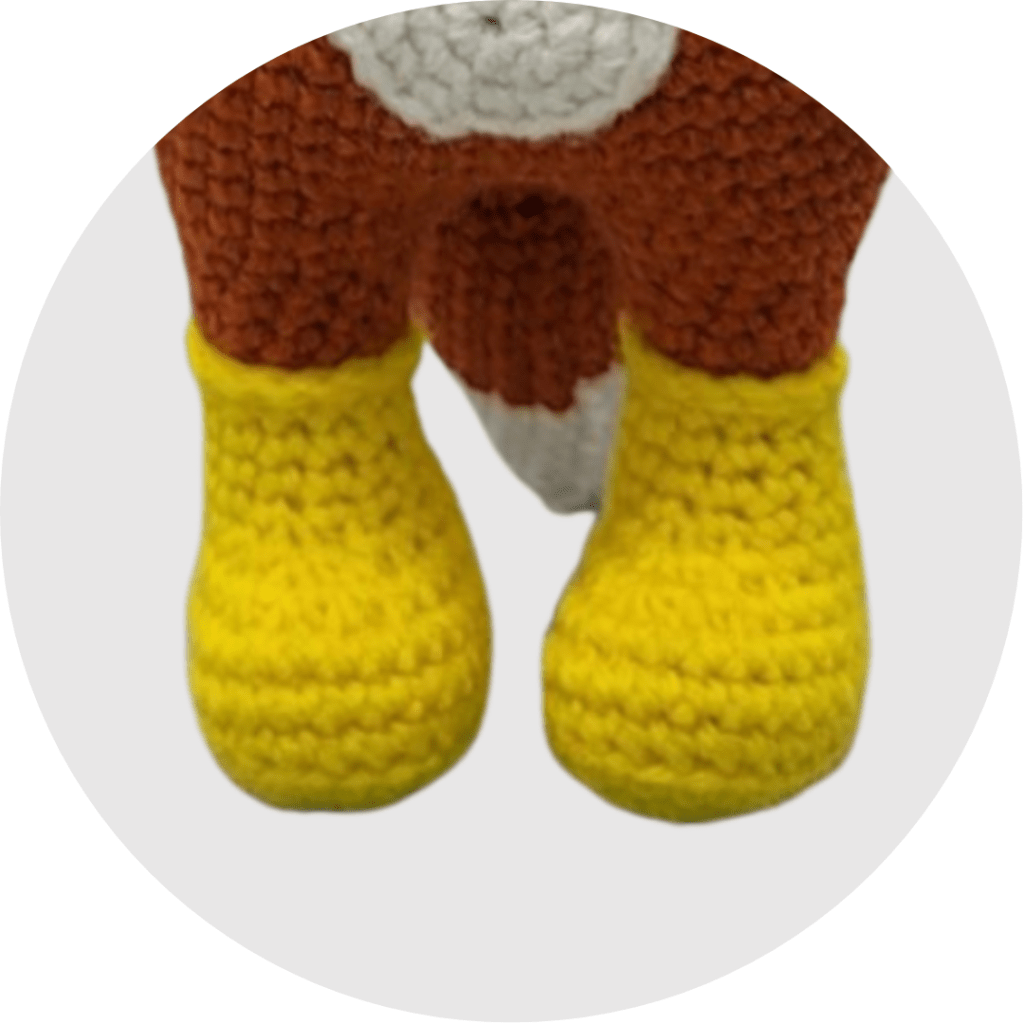
LEGS AND BODY
Starting with Yellow. You will be starting with Forest’s boots. Stuff firmly as you go.
Rnd 1 – ch 6, starting in the second ch from the hook, use the back bumps of the ch, 4 sc, 3 sc in the last ch, now working on the opposite side of the ch, 3 sc, inc (12)
Rnd 2 – inc, 3 sc, inc x3, 3 sc, inc x2 (18)
Rnd 3 – sc, inc, 3 sc, (sc, inc) x3, 3 sc, (sc, inc) x2 (24)
Rnd 4 – BLO, sc around (24)
Rnd 5 – 6 – sc around (24) (2 rounds total)
Rnd 7 – 7 sc, dec x4, 9 sc (20)
Rnd 8 – 5 sc, dec x4, 7 sc (16)
Rnd 9 – 5 sc, dec x2, 7 sc (14)
Rnd 10 – 2 sc, dec, 5 sc, dec, 3 sc (12)
Rnd 11 – 12 – sc around (12) (2 rounds total) Change to Burnt Pumpkin
Rnd 13 – BLO, sc around (12)
Rnd 14 – 16 – sc around (12) (3 rounds total)
Rnd 17 – (sc, inc) x6 (18)
I added 5 more sc to get to the side of the first leg. FO the first leg. Follow rounds 1 through 17 to make the second leg. Do NOT FO the second leg. No need to add the 5 additional sc we added to the first leg. Continue on to round 18.
Rnd 18 – 14 sc, ch 2, 18 sc around the first leg, 2 sc across the ch, 4 sc (40)
Rnd 19 – 5 sc, inc, 18 sc, inc, 15 sc (42)
Rnd 20 – (6 sc, inc) x6 (48)
Rnd 21 – 23 – sc around (48) (3 rounds total)
Rnd 24 – 41 sc, 6 sc through both layers of the tail and body, sc (48) You may need to adjust position depending on your tension.
Rnd 25 – (10 sc, dec) x4 (44)
Rnd 26 – 27 – sc around (44) (2 rounds total)
Rnd 28 – 6 sc, dec, 20 sc, dec, 14 sc (42)
Rnd 29 – sc around (42)
Rnd 30 – (2 sc, dec, 3 sc) x6 (36)
Rnd 31 – 32 – sc around (36) (2 rounds total)
Rnd 33 – (4 sc, dec) x6 (30)
Rnd 34 – sc around (30)
Rnd 35 – (sc, dec, 2 sc) x6 (24)
Rnd 36 – 37 – sc around (24) (2 rounds total)
Rnd 38 – 6 sc, 6 sc through both layers of the first arm and body, 6sc, 6 sc through both layers of the second arm and body. (24) You may need to adjust position depending on your tension.
Rnd 39 – (2 sc, dec) x6 (18)
Rnd 40 – sc around (18)
FO, no need to leave a long tail to sew his body to his head, we have a long tail from his head.
Using Yellow.
Holding Forest’s body upside down, attach yarn to one of the FLO left on his rainboots. Sl st in each FLO around his boot. FO, and secure the yarn tails inside his body. Repeat for his second boot.
TUMMY
Using Ivory. Ch 8, use the back bumps of the ch.
Rnd 1 – in the second ch from the hook, inc, 5 sc, 4 sc in the last ch, now working on the opposite side of the ch, 5 sc, inc (18)
Rnd 2 – sc, inc, 5 sc, (sc, inc) x2, 6 sc, inc (22)
Rnd 3 – 2 sc, 3 sc in the next st, 5 sc, 3 sc in the next st, 4 sc, 3 sc in the next st, 5 sc, 3 sc in the next st, 2 sc (30)
Sl st into the next st. FO, leave a long tail to sew his tummy to his body.
PONCHO
Crochet the poncho using a G 4mm hook. Hook size could differ based on your tension. Using Yellow. The ch 2 at the end of each row does not count as a st.
Ch 32, use the back bumps of the ch.
Row 1 – dc in the 3rd ch from the hook, 14 dc, sc, 14 dc, ch 2, turn (30)
Row 2 – 14 dc, sc, 15 dc, ch 2, turn (30)
Row 3 – 15 dc, sc, 14 dc, ch 2, turn (30)
Row 4 – 14 dc, sc, 8 dc, ch 5, skip 5 sts, 2 dc, ch 2, turn (30)
Row 5 – 2 dc, 5 dc across the ch, 8 dc, sc, 14 dc, ch 2, turn (30)
Row 6 – 14 dc, sc, 15 dc, ch 2, turn (30)
Row 7 – 15 dc, sc, 14 dc, ch 2, turn (30)
Row 8 – 14 dc, sc, 15 dc, ch 2, turn (30)
Row 9 – 15 dc, sc, 14 dc, ch 2, turn (30)
Row 10 – 14 dc, sc, 15 dc, ch 2, turn (30)
Row 11 – 15 dc, sc, 14 dc, ch 2, turn (30)
Row 12 – 14 dc, sc, 15 dc, ch 2, turn (30)
Row 13 – 15 dc, sc, 14 dc, ch 2, turn (30)
Row 14 – 14 dc, sc, 8 dc, ch 5, skip 5 sts, 2 dc, ch 2, turn (30)
Row 15 – 2 dc, 5 dc across the ch, 8 dc, sc, 14 dc, ch 2, turn (30)
Row 16 – 14 dc, sc, 15 dc, ch 2, turn (30)
Row 17 – 15 dc, sc, 14 dc (30)
FO, hide tails.
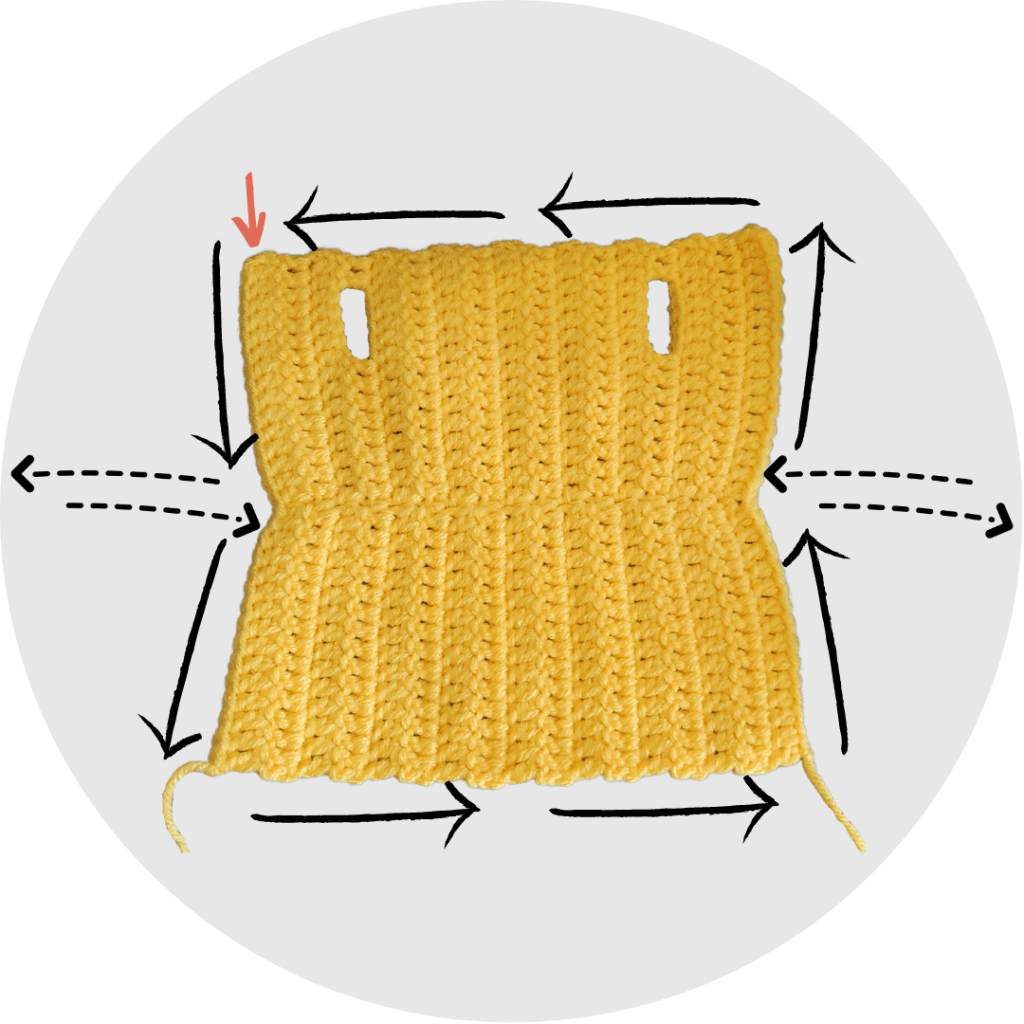
We will be attaching the yarn to the left corner, crochet down the side, across the bottom, up the second side, and across the top.
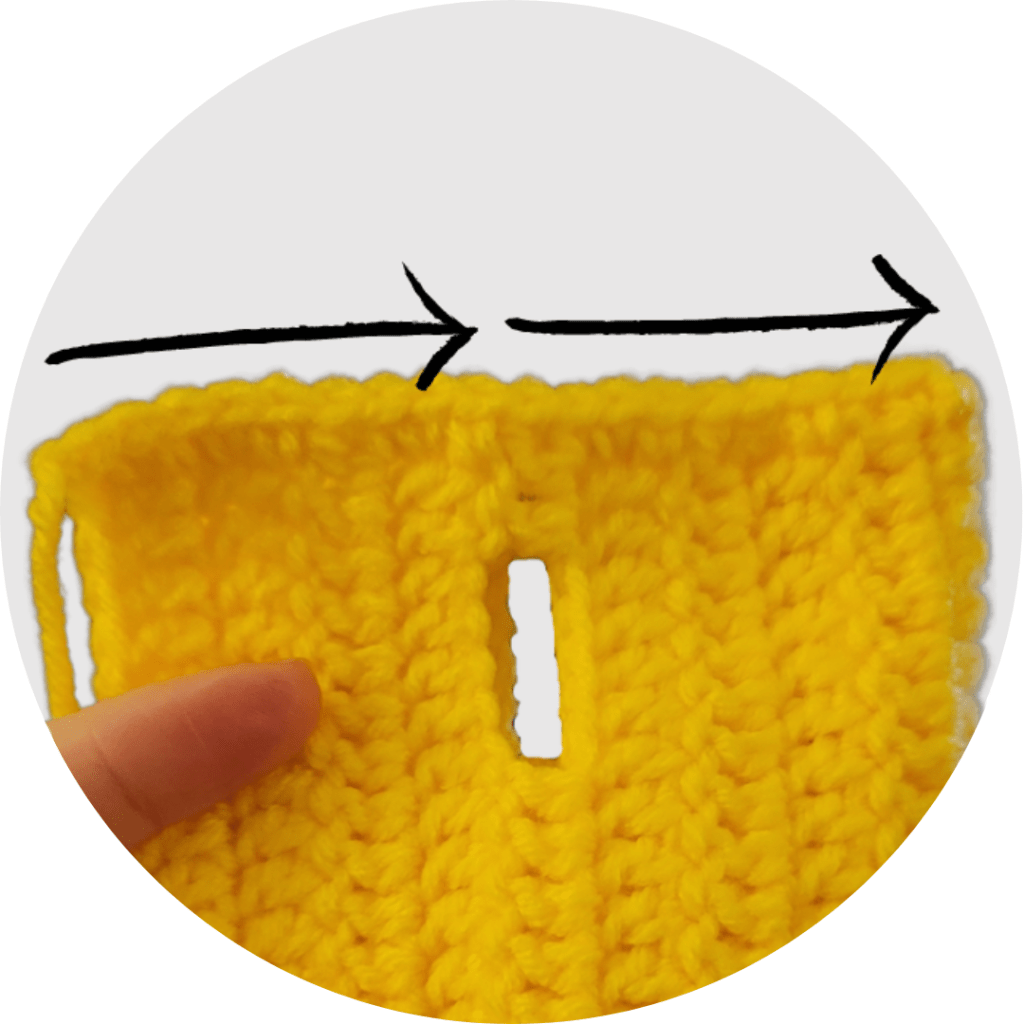
Attach the yarn to the top left corner, where the orange arrow is pointing in diagram above. Ch 2, 15 dc, sl st, ch 21, starting in the second ch from the hook, 20 sl st, sl st back onto the poncho into the same st, 14 dc. Ch 1, sc across the bottom (including the last dc we made from the side). I made approximately 36 sc (2 sc in each dc side). Ch 2, 14 dc, sl st, ch 21, starting in the second ch from the hook, 20 sl st, sl st back onto the poncho into the same st, 15 dc. Ch 1, sc across the top (including the last dc we made from the side). I made approximately 38 sc.
FO, leave a long tail to seam the top of the hood together. Fold poncho in half so the ear holes meet. Seam the top together to create the hood. Hide tails.
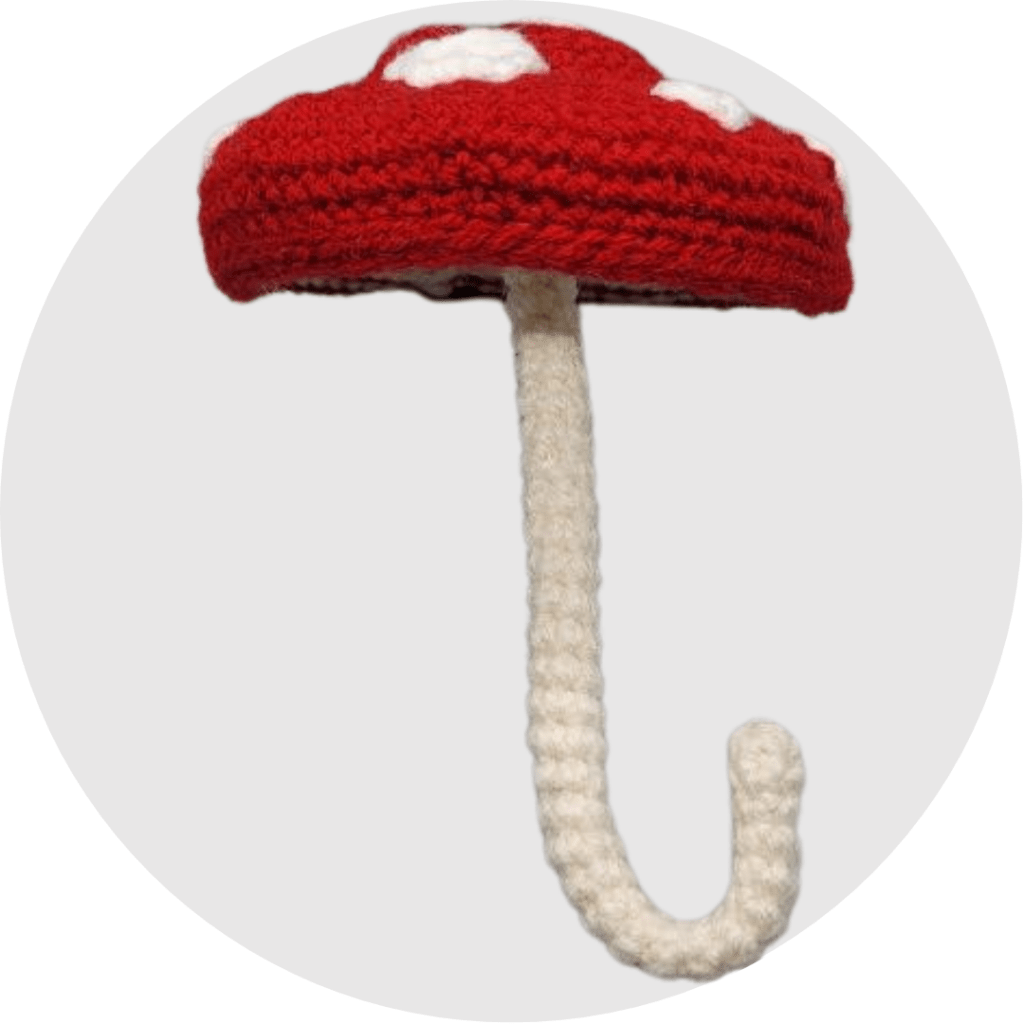
MUSHROOM BOTTOM
Using Ivory.
Rnd 1 – MR, 6 sc (6)
Rnd 2 – inc in each st (12)
Rnd 3 – (sc, inc) x6 (18)
Rnd 4 – (2 sc, inc) x6 (24)
Rnd 5 – (sc, inc, 2 sc) x6 (30)
Rnd 6 – (4 sc, inc) x6 (36)
Rnd 7 – (2 sc, inc, 3 sc) x6 (42)
Rnd 8 – (6 sc, inc) x6 (48)
Rnd 9 – (3 sc, inc, 4 sc) x6 (54)
Rnd 10 – (8 sc, inc) x6 (60)
Rnd 11 – (19 sc, inc) x3 (63)
FO, leave a short tail. The top and bottom of the mushroom will be attached with sl sts.
MUSHROOM TOP
Using red.
Rnd 1 – MR, 6 sc (6)
Rnd 2 – inc in each st (12)
Rnd 3 – (sc, inc) x6 (18)
Rnd 4 – (2 sc, inc) x6 (24)
Rnd 5 – (sc, inc, 2 sc) x6 (30)
Rnd 6 – 7 – sc around (30) (2 rounds total)
Rnd 8 – (4 sc, inc) x6 (36)
Rnd 9 – (2 sc, inc, 3 sc) x6 (42)
Rnd 10 – (2 sc, inc) x14 (56)
Rnd 11 – (sc, inc, 2 sc) x14 (70)
Rnd 12 – (6 sc, inc) x10 (80)
Rnd 13 – 14 – sc around (80) (2 rounds total)
Rnd 15 – (6 sc, dec) x10 (70)
Rnd 16 – (8 sc, dec) x7 (63)
Rnd 17 – holding the wrong side of the mushroom top against the wrong side of the mushroom bottom, before continuing, I tied the tail from the MR from both sides of the mushroom together, with a finger width between the two, to keep them together better. Add light amount of stuffing as you connect the two pieces to help the mushroom keep its shape. Now, sl st around to connect them together. (63)
FO, hide tails inside the mushroom top.
MUSHROOM STEM
Using Ivory.
Rnd 1 – MR, 6 sc (6)
Rnd 2 – 31 – sc around (6) (30 rounds total)
FO, leave a long tail to sew the handle to the mushroom. Optional, but encouraged, add wire or pipe cleaners to the umbrella handle to be able to bend the handle around Forest’s hand and for the umbrella to stay upright.
LARGE SPOTS x3
Using White.
Rnd 1 – MR, 6 sc (6)
Rnd 2 – inc in each st (12)
Sl st in next st. FO, leave a long tail to sew to the mushroom.
SMALL SPOTS x4
Using White.
Rnd 1 – MR, 6 sc (6)
Sl st in next st. FO, leave a long tail to sew to the mushroom.
SOME ASSEMBLY REQUIRED
- Head –
- Sew the head to the body. As you are sewing the head to the body, make sure to add stuffing to the head and the body, this will allow more support and stability in the neck.
- Sew the ears between Rounds 4 and 10, while making sure to line up the ears with the MR and the cheek points.
- Sew the snout between Rounds 9 and 17 with the end of the round at the bottom and one of the 3 sc in one st up between the middle of his eyes. Before you finish sewing the snout to the head, make sure to stuff it firmly.
- Body –
- Sew his tummy front and center between rounds 23 and 37.
- Mushroom –
- Sew the stem over the MR of the mushroom bottom.
- Sew the mushroom spots randomly on the mushroom top.
- Finishing up Forest –
- Make sure to secure and hide all of your yarn tails.
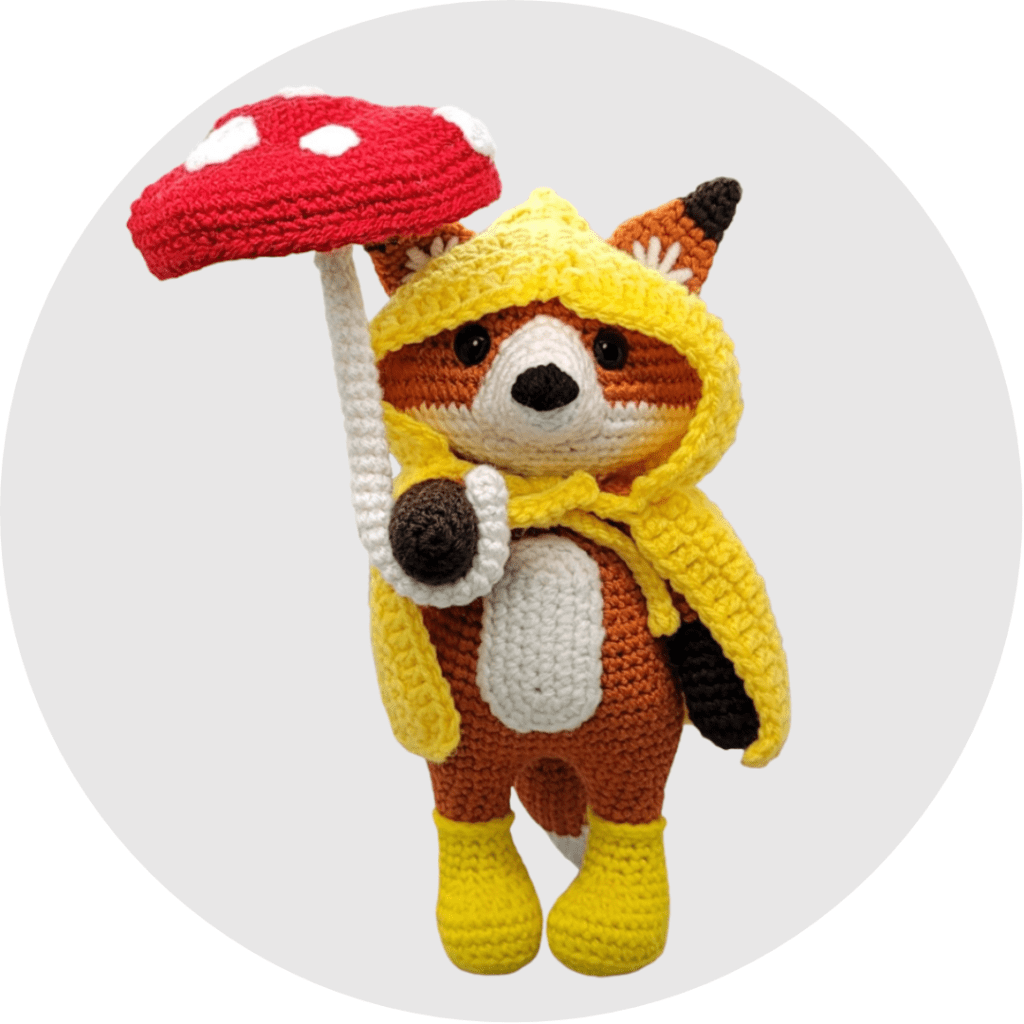
- Put Forest’s poncho on! He wants to go play in the rain.
- Add his umbrella onto his hand.
- For me, I did not sew his arm in a horizontal position, I added straight pins under his poncho to hold his arm in place, to take pictures of him holding his umbrella. This allows my kiddos to be able to play with him better.
- Take lots of pictures and please share them with me!
- I hope you enjoyed making Forest as much as I did creating him.
I would love to see your finished Forest! If you load your project onto Ravelry please link your Forest to my pattern, that way I can see, and possibly feature your Forest on my patterns page. If you have any questions, comments, or feedback please do not hesitate to drop me a message on Instagram or Etsy, or shoot me an e-mail at bissycrowechet@yahoo.com. I will get back to you as fast as possible!
Visit me on Facebook, Instagram, Etsy, and Ravelry, all under the same name, BissyCrowechet!
Also thank you very much to my pattern testers! I could not have done this without you! (Instagram Names):
- sarahdeecrochet
- happy.time.crochetland
- mamacrochetti
- bogicrochets
- craftykittennz
- linkscrochet
- loopsydaisycrafts
- marsugurumi
- melissasrusticgoodness
- nightmarestitchery
You have finished Forest the Fox!
Please tag @bissycrowechet #bissycrowechet and @sarahdeecrochet #sarahdeecrochet with all of your projects so we can see and share your wonderful projects.

