
Happy February!!
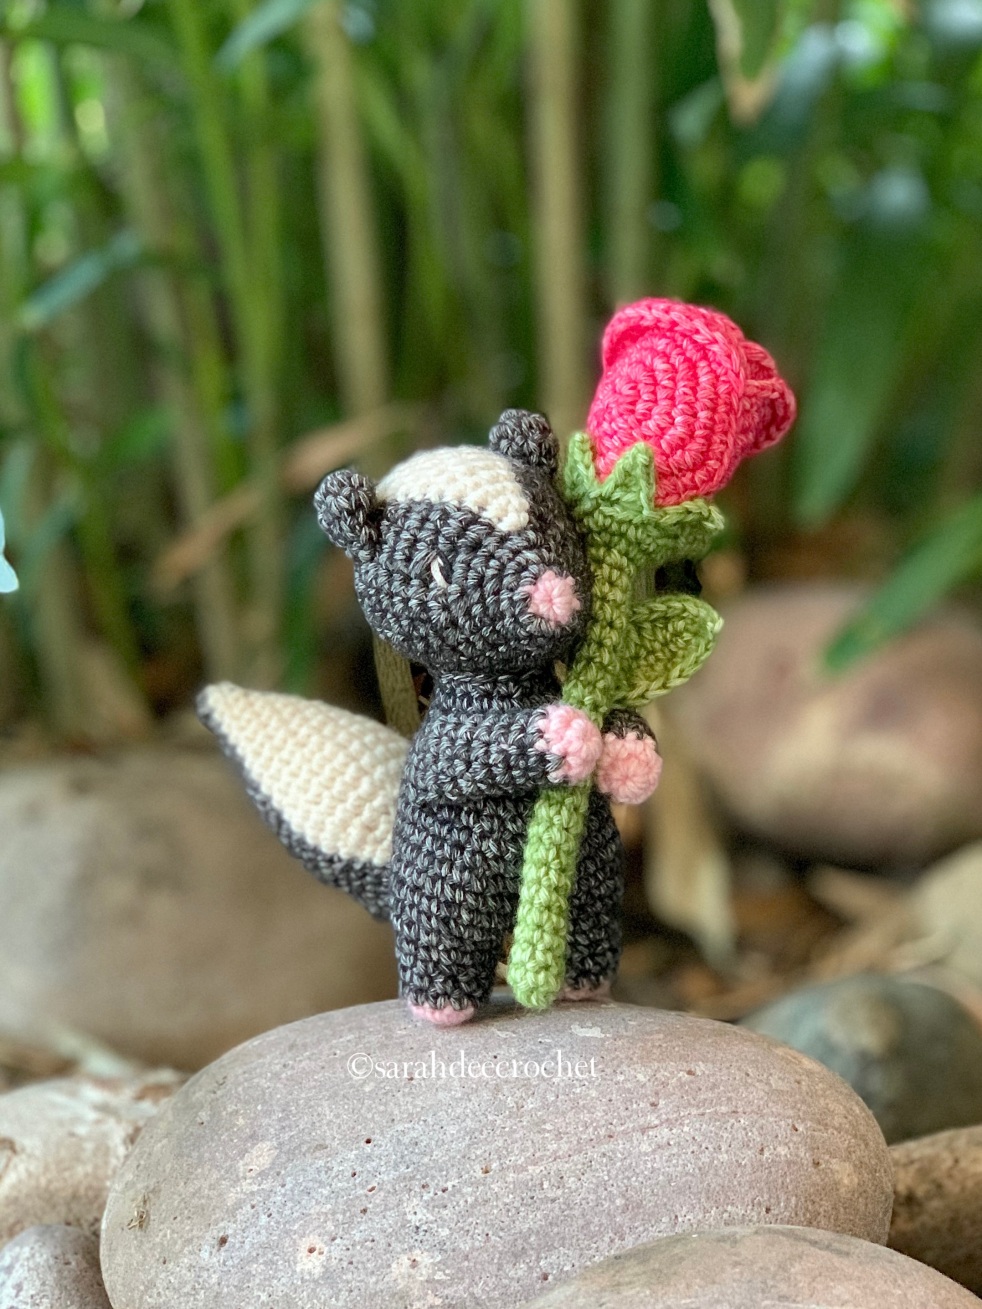
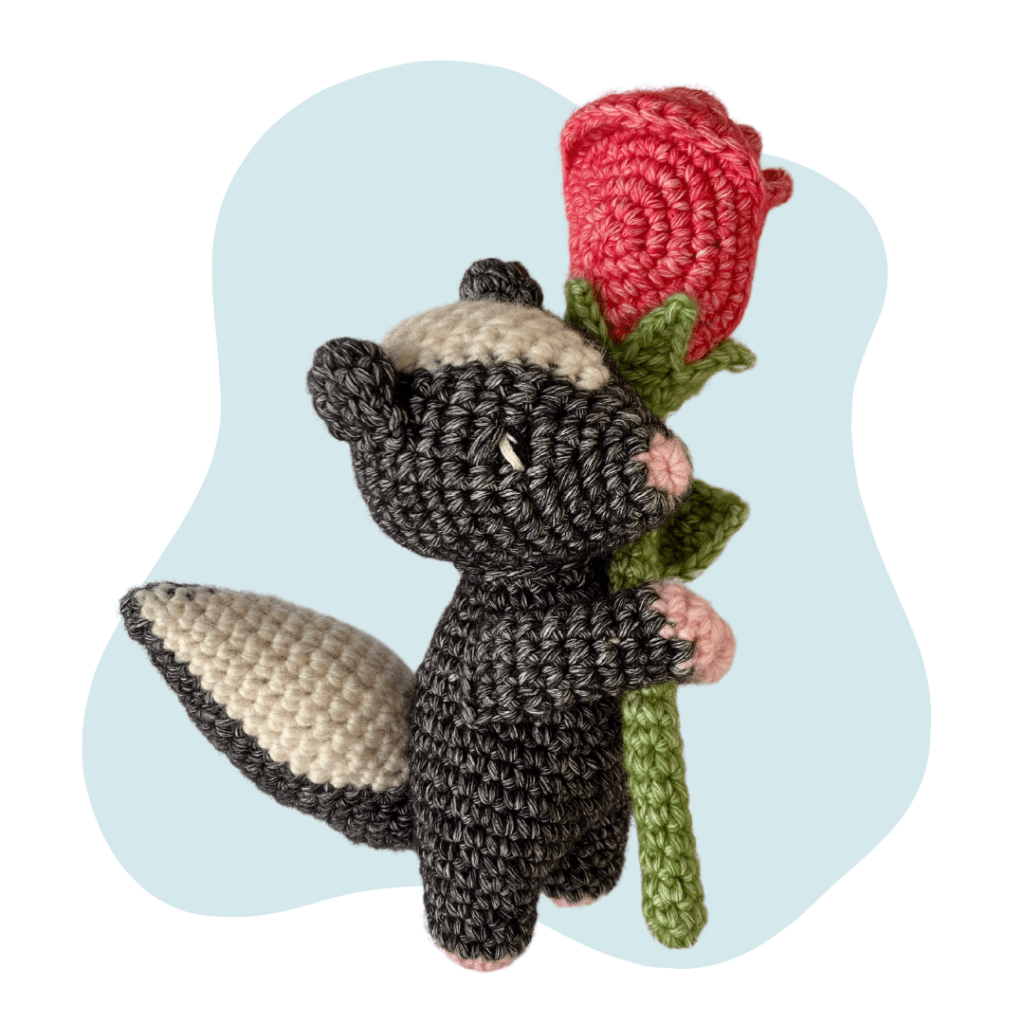
I am happy to bring you a free version of my Blossom the Skunk pattern. This will be a perfect Valentine’s Day gift! Or if you are like me, Blossom is an addition to your shelf because you love this little skunker so much.
Some information about the yarn I love so much…
If you would have asked me at the beginning of my designing career if I would ever design so many pattern using black yarn, I would have laughed at you! Then I found my “signature yarn” and black fiber has never been so easy to use. Scheepjes Stonewashed brings amigurumi to life like no other and I highly recommend this yarn.
This amazing yarn comes in two weights. The regular Stonewashed is considered a sport weight, even though I think it works more like a DK. Then there is Stonewashed XL which is listed as an Aran weight. This will make a perfect substitute for your weight 4/5 yarn. For those of you who love using medium(4) weight yarn, and also love the look of Stonewashed, this is perfect for you! You can find a store locator on the Scheepjes website. I am in the U.S. and purchase mine from DotsYarnDen. If you are in Canada, I highly recommend Taemombo. Also, I am not affiliated with Scheepjes. (Not yet. I love you, Scheepjes.🤞😅) I just love this yarn so much that it has become my signature yarn. (Also I have been saying that like my signature colors are Blush and Bashful, IYKYK.) Pay attention to yardage to make sure you have enough for your projects!
Blossom the Skunk was my contribution to the CrochetValentine’s Crochet Along from Instagram. He was so well loved, I knew I wanted to treat you all to a freebie after the CAL was over. There is also an ad-free version of Blossom’s pattern available in my shops.
Materials
- 3.25mm crochet hook
- Stitch marker
- Scissors
- Tapestry needle
- Yarn
- Polyfill
- Pipe cleaner/craft wire (Optional)
- White/Black embroidery thread
Yarn Used
Scheepjes Stonewashed XL
Black Onyx (40g)
Moonstone (8g)
Rose Quartz (4g)
Red Jasper (24g)
Canada Jade (8g)
Notes
**Please read through entire pattern before beginning**
Pattern is in US terminology. Work in continuous rounds. Take care to always move up the stitch marker to the last stitch, at the end of each round. Stitch count is in ( ) at the end of each row. Make sure to have the correct number of stitches before moving on to the next round. If using safety eyes, squeaky toys, rattle inserts or any other small parts, please include safety warnings for children under 3.
Legal
This pattern is for personal use only. You may sell the items that you make from this pattern, but I ask that you please refer back to ©️SarahDeeCrochet as the designer. Altering, reproducing, or selling this pattern, online or in print is strictly prohibited. This pattern is protected by international copyright laws.
Abbreviations
Rnd – round
chX – chain X amount of stitches
MR – magic adjustable ring
st(s) – stitch(es)
sl st – slip stitch
sc – single crochet
hdc – half double crochet
inc – 2sc in the same stitch
hdcinc – 2hdc in the same stitch
dec – invisible decrease
BLO – back loop only
FLO – front loop only
FO – fasten off
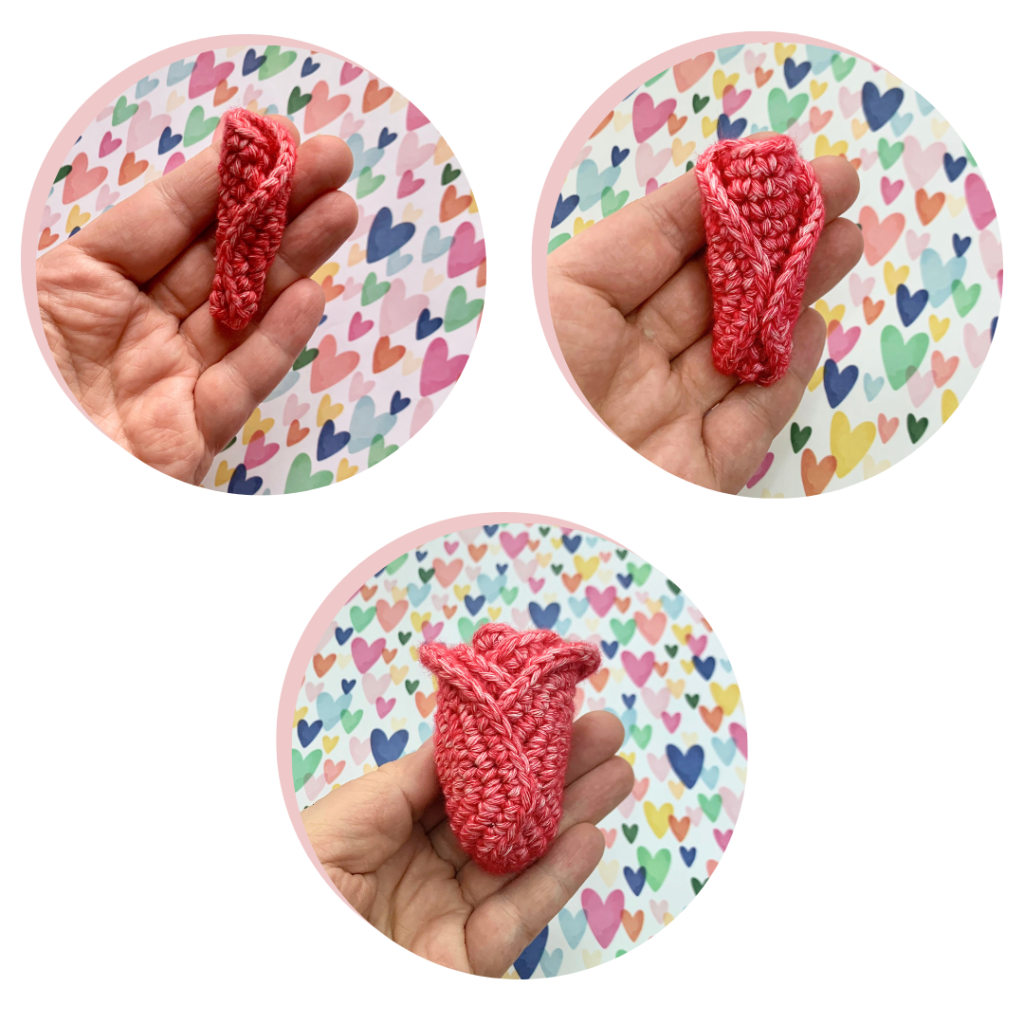
Rose
The rose is made of 7 parts. 5 petals, a stem and a leaf.
Petal 1
Make one
Using Red Jasper
Rnd 1: 6sc in a MR (6)
Rnd 2: inc x 6 (12)
Rnd 3: [sc, inc] x 6 (18)
Rnd 4: [2sc, inc] x 6 (24)
Rnd 5: [2sc, inc] x 8 (32)
Rnd 6: [3sc, inc] x 8 (40)
Sl st into the next st to FO. Leave a long tail for sewing. Sew in starting end and snip excess. With the yarn tail at the bottom, roll the petal and sew into place, leaving the top half of the petal free to naturally shape into the center of the rose.
Petals 2&3
Make two
Using Red Jasper
Rnd 1-5: Same as Petal 1
Rnd 6: [3sc, inc] x 3, [3hdc, hdcinc] x 2, [3sc, inc] x 3 (40)
Sl st into the next st to FO. Leave a long tail for sewing. Sew in starting end and snip excess.
With the seam facing inward, sew Petal 1 to the center of Petal 2 with the hdc of rnd 6 at the top, then wrap Petal 2 around and sew in place. Do not sew the top half of the rose, so it can naturally fall open like a rose would. Repeat for Petal 3, making sure that the seam is facing inward and the hdc of the last rnd is at the top, every time we add a new petal.
Petals 4&5
Make two
Using Red Jasper
Rnd 1-6: Same as Petals 2&3
Rnd 7: 15sc, [4hdc, hdcinc] x 2, 15sc (42)
Sl st into the next st to FO. Leave a long tail for sewing. Sew in starting end and snip excess.
Repeat the sewing process, making sure that the bottom of Petals 4&5 are covering the other petals when finished. Take care to have the hdc of the last rnd at the top of the rose. Sew in all ends.
Leaf
Using Canada Jade
Ch 7
Rnd 1: Starting in the 2nd ch from hook, 6sc across, through back humps. (6)
Rnd 2: Work in the next available st, on the opposite side of the piece. Sc, 2hdc, 2dc, 3dc in the next st, continue working around, 3dc in the next st, 2dc, 2hdc, sc, ch 3, sl st in the 3rd ch from hook.
Sl st into the next st to join. Place 8 more sl st down the side of the leaf so the tail is at the bottom. FO. Leave a long tail for sewing. Sew in the starting tail.
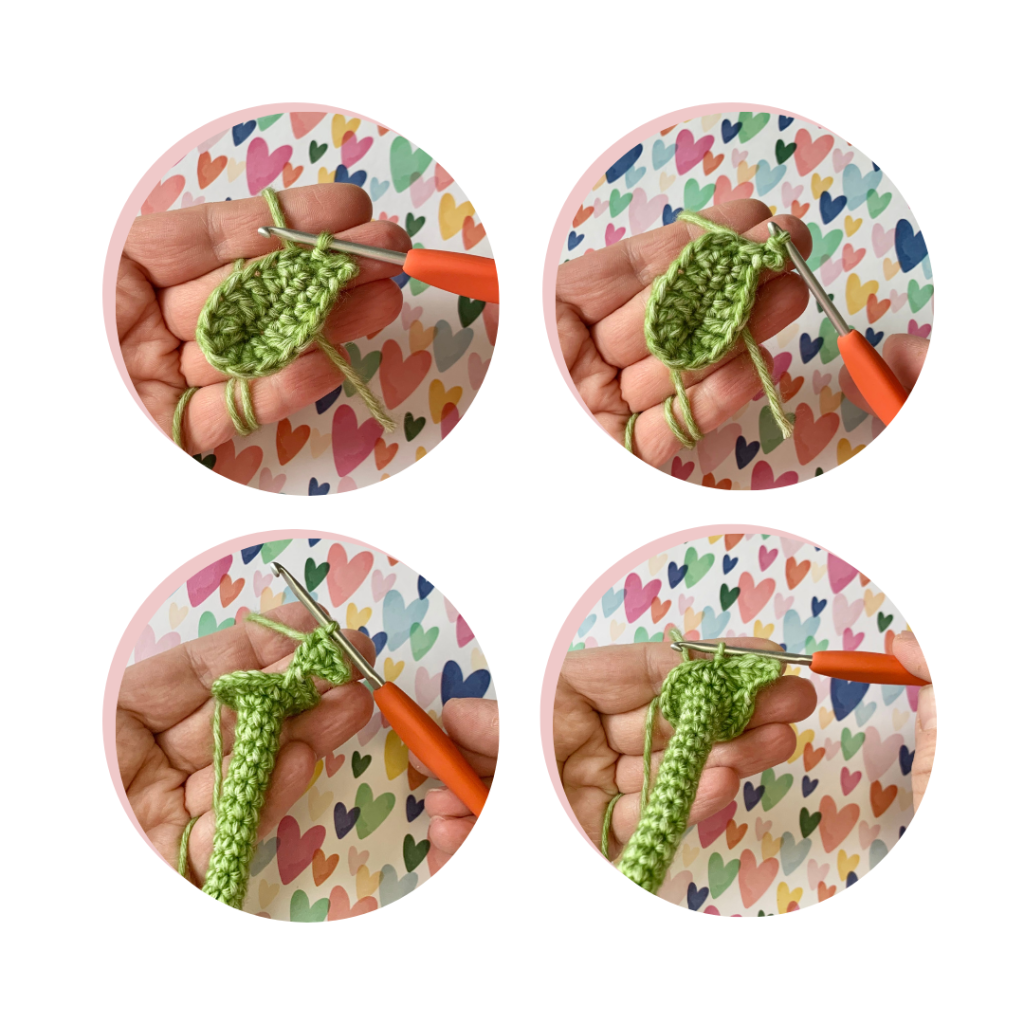
Stem
Using Canada Jade
Rnd 1: 6sc in a MR (6)
Rnd 2-24: sc in each st (6)
Rnd 25: inc x 6 (12)
Rnd 26: [sc, inc] x 6 (18)
Rnd 27: ch 5, starting in the second ch from hook, sl st, sc, hdc, dc, skip 2sts on the stem, sl st into the third] x 6.
FO. Leave a long tail for sewing.
Rose Assembly
Add the optional pipe cleaner to the stem. I used two, twisted around each other, to help with the weight of the rose. You can skip this step, the wire just adds a little stability to the stem so it doesn’t get misshapen while sewing or over time.
Sew the rose to the stem, leaving the tips of the green sepal leaves to curl away from the rose bud.
Sew the leaf to the stem over rnds 18-22.
The rose may be a little top heavy. It will be anchored when we sew it to the skunk.
Skunk
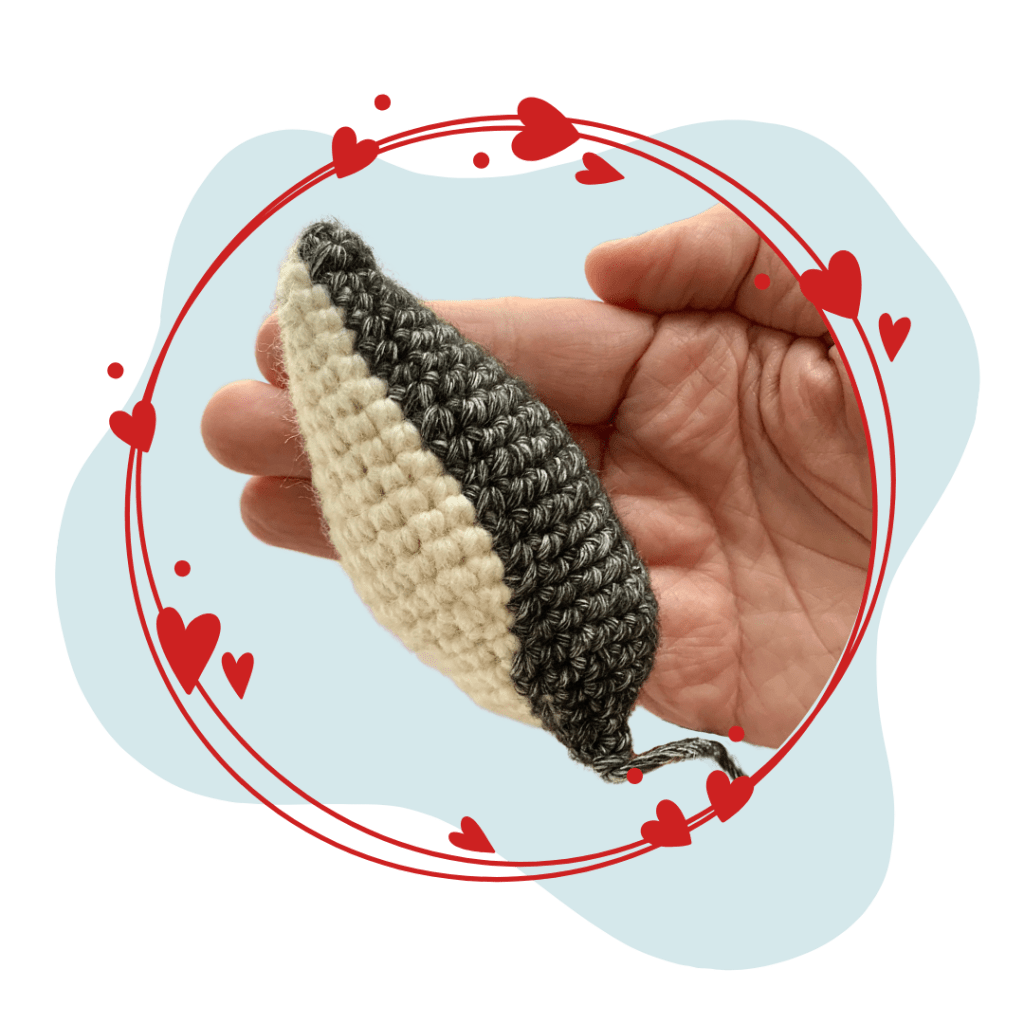
Tail
Starting with Black Onyx
Rnd 1: 5sc in a MR (5)
This is where we start the color work. The color (B for black and W for white) is listed before the stitches. Sometimes the dec sts will be worked over both colors, and sometimes you will have an inc next to a dec, this will help with the way the color placement lays. Carry the yarn whenever possible. If you are unable to carry the yarn, snip at each color change and tie the ends together.
Rnd 2: B – sc W – sc into the same st to make an inc B – 4sc (6)
Rnd 3: B – sc W – 2sc B – [inc] x 3 (9)
Rnd 4: B – sc W – 3sc B – 2sc, [inc] x 3 (12)
Rnd 5: B – sc W – 4sc B – 7sc (12)
Rnd 6: B – sc W – 5sc B – [inc, sc] x 3 (15)
Rnd 7: B – sc W – 6sc B – [inc, 2sc] x 2, inc, sc (18)
Rnd 8: B – sc W – 7sc B – 4sc, [inc] x 2, 4sc (20)
Rnd 9: B – sc W – 6sc, inc B – dec, 10sc (20)
Rnd 10: B – sc W – 8sc B – 11sc (20)
Rnd 11: B – sc W – 3sc, inc, 5sc B – sc into the same st to make an inc, [4sc, inc] x 2 (24)
Rnd 12: B – sc W – 10sc B – 13sc (24)
Rnd 13: B – sc W – 9sc, inc B – dec, 11sc (24)
Rnd 14-15: B – sc W – 11sc B – 12sc (24)
Rnd 16: B – sc W – sc, dec, [2sc, dec] x 2 B – 3sc, [inc, 2sc] x 3 (24)
Rnd 17: B – sc W – [dec, sc] x 2, sc, dec B – [3sc, inc] x 3, 2sc (24)
Rnd 18: B – sc W – 6sc B – 17sc (24)
Rnd 19: B – 2sc W – 5sc B – [sc, dec] x 3, [dec, sc] x 2, dec (18)
Rnd 20: B – 2sc W – 5sc B – 11sc (18)
Stuff the tail firmly, continue stuffing until the last rnd.
Rnd 21: B – sc, dec W – sc, dec, sc B – dec, [sc, dec] x 3 (12)
Using Black Onyx from here on.
Rnd 22: sc, [dec] x 3, 5sc (9)
Rnd 23: [sc, dec] x 3 (6)
Sl st in the next st to FO. Snip yarn. Leave a long tail. We will be crocheting the tail to the body, but will use the tail to anchor the tail during assembly.
Head
Starting with Rose Quartz
Rnd 1: 6sc in a MR (6)
Change to Black Onyx
Rnd 2: [sc, inc] x 3 (9)
Rnd 3: 3sc, [inc] x 3, 3sc (12)
Rnd 4: 3sc, [sc, inc] x 3, 3sc (15)
This is where we start the color work. The color (B for black and W for white) is listed before the stitches. Sometimes the dec sts will be worked over both colors, and sometimes you will have an inc next to a dec, this will help with the way the color placement lays. Carry the yarn whenever possible. If you are unable to carry the yarn, snip at each color change and tie the ends together.
Rnd 5: B – 5sc, inc, 2sc W – inc B – 2sc, inc, 3sc (18)
Rnd 6: B – 3sc, [sc, inc] x 3 W – sc, inc B – [sc, inc] x 2, 3sc (24)
Rnd 7: B – 3sc, [2sc, inc] x 3 W – 2sc, inc B – [2sc, inc] x 2, 3sc (30)
Rnd 8: B – 15sc W – 3sc, inc B – dec, 9sc (30)
Rnd 9: B – 15sc W – 5sc B – 10sc (30)
Rnd 10: B – 15sc W – 4sc, inc B – dec, 8sc (30)
Rnd 11: B – 15sc W – 6sc B – 9sc (30)
Rnd 12: B – 15sc W – 5sc, inc B – dec, 7sc (30)
Rnd 13-14: B – 15sc W – 7sc B – 8sc (30)
Rnd 15: B – [3sc, dec] x 3 W – 3sc, dec, 2sc B – sc, dec, 3sc, dec (24)
Using Black Onyx from here on.
Rnd 16: [2sc, dec] x 6 (18)
Stuff the head firm, continue stuffing until the last rnd.
Rnd 17: [sc, dec] x 6 (12)
Rnd 18: dec x 6 (6)
Sl st in the next st to FO. Snip yarn. Weave the tail through FLO of the remaining 6 sts, pulling tight to close. Bury yarn tail in the head.
Eye Indents
The eye indents are added over rnd 7, approx. 5 sts away from either side of the color change. To add the eye indents, use a 12-inch piece of yarn. Insert the needle from the bottom of the head and back to front, into the same stitch where you want your eye placement. Then insert the needle back into the sc above that st, and pull to reduce slack.
Repeat on the second eye, and pull tight. Tie yarn together on the inside of the head. Take care not to pull them too close together, as this is just to add a bit of character to the face. Add extra stuffing, if needed.
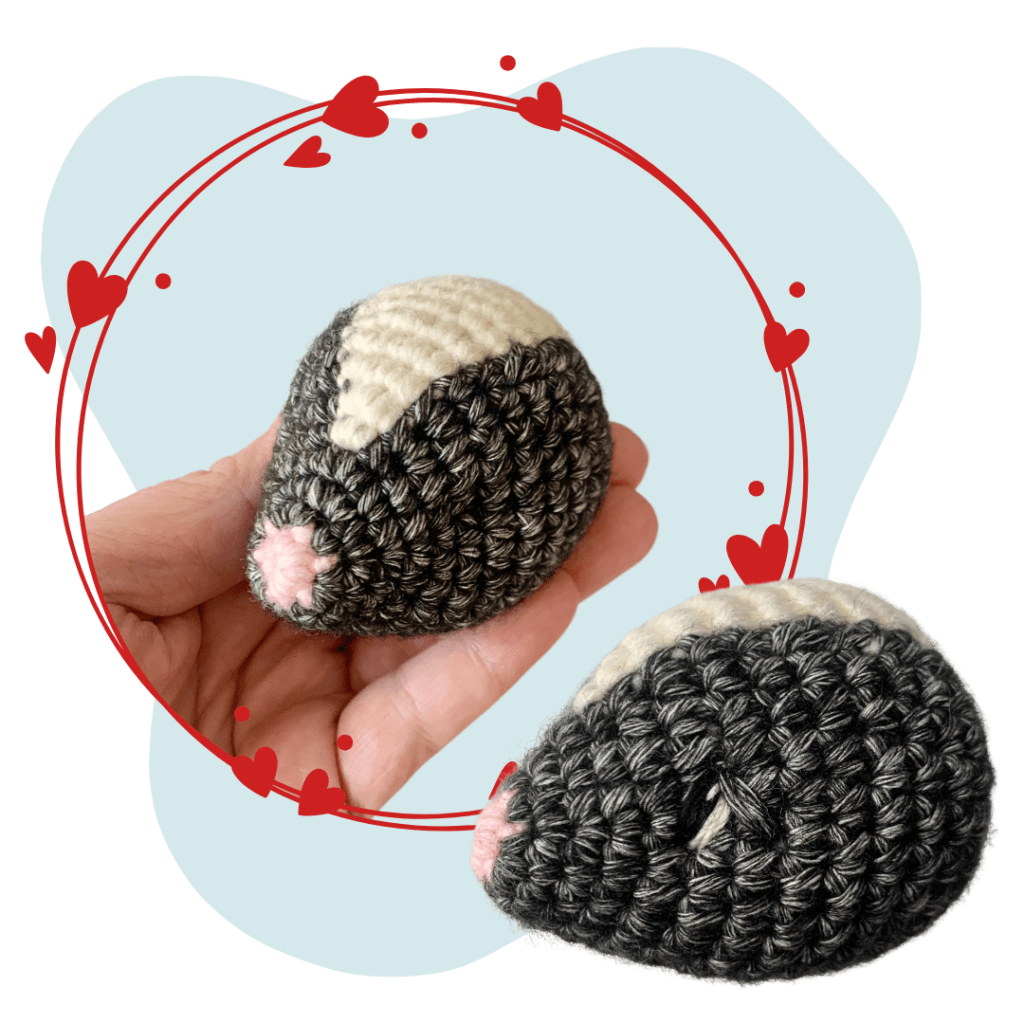
Reference the short video below from my Tulip the Mouse pattern.
Eye Embroidery
Tip* If you are a glutton for punishment, and used solid black yarn, you might find that using a different color for the eyes might be helpful. Try brown or dark blue instead of black!
Using embroidery thread, embroider the eyes over rnd 7, over the st with the eye indent.
First create the eye using black embroidery thread. The eye will be worked over one rnd and three sts. The middle st will be the one that we worked the eye indent into.
Next add the whites of the eyes and the little white reflection mark, using white embroidery thread.
Then, using Black Onyx, create the eyelids.
Hide all ends inside of the head.
Ears x 2
Using Black Onyx
Rnd 1: 5sc in a MR (5)
Rnd 2: inc x 5 (10)
Rnd 3: sc in each st (10)
Rnd 4: dec x 5 (5)
Sl st in the next st to FO and cut yarn, leaving a long tail for sewing. Do not stuff.
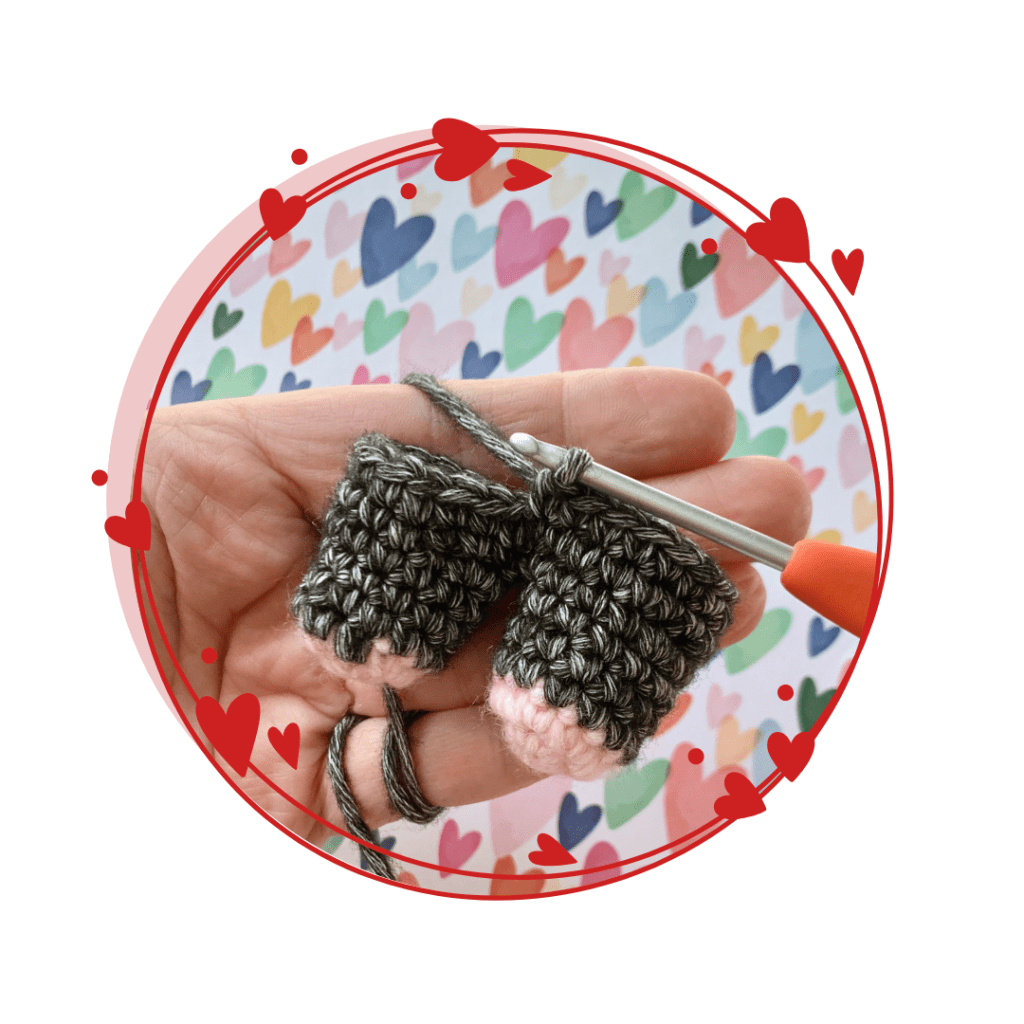
Arms x 2
Starting with Rose Quartz
Rnd 1: 6sc in a MR (6)
Rnd 2: [sc, inc] x 3 (9)
Change to Black Onyx
Rnd 3-10: sc in each st (9)
Stuff the arms lightly.
Fold in half and place 4sc across to close.
FO and cut yarn, leaving a long tail for sewing.
Legs x 2
Starting with Rose Quartz
Rnd 1: 6sc in a MR (6)
Rnd 2: inc x 6 (12)
Change to Black Onyx
Rnd 3-5: sc in each st (12)
Rnd 6: [3sc, inc] x 3 (15)
Sl st into the next st to FO the 1st leg and cut yarn. DO NOT FO the 2nd leg. Continue with the body.
Body
Continuing from the 2nd leg, when adding the first sc to the first leg, make sure the color change on the back of the leg is facing you. This is the back of the body.
Rnd 7: 15sc around the 1st leg, 14sc around the 2nd leg, attaching the tail – hold the tail with the color work facing you, sc through both sides of the tail and the next st of the body. Place your st marker. Keep the yarn tail on the outside of the body, this will be used to sew it to the body once we are finished. (30) The color work for the tail might not be centered. That is okay as we will be sewing it to the body and can adjust as needed.
Rnd 8: [9sc, inc] x 3 (33)
Rnd 9-11: sc in each st (33)
Rnd 12: [9sc, dec] x 3 (30)
Rnd 13: sc in each st (30)
Rnd 14: [8sc, dec] x 3 (27)
Rnd 15: sc in each st (27)
Rnd 16: [7sc, dec] x 3 (24)
Add stuffing, continue stuffing until the last rnd.
Rnd 17: sc in each st (24)
Rnd 18: [2sc, dec] x 6 (18)
Rnd 19-20: sc in each st (18)
Rnd 21: [4sc, dec] x 3 (15)
Sl st into the next st to FO. Cut yarn, leaving a long tail for sewing the head to the body.
Assembly
Use straight pins to hold all pieces in place while sewing. Pin all pieces together before sewing to ensure proper placement.
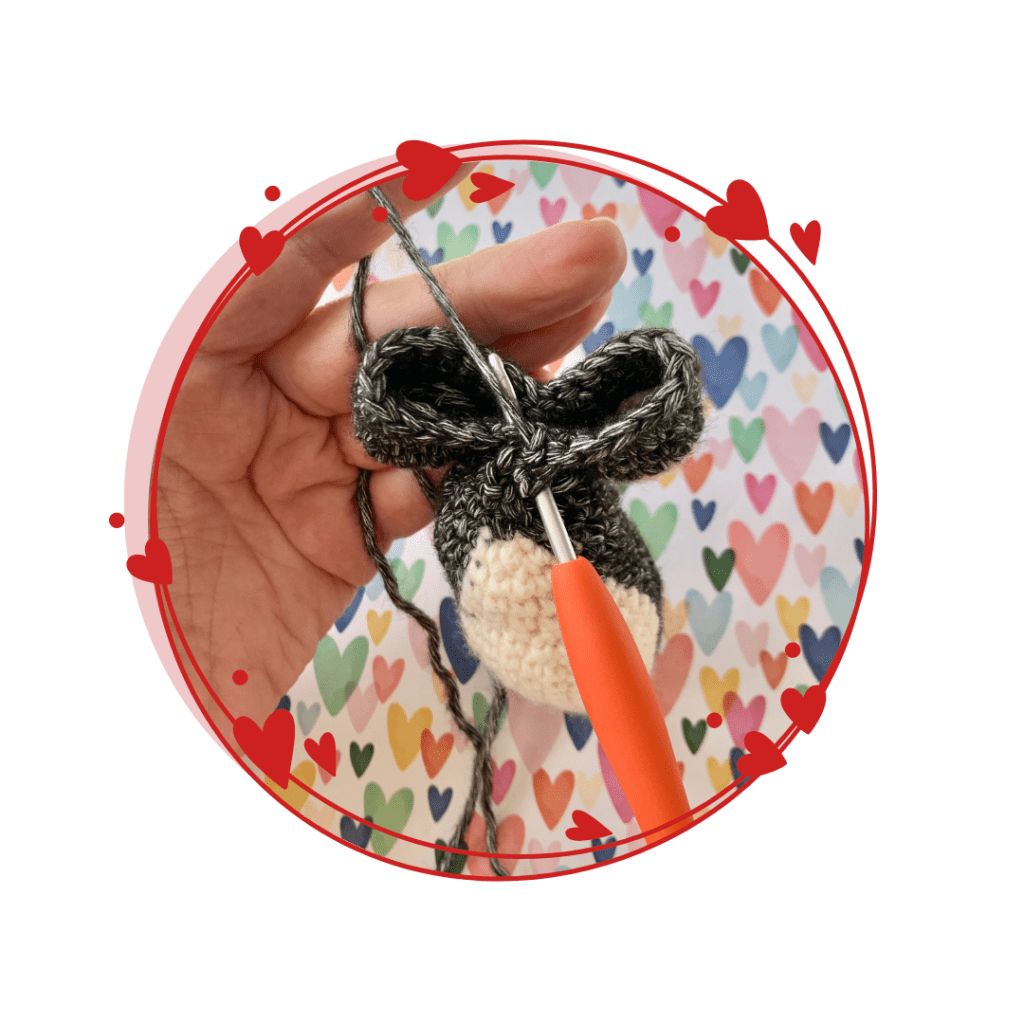
Sew the ears to the head over rnds 11-12. The colorwork of the head should hit roughly in the middle of the ear. Use the eyes as reference for even sewing.
Sew the head to the body. I tilted mine slightly to accommodate for the rose.
Sew the arms over rnds 15-20, on either side of the body.
Using the yarn end from the tail FO, weave it through the body and out between rnds 10&11, sew the tail in place. I sewed mine off-centered so that the tail was visible while looking at the skunk straight on. There is a dip in the tail where the tail should lay perfectly against Blossom’s body.
Sew the rose to Blossom’s hands, belly and head. If you don’t anchor the top of the rose, it could droop over time due to the weight. Sew the hands to the rose. Tip* Sew the rose to the opposite side that you have sewn the tail.

Congratulations! You have finished your little skunker! Please don’t forget to share on your Instagram account using #sarahdeecrochet
Discover more from SarahDee Crochet
Subscribe to get the latest posts sent to your email.


Bellísimo!!! Muchísimas Gracias!!! Cuando empiece a tejer nuevamente lo haré con mucho gusto, es muy adorable, haces un hermoso trabajo y sos una gran maestra!!! ❤️🥰😘 Saludos desde Mar del Plata Argentina 🇦🇷
LikeLike