
Created by Sara Bailey of @littleellies_handmade
Skill level – Easy
LittleEllies_Handmade
Hi there! I am Sara. My journey as a designer started with knitting and babies. I was desperate to make something unique and handmade, something I could look at and say “I made that!” With my twins already having been gifted their granny square blankets I truly adored, I set out to make something for my new little bundle of joy. After many Youtube videos, a couple obscure handmade giraffes, and lots of practice as a pattern tester, I decided to start designing in 2020. 3 years later I am in full design mode!

Follow Sara!
Sara has also created an ad-free, high quality PDF for purchase, if you prefer.
Yarn Used
Stylecraft Special DK
• 20g – Walnut (1054)
• 20g – Mocha (1064)
• Less than 15g – Stone (1710)
• 5-10g Citron (1263)
• 5-10g Matador (1010)
• 5-10g Dark Brown (1004)
• Scrap yarn – White (1001) for expression.
Notions
• Black safety eyes 9mm
• Soft stuffing
• Tapestry needle
• Pins for fixing before stitching
• Stitch markers
• Scissors
• 2mm crochet hook.
Notes
My patterns are tightly stitched in order to keep rounds neat so that no stuffing can be seen. If you find you are struggling, change your hook size to a smaller one than suggested.
This pattern is for personal use only. You may sell the items that you make from this pattern, but I ask that you please refer back to @littleellies_handmade as the designer. Altering, reproducing, or selling this pattern, online or in print is strictly prohibited.
Measurements
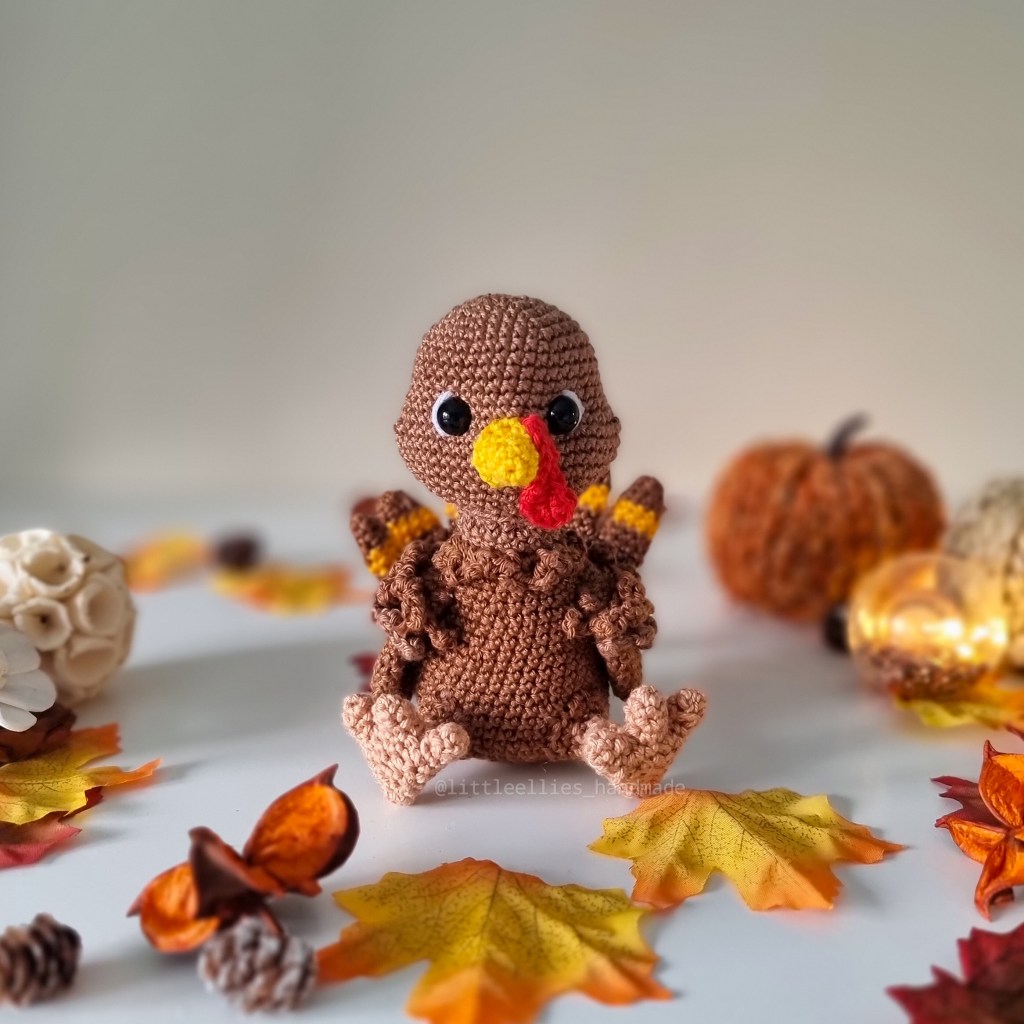
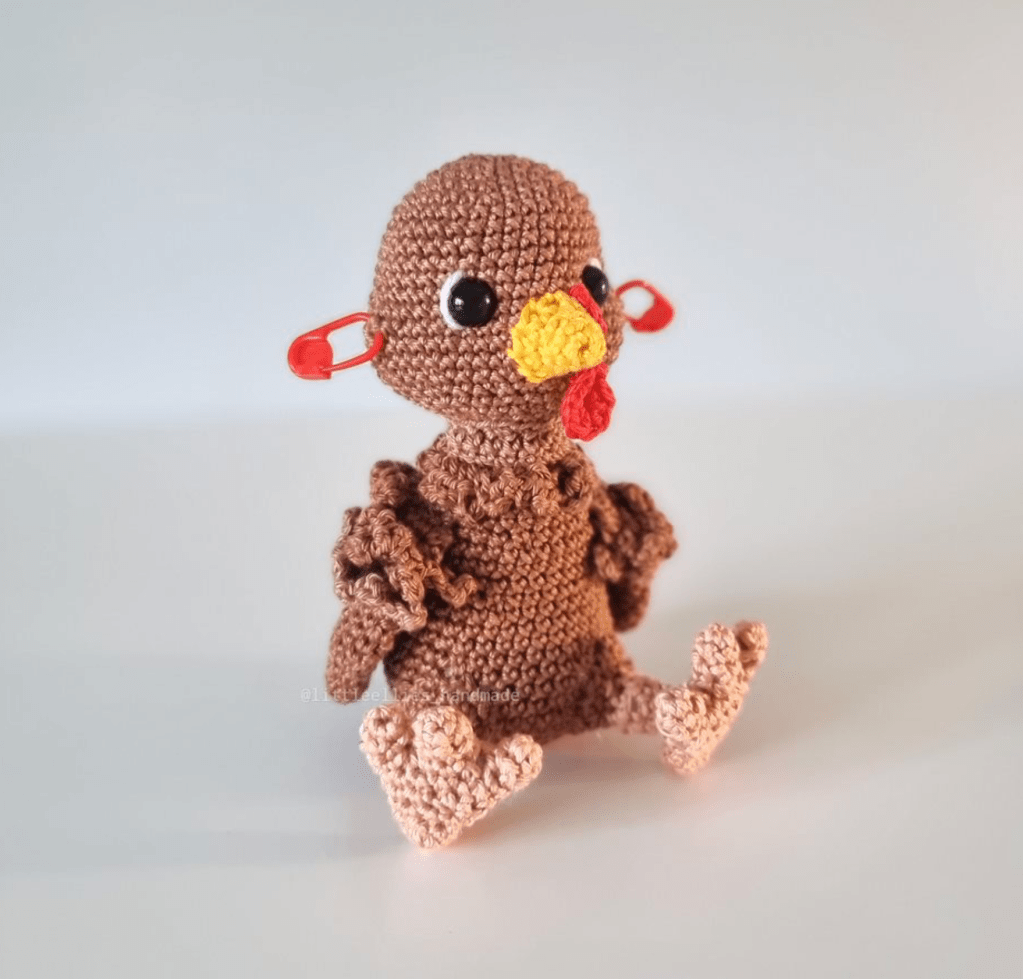
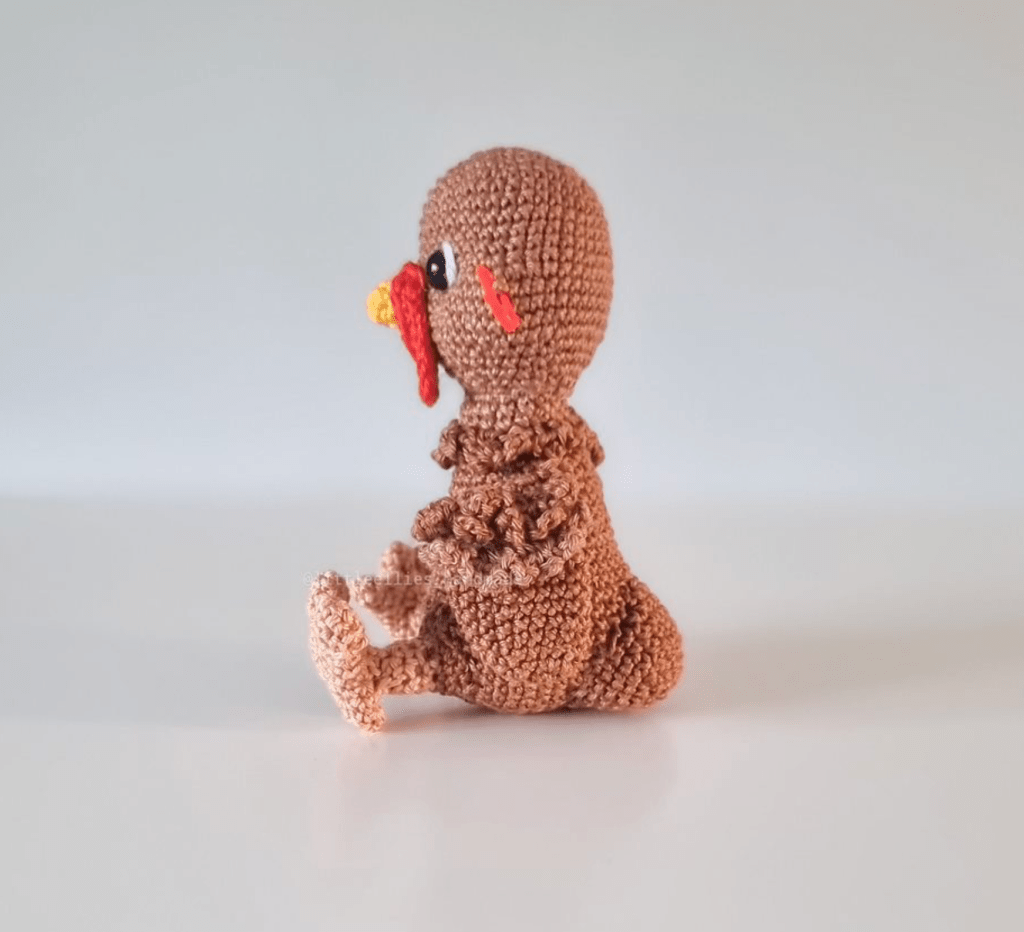
Tookie measures ~4in(11cm) while sitting, when using specified yarn.
Abbreviations
• The pattern asks for a MAGIC RING for all starting points. If you are unfamiliar with this technique, simply CHAIN 2 and work into the second chain for the designated amounts of stitches. This will work just as well.
• Ch – Chain.
• Sc – Single crochet.
• Dec – Sc 2 stitches together.
• Inc – Sc 2 stitches in the same stitch.
• CC – Change yarn colour.
• […] x – Repeat by the amount (x).
• (…) – Total stitches.
• Sl st – Slip stitch.
• F.O – Finish off.
Pattern
Using Walnut
1. Sc 6 into a magic ring. (6)
2. Inc in each stitch. (12)
3. [Sc 1, inc] x6 (18)
4. [Sc 2, inc] x6 (24)
5. [Sc 3, inc] x6 (30)
6. [Sc 4, inc] x6 (36)
7 – 11. Sc around (36) 5 Rounds.
12. [Sc 5, inc] x6 (42)
The stitch markers on Round 13, mark the sides of the head. This aids with the assembly of Tookie.
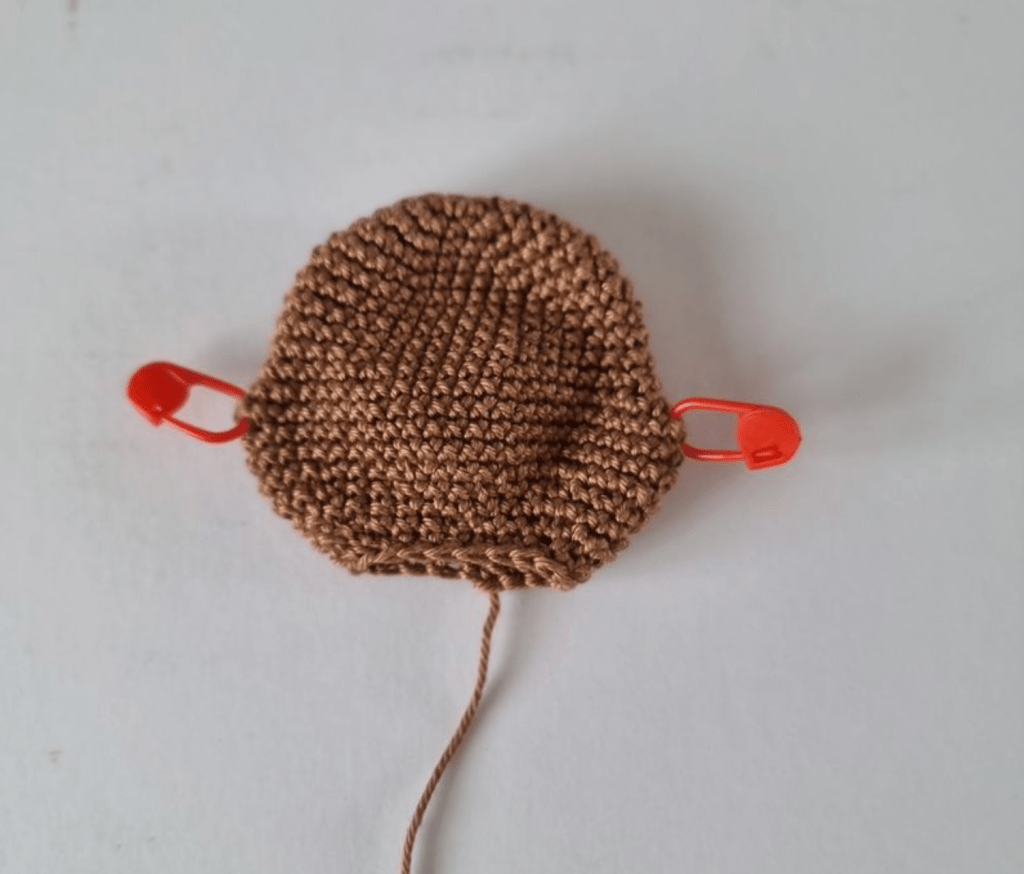
13. Sc 6, inc x3 [Place a stitch marker in the first sc of the second inc] sc 17,
inc x3 [Place a stitch marker in the second sc of the second inc] sc 13 (48)
14. Sc 9, inc, sc 22, inc, sc 15. (50)
15 – 16. Sc around. (50) 2 Rounds.
17. [Sc 3, dec] x10 (40) Stuff firmly.
18. [Sc 2, dec] x10 (30)
19. Sc around. (30)
20. [Sc 3, dec] x6 (24)
21. [Sc 2, dec] x6 (18)
F.O and leave a long thread for sewing.
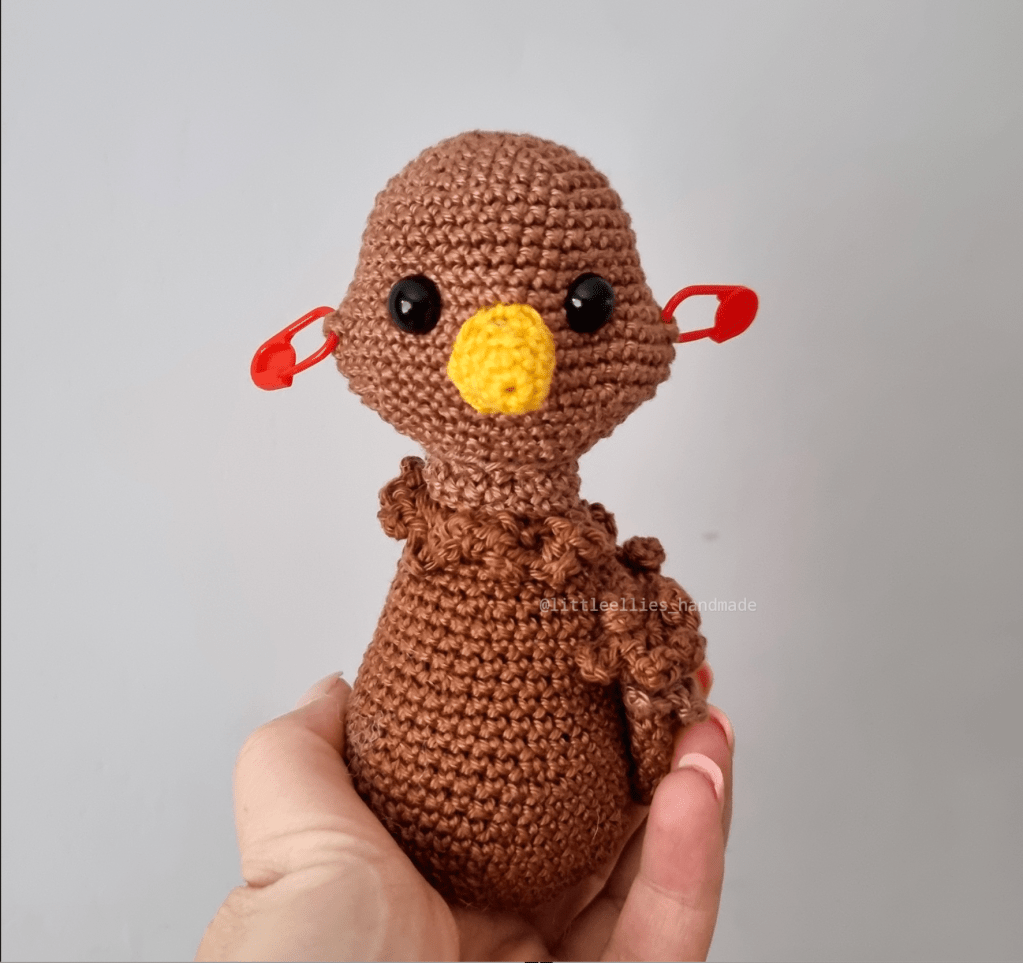
The eyes sit on Rounds 11 and 12 with 8 sts between them. Keep the distance between the safety eyes and the stitch markers even on both sides. Using White yarn, create expression beside the eyes, by stitching around the eye. Different placements create different expressions.
Body
Using Walnut
1. Sc 6 into a magic ring. (6)
2. Inc in each stitch. (12)
3. [Sc 1, inc] x6 (18)
4. [Sc 2, inc] x6 (24)
5. [Sc 3, inc] x6 (30)
6. [Sc 4, inc] x6 (36)
7. [Sc 5, inc] x6 (42)
8. [Sc 6, inc] x6 (48)
9. [Sc 7, inc] x6 (54)
10 – 11. Sc around. (54) 2 Rounds.
12. [Sc 7, dec] x6 (48)
13. [Sc 6, dec] x6 (42) Stuff firmly throughout.
14. Sc around. (42)
15. [Sc 5, dec] x6 (36)
16 – 18. Sc around. (36) 3 Rounds.
19. [Sc 4, dec] x6 (30)
20 – 22. Sc around. (30) 3 Rounds.
23. [Sc 3, dec] x6 (24)
24 – 25. Sc around. (24) 2 Rounds.

26. [Sc 2, dec] x6 (18)
27. Sc around. (18) CC to Mocha.
28. Blo sc around. (18)
29. Sc around. (18)
F.O and hide the thread.
You will be using the thread from the head section to piece the parts together.
Working the frill –
With the neck of Tookie facing you, take thread that is the same colour and work into the unused loops of Round 28.
28. [Sc 1, ch 4, work into the 3rd ch sc 1, skip last ch] x 18. You will have 18 individual frills in total.
F.O and hide the thread.
Beak
Using Citron
1. Sc 6 into a magic ring. (6)
2. Inc in each stitch. (12)
3 – 5. Sc around. (12) 3 Rounds. Stuff on assembly.
6. [Sc 2, inc] x4 (16)
F.O and leave a long thread. Place the beak evenly between the eyes on rounds
12-17. Use the stitch markers for guidance.
Wings x 2
Using Walnut
1. Sc 6 into a magic ring. (6)
2. Inc in each stitch. (12)
3. [Sc 3, inc] x3 (15)
4 – 5. Sc around. (15) 2 Rounds.
6. [Sc 4, inc] x3 (18)
7 – 10. Sc around. (18) 4 Rounds.
11. Blo [sc 4, dec] x3 (15)
12 – 13. Sc around. (15) 2 Rounds.
14. Blo [sc 3, dec] x3 (12)
15. Fold in half. Sc 6 through both sides. (6)
F.O and leave a long thread for sewing.
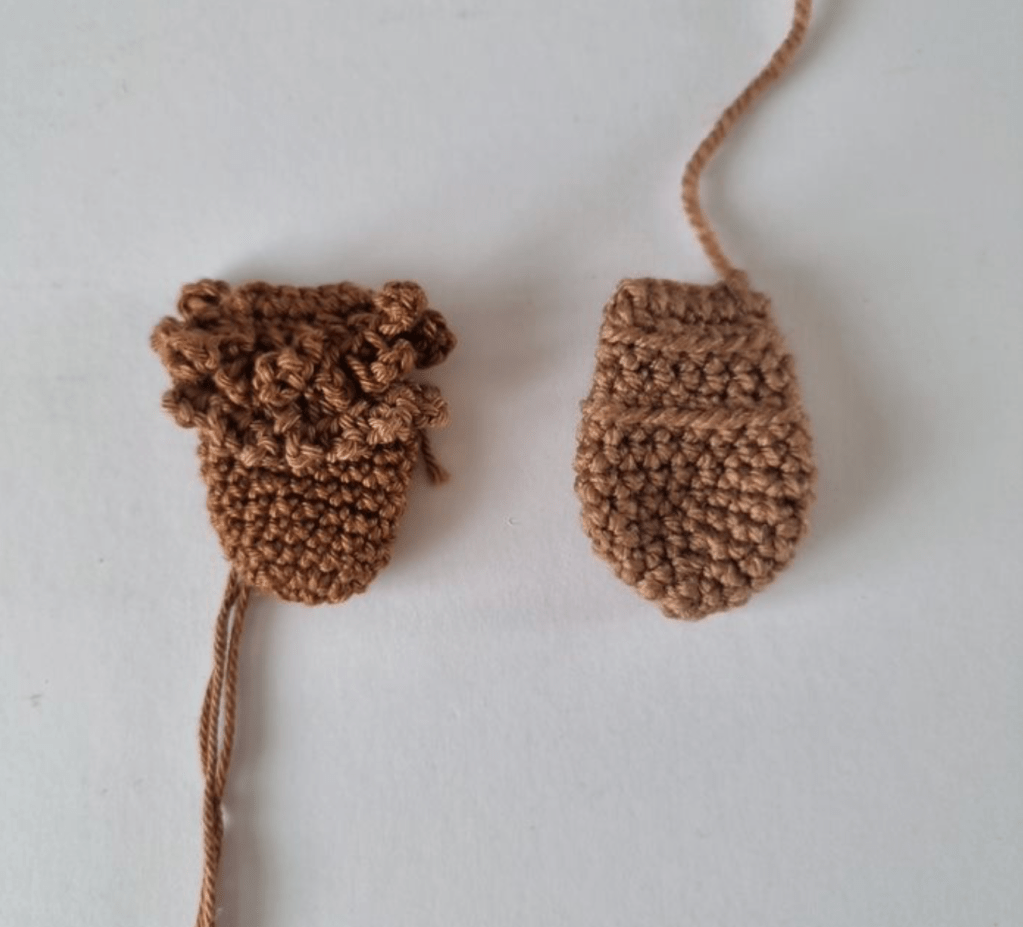
Working the frill –
You will only work one side of the wing for this next part. There is no Right or Left wing. With the wing tip facing away from you, take Mocha thread and work into the unused loops of Round 11.
11. [Sc 1, ch 4, *work into the 4th ch*, sc 1.] x 7, Sl st. You will have 7 individual frills.
With the wing tip facing away from you, take Walnut thread and work into the unused loops of Round 14.
14. [Sc 1, ch 5, *work into the 4th ch*, hdc 1, sc 1.] x 6. You will have 6 individual frills.
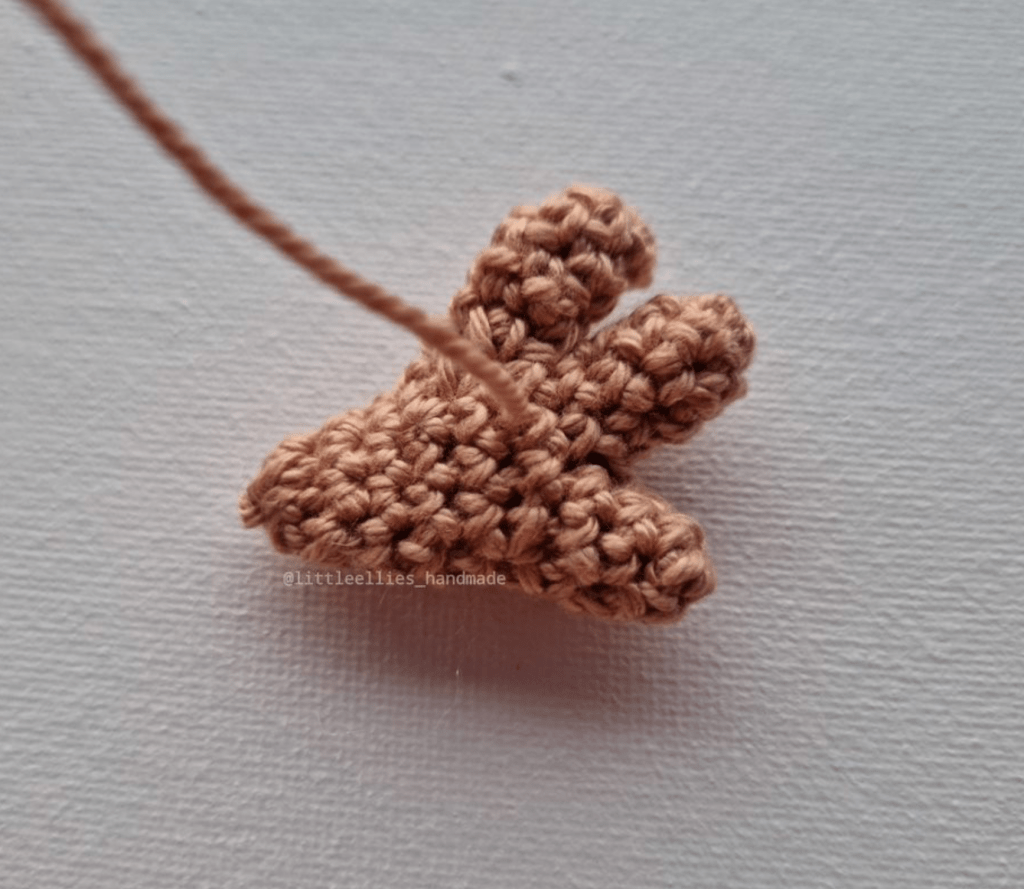
Toes x 3(per foot)
Using Stone
1. Sc 5 into a magic ring. (5)
2 – 3. Sc around. (5) 2 Rounds.
F.O for two and leave a long thread for sewing the holes left when you connect the toes together.
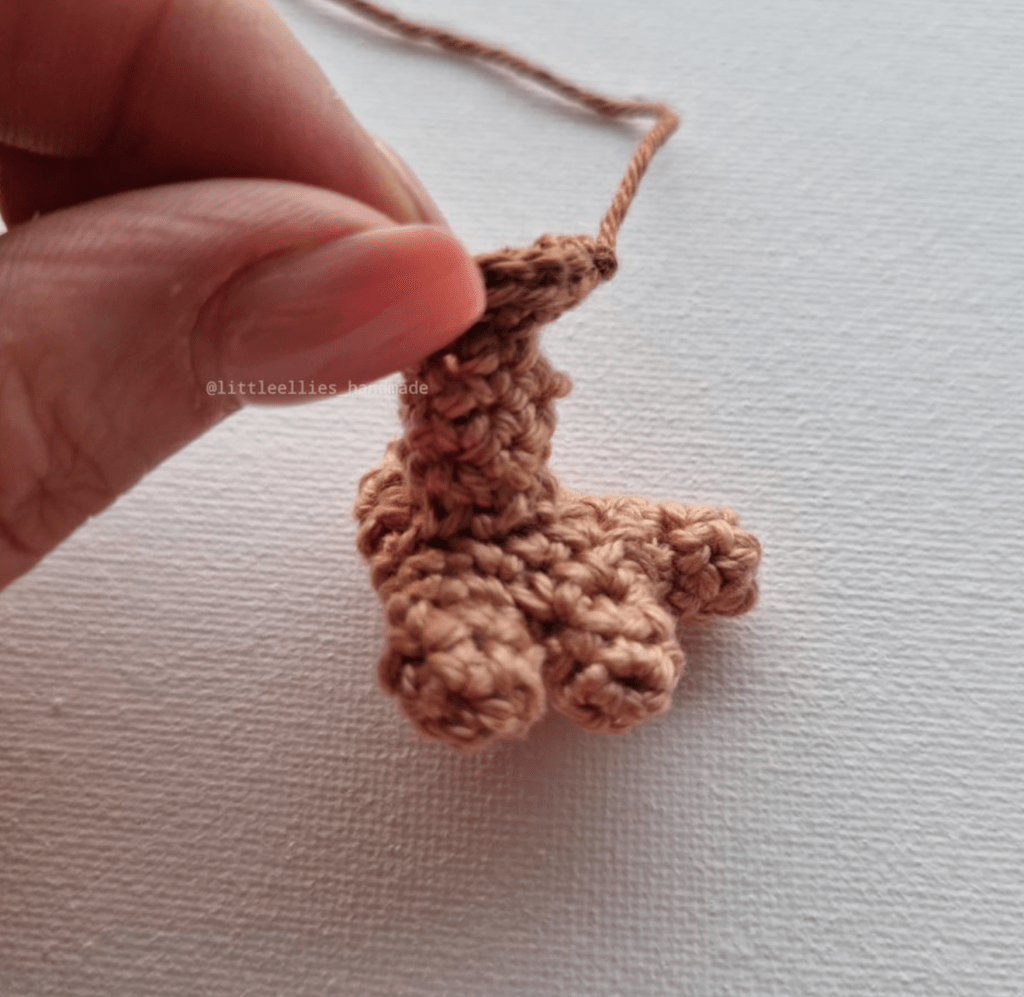
Connecting them together to create the foot.
With the third toe per foot, continue.
4. Sc 1. Connect with another toe with sc 1, sc 2. Connect with the last toe with sc 1, sc 4. Working back into the second toe, sc 2. Working back in to your first toe, sc 4. (15)
5. [Sc 3, dec] x3 (12)
6. Sc 2, dec, sc 4, dec. sc 2. (10) Stuff firmly.
7. [Sc 3, dec] x2 (8)
8. Sc around. (8)
9. Dec x4 (4)
F.O and pull the thread out through the middle of the foot. Leave this thread for sewing late Leave this thread for sewing later.
Now repeat once more to make the second foot.
Legs x 2
Using Stone
1. Sc 4 into a magic ring.(4)
2. [Sc1, inc]x2(6)
3. Blo sc around.(6)
4-5. Sc around.(6) 2 Rounds
6. [Sc 1, inc] x3 (9)
7. Inc in each stitch. (18) Stuff on assembly.
F.O and leave a long thread.
Piecing it together.
Take a foot with the thread pulled through the top. This is the thread that will connect the leg and foot together. Pin the leg onto the foot and using the thread from the foot, sew them together with the unused loops of Round 3.

Assembling the Body
Place the wings on either side of the body. You have only worked the frill on one side of the wing, so you can place the wing flat against the body on Round 24. You can choose to sew the wing down entirely or leave it free.
Place the legs on Rounds 6-11. Use the stitch markers and the images as a guide. The middle toe should be pointing to the ceiling in line with the safety eyes. The edge of the leg should be in line with the stitch marker. An equal amount of visible stitches between each leg with help him sit properly.

Wattle
Using Matador
1. Ch 9, [start in the second ch] sc 4, hdc 3, [in the last ch] hdc 5, working around the other side of the chain, sl st 8 (20)
F.O and leave a long thread for sewing. Place the wattle so it just overlaps the beak on one side. Reference photos for proper placement.
Tail
Using Walnut
1. Sc 6 into a magic ring. (6)
2. Inc in each stitch. (12)
3. [Sc 1, inc] x6 (18)
4. Sc around (18)
5. [Sc 2, inc] x6 (24)
6-7. Sc around (24) 2 Rounds.
F.O and leave a long thread for sewing.
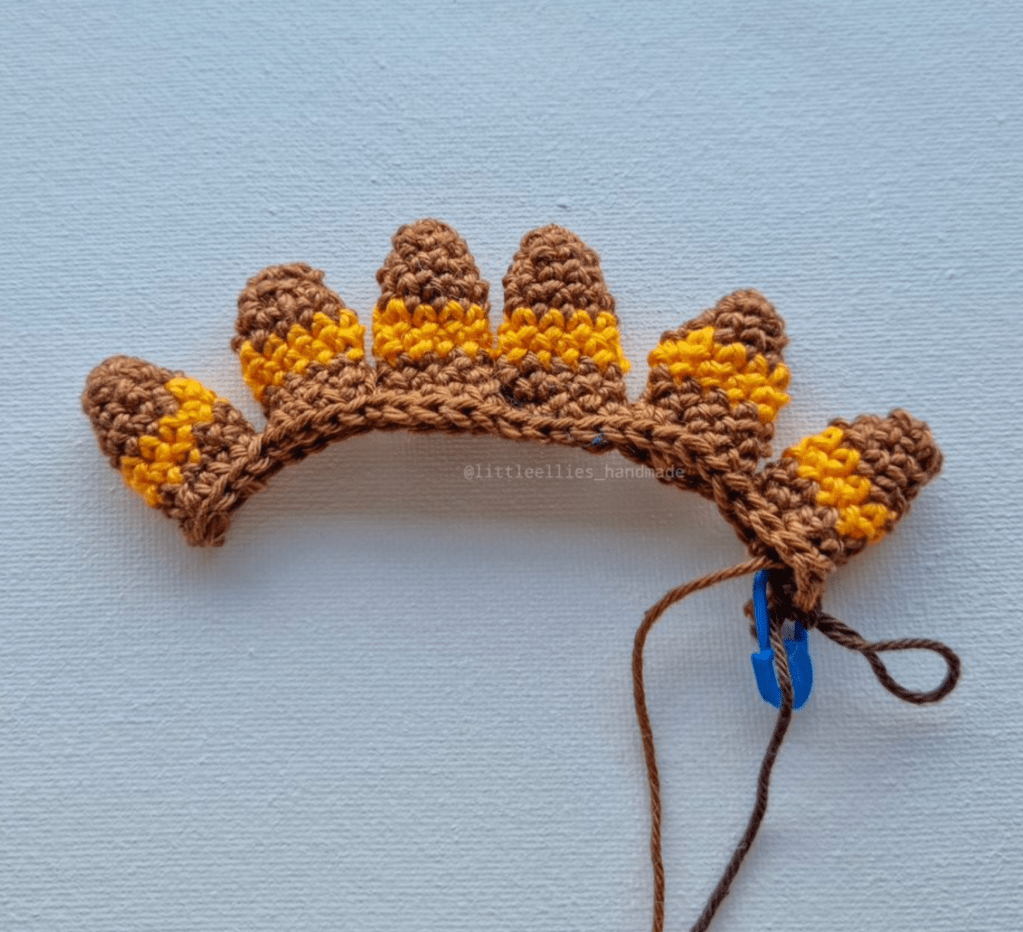
Tail Feathers
The tail feathers are made out of 2 big feathers and 4 little feathers.
Big x 2
1. Sc 6 into a magic ring. (6)
2-4. Sc around (6) 3 Rounds. CC to Sunshine.
5. [Inc, sc 1] x3 (9)
6. Sc around (9) CC to Walnut
7-8. Sc around (9) 2 Rounds.
F.O and leave thread to hide the hole when connecting them together.
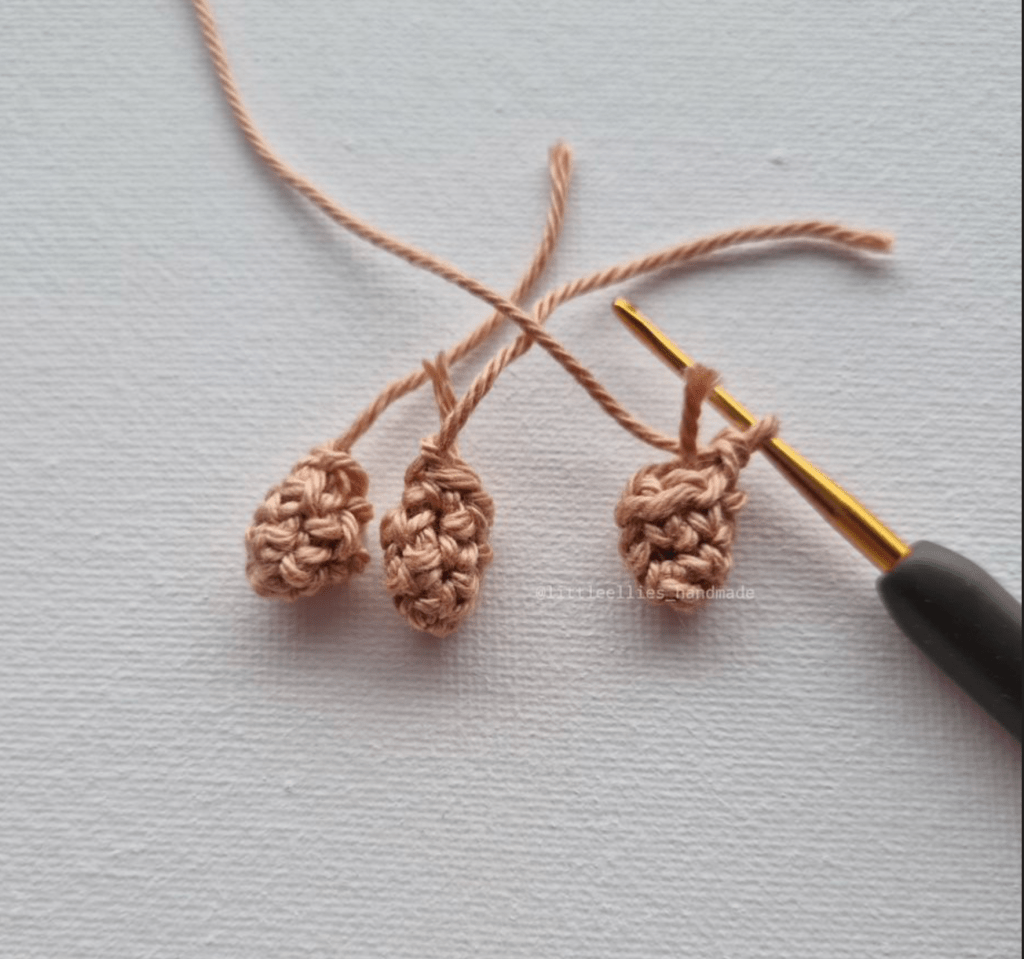
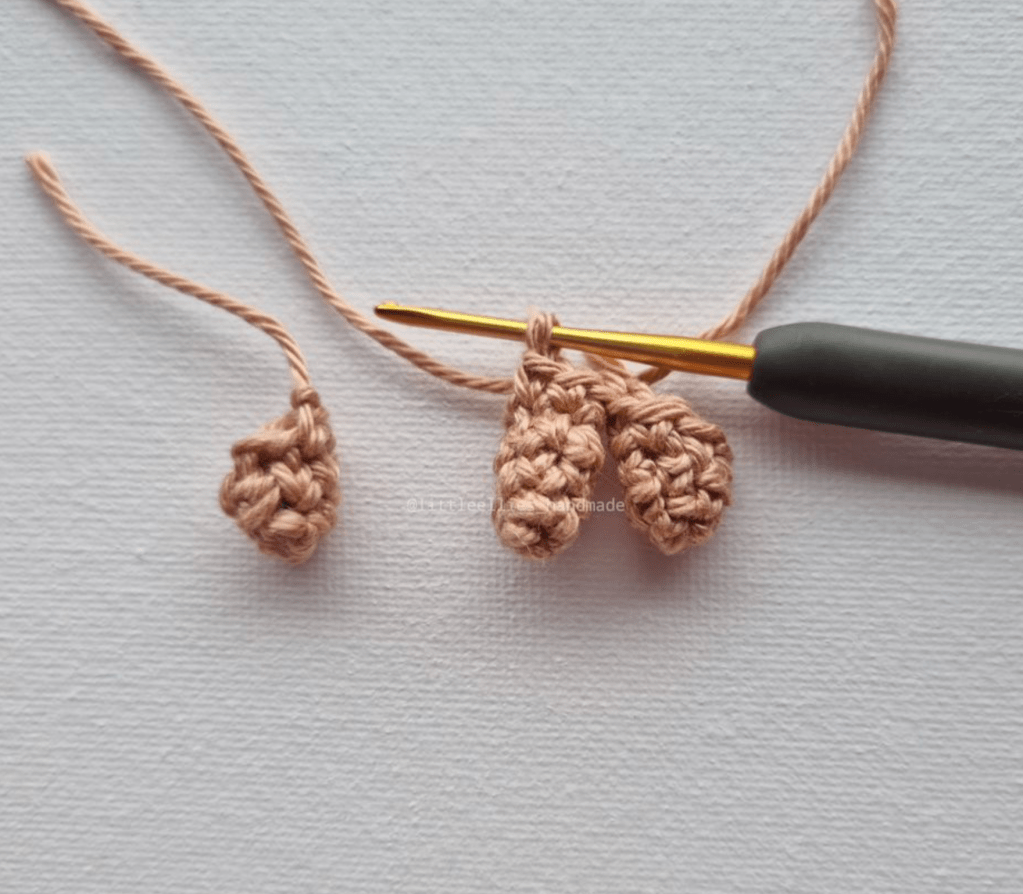
Little x 4
1. Sc 6 into a magic ring. (6)
2-3. Sc around (6) 2 Rounds. CC to Sunshine.
4. [Inc, sc 1] x3 (9)
5. Sc around. (9) CC to Walnut
6-7. Sc around. (9) 2 Rounds
F.O and hide the thread for the first three small feather.
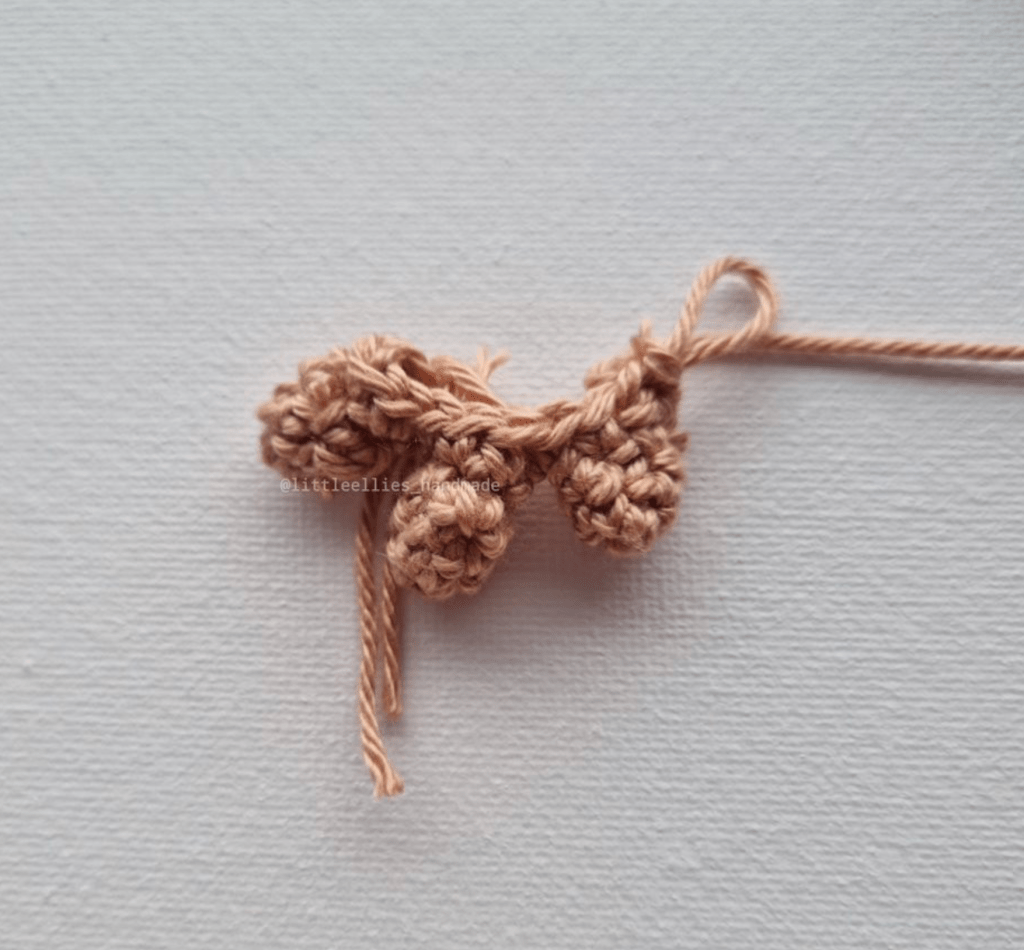
Place the feathers out so that the two big feathers are worked third and fourth in the sequence. Starting with the fourth little feather that is still on your hook.
1. Sc 6, connect to a small feather(2) and sc 4, [connect to a big feather(3-4) and sc 4] x2, connect to a small feather(5) and sc 4, connect to a small feather(6) and sc 9, connect back to small feather(5) and sc 5, [connect back to big feather(4-3) and sc 5] x2, connect back to small feather(2) and sc 5, connect back to final feather(1) and sc 5. (54)
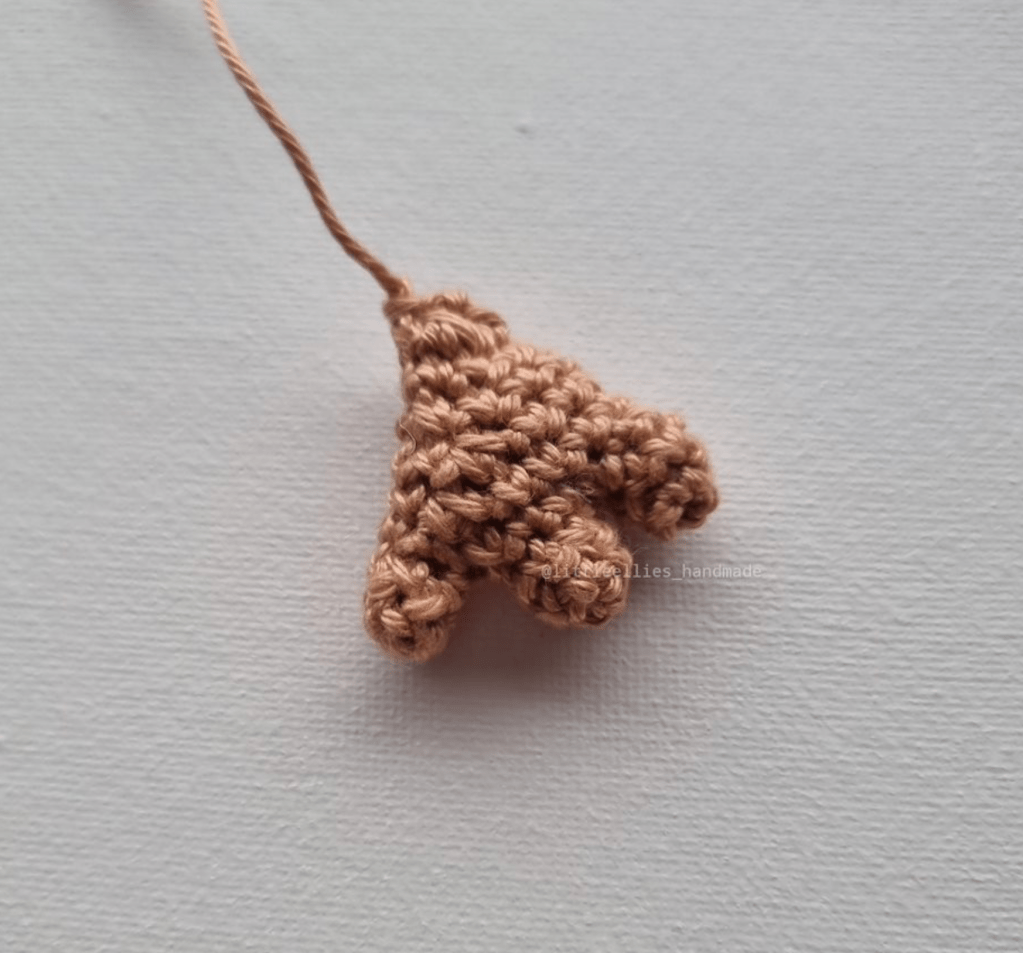
2. [Sc 7, dec] x6 (48)
3. Sc around. (48) CC to Dark Brown
4. [Sc 6, dec] x6 (42)
5. Sc around. (42) CC to Walnut
6. [Sc 5, dec] x6 (36)
7-8. Sc around. (36) 2 Rounds.
9. [Sc 4, dec] x6 (24)
10. Sc around. (24)
F.O and leave a long thread for sewing.

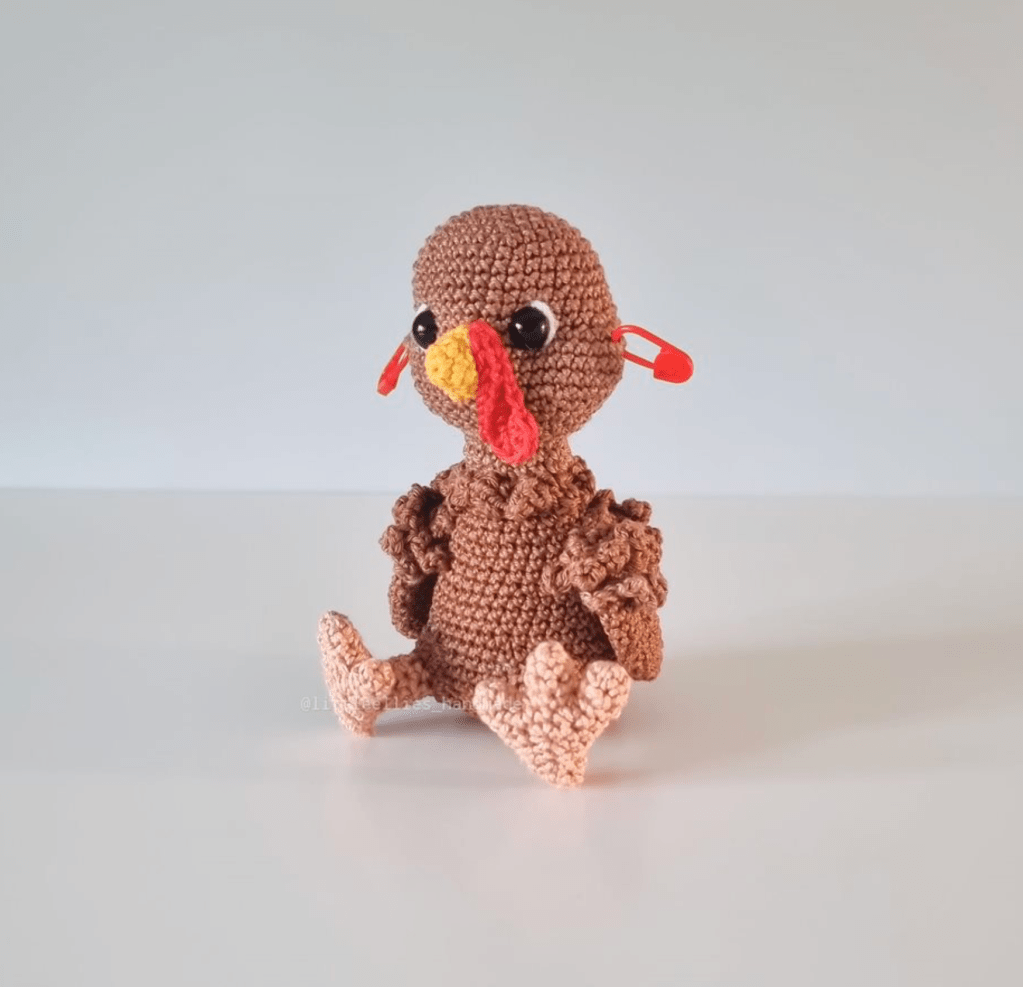
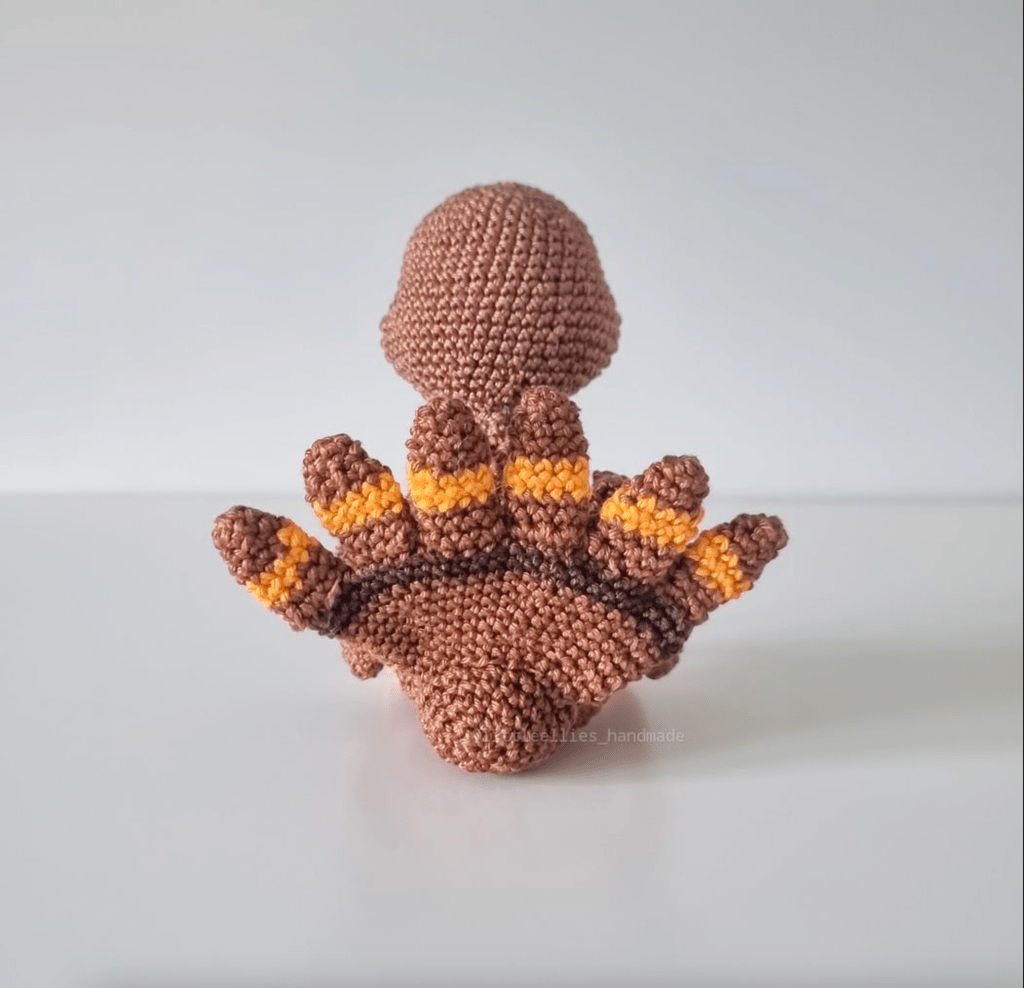
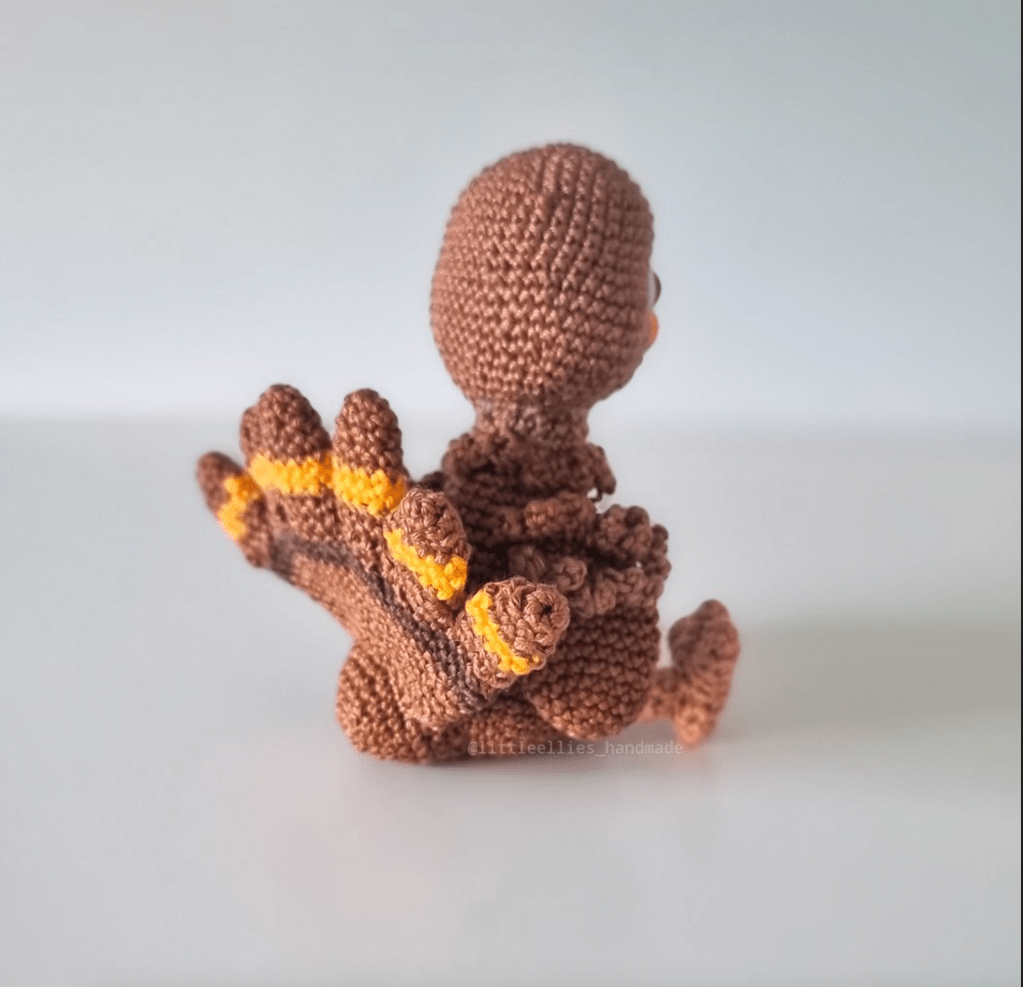
Place the completed tail feather onto the last round of the tail and pin in place. Make sure the two big feathers centered on Tookie’s back and the other two small feathers are equal on either side. Have a look at Tookie from the front as well, to see if you are happy with his stance. Once you are happy, sew the back part of the feather down first and then sew the front part, so it is directly over the seam of the body and tail.
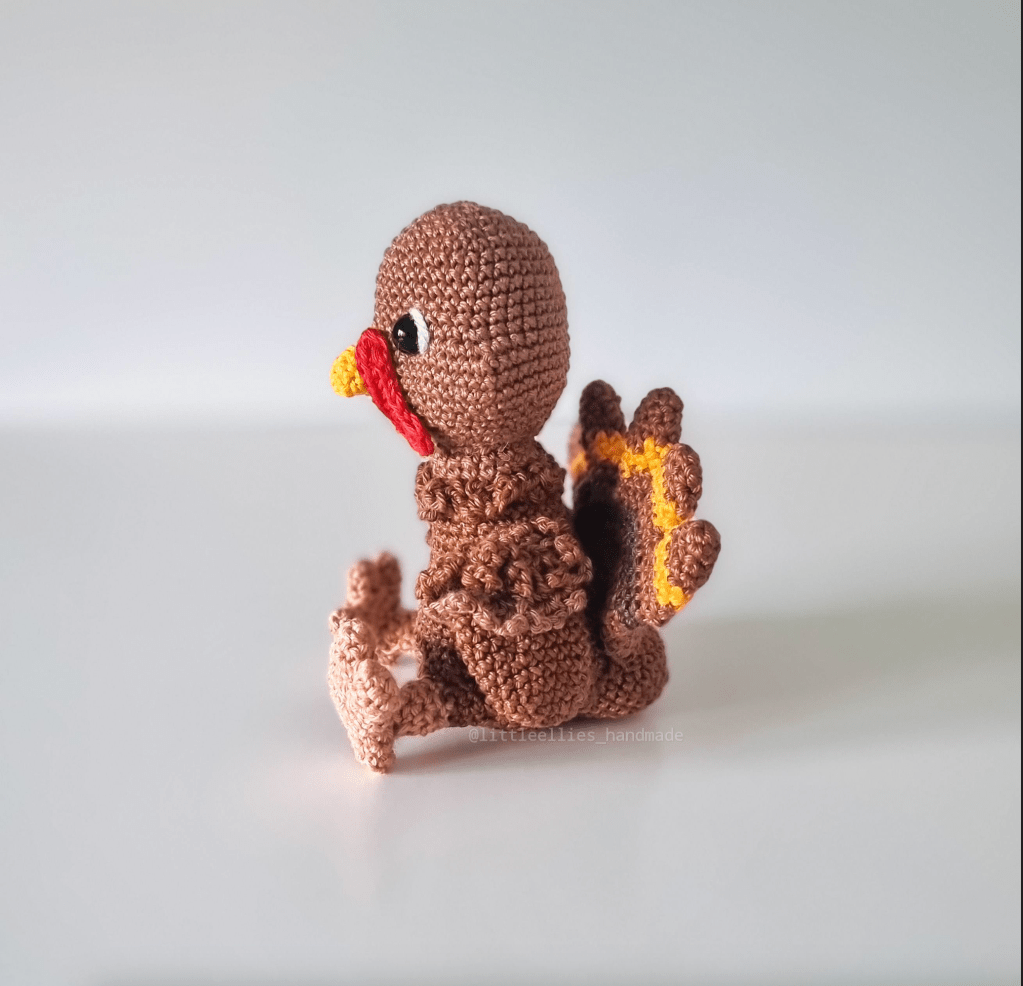
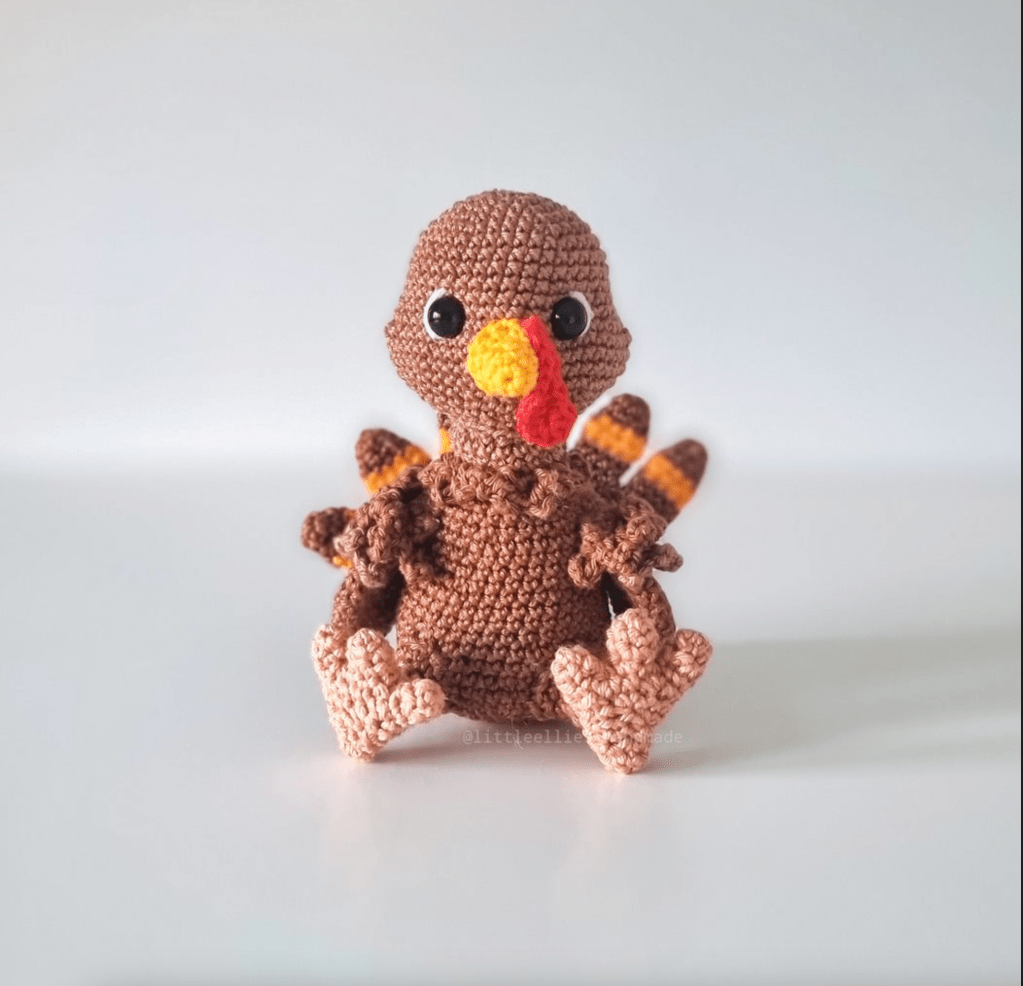
Now sit back and admire your completed turkey!
If you make your own Turkey – I’d love to see it! Please tag me on Instagram at @LittleEllies_Handmade and use the hashtag #LittleEliies_Handmade. Don’t forget to tag @sarahdeecrochet and also use the hashtag #sarahdeecrochet
If you have any questions or need pattern assistance, please reach out to the designer! All contact information is listed above.

