
Created by SarahHooksandLoops
Level – Adventurous beginner

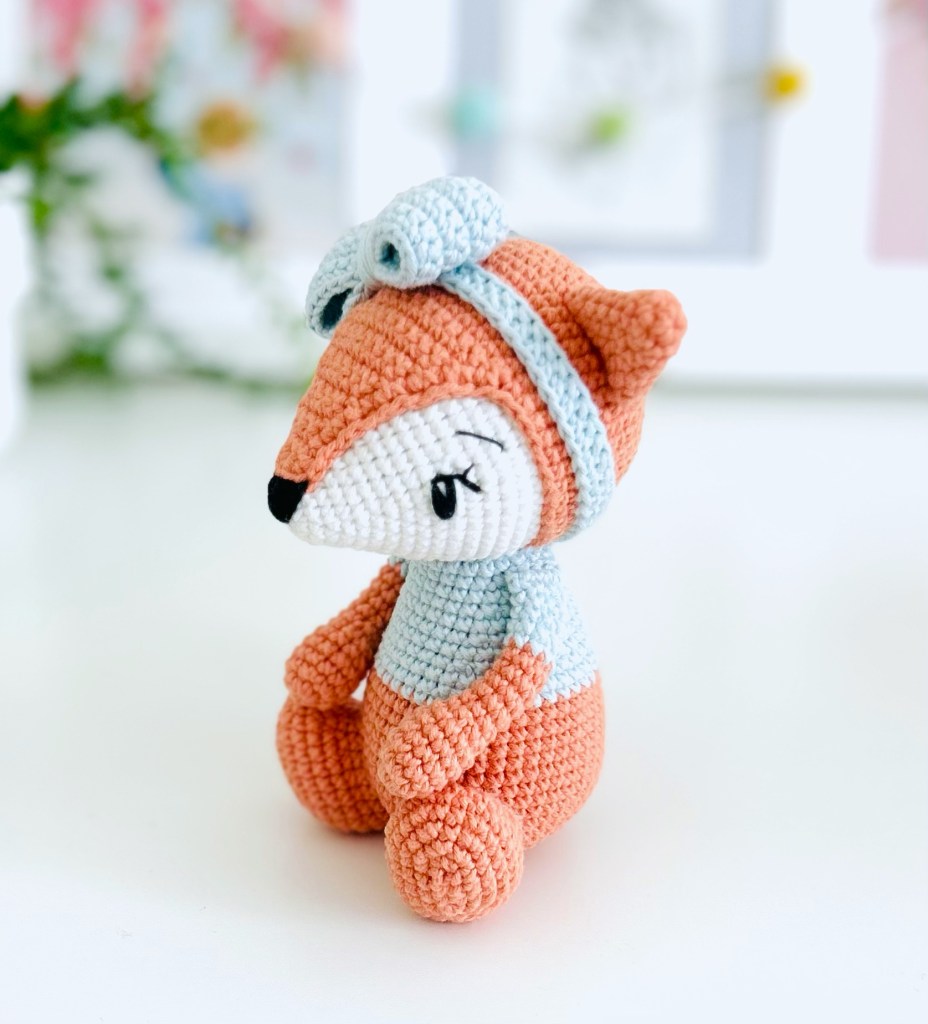
I’m super excited to be sharing with you today my pattern for Pippi the fox, who is the sweet little
mascot for Sarah’s Hooks & Loops. At heart, I love creating woodland animals, there’s just something
about them that brings back so many childhood memories and Pippi is another one of those
creations that I am so happy to share with you.
Happy crocheting xx

Follow Sarah!
Instagram
Etsy
Amigurumi.com
Facebook
Pinterest
Sarah has also created an ad-free PDF for purchase!
Yarn: Ricorumi Cotton D
- Papaya 068 x 2
- White 001 x 1
- Light Blue 033 x 1
Notions
- 2.25mm crochet hook
- Black embroidery thread for the eye lashes and eyebrows.
- Small amount of black sport weight yarn for the main section of the eye and nose.
- Tapestry needle
- Soft toy filling
- Stitch markers/pins/scissors
- Pair of 9mm safety eyes (if using)
Abbreviations (US Terms)
mr – magic ring
st/sts – stitch/stitches
sl st – slip stitch
ch – chain
sc – single crochet
inc – single crochet increase
dec – decrease (dec 2 sts together FLO)
rnd – round
F/O – fasten off
*…* x N:… – repeat the instructions between asterisk N number of times.
(…) – total number of sts in round/row
Notes
- Work in continuous rounds unless otherwise stated in the pattern.
- I have used the ‘x’ stitch to create my Pippi the Fox (yarn under technique).
- Using different materials and hook size to what is recommended may alter the final appearance of your fox. For example, a smaller hook and lighter weight yarn will produce a smaller fox.
- Colour changes are made in the final step of the stitch.
- To make an invisible st, pull the yarn end through the last st and thread it onto a tapestry needle. Skip one st and guide the yarn under both loops of the next st, going from the outside to the inside of your work. Insert the needle back into the top of the sc (or st) in which you started. This completes your invisible st.
Pattern
Finished size: 12 cm in height when using the recommended materials and crochet hook size.
Body
Start with papaya yarn.
Rnd 1: 6 sc in to a mr (6)
Rnd 2: [inc] x 6 (12)
Rnd 3: [1 sc, inc] x 6 (18)
Rnd 4: 1 sc, inc, [2 sc, inc] x 5, 1 sc (24)
Rnd 5: [3 sc, inc] x 6 (30)
Rnd 6: 2 sc, inc, [4 sc, inc] x 5, 2 sc (36)
Rnd 7: [5 sc, inc] x 6 (42)
Rnd 8 – 15 (8 rnds): 42 sc (42)
Rnd 16: [12 sc, dec] x 3 (39)
Change to light blue yarn.
Rnd 17: 39 sc (39)
Rnd 18: [11 sc, dec] x 3 (36)
Rnd 19: 36 sc (36)
Rnd 20: [10 sc, dec] x 3 (33)
Rnd 21: 33 sc (33)
Rnd 22: [9 sc, dec] x 3 (30)
Start stuffing the body and continue until the end.
Rnd 23: 30 sc (30)
Rnd 24: [8 sc, dec] x 3 (27)
Rnd 25: 27 sc (27)
Rnd 26: [7 sc, dec] x 3 (24)
Rnd 27: 24 sc (24)
F/O and leave a long tail for attaching the head.
Fox’s Head
The head is made in 2 parts, the outer cap and the inner part. We will start by making the inner part.
Inner Part
Use white yarn.
Rnd 1: 6 sc in to a mr (6)
Rnd 2: [inc] x 6 (12)
Rnd 3: 12 sc (12)
Rnd 4: [1 sc, inc] x 6 (18)
Rnd 5: 18 sc (18)
Rnd 6: 1 sc, inc, [2 sc, inc] x 5, 1 sc (24)
Rnd 7: 24 sc (24)
Rnd 8: [3 sc, inc] x 6 (30)
Rnd 9: 30 sc (30)
Rnd 10: 2 sc, inc, [4 sc, inc] x 5, 2 sc (36)
Rnd 11: 36 sc (36)
Rnd 12: [5 sc, inc] x 6 (42)
Rnd 13: 42 sc (42)
Rnd 14: 3 sc, inc, [6 sc, inc] x 5, 3 sc (48)
Rnd 15 – 23 (9 rnds): 48 sc (48)
If you are using safety eyes, insert them between rnds 11 & 12 with approximately 17 sts apart across the bottom of the head, counting in rnd 11 (15 sts apart once inserted). Mark the top of the head with a stitch marker so you know the correct way up when attaching the cap to the head later.
Rnd 24: 3 sc, dec, [6 sc, dec] x 5, 3 sc (42)
Rnd 25: [5 sc, dec] x 6 (36)
Rnd 26: 2 sc, dec, [4 sc, dec] x 5, 2 sc (30)
Start stuffing the head and continue until the end.
Rnd 27: [3 sc, dec] x 6 (24)
Rnd 28: 1 sc, dec, [2 sc, dec] x 5, 1 sc (18)
Rnd 29: [1 sc, dec] x 6 (12)
Rnd 30: [dec] x 6 (6)
F/O and weave the yarn tail through each FLO of the last round. Gently pull the tail to close the opening and weave it in.
Outer Cap
Use papaya yarn.
Rnd 1: 6 sc in to a mr (6)
Rnd 2: [inc] x 6 (12)
Rnd 3: [1 sc, inc] x 6 (18)
Rnd 4: 1 sc, inc, [2 sc, inc] x 5, 1 sc (24)
Rnd 5: [3 sc, inc] x 6 (30)
Rnd 6: 2 sc, inc, [4 sc, inc] x 5, 2 sc (36)
Rnd 7: [5 sc, inc] x 6 (42)
Rnd 8: 3 sc, inc, [6 sc, inc] x 5, 3 sc (48)
Rnd 9 – 17 (9 rnds): 48 sc (48)
Place the cap onto the inner part. The cap should sit in rnd 17 of the inner part of the head. If the cap is too long or too short, adjust the number of rnds accordingly.
Next, we will create the snout section and work in rows. Do not ch 1 at the end of each row unless otherwise stated.
Row 1: 15 sc, turn (15)
Row 2: skip the first st, 14 sc, turn (14)
Row 3: skip the first st, 13 sc, turn (13)
Row 4: skip the first st, 12 sc, turn (12)
Row 5: skip the first st, 11 sc, turn (11)
Row 6: skip the first st, 10 sc, turn (10)
Row 7: skip the first st, 9 sc, turn (9)
Row 8: skip the first st, 8 sc, turn (8)
Row 9: skip the first st, 7 sc, turn (7)
Row 10: skip the first st, 6 sc, turn (6)
Row 11: skip the first st, 5 sc, turn (5)
Row 12: skip the first st, 4 sc, turn (4)
Row 13: skip the first st, 3 sc, turn (3)
Row 14: skip the first st, 2 sc, CH 1, turn (2)
Row 15: 2 sc (2)
At the end of row 15, ch 1 and turn your work so that the tip of the snout is to your right and the cap is to your left. Skip row 15 and make 13 sc along the edge of the snout. Make a sc into the corner, 33 sc around the cap, 1 sc in the corner, 13 sc along the snout. F/O with a long tail.
Thread the yarn tail onto a tapestry needle and make an invisible st into the first st of row 15 to finish. Leave a long tail for attaching the cap to the head.
Place the cap on the head; the main section of the cap should sit in rnd 16 of the head and the tip of the snout between rnd 2/3. Attach the cap, secure and weave in the tail.
Ears – Make 2
Use papaya yarn.
Rnd 1: 6 sc into a mr (6)
Rnd 2: [1 sc, inc] x 3 (9)
Rnd 3: 9 sc (9)
Rnd 4: [2 sc, inc] x 3 (12)
Rnd 5: 12 sc (12)
Rnd 6: [3 sc, inc] x 3 (15)
Rnd 7: [4 sc, inc] x 3 (18)
F/O and leave a long tail for attaching.
Feet – Make 2
The feet are worked around a foundation ch. Ch 5 and start in the second ch from the hook.
Use papaya yarn.
Rnd 1: 3 sc, 3 sc in the last ch, working on the other side of the ch, 2 sc, inc (10)
Rnd 2: inc, 2 sc, [inc] x 3, 2 sc, [inc] x 2 (16)
Rnd 3: 1 sc, inc, 2 sc, [1 sc, inc] x 3, 2 sc, [1 sc, inc] x 2 (22)
Rnd 4: 2 sc, inc, 2 sc, [2 sc, inc] x 3, 2 sc, [2 sc, inc] x 2 (28)
Rnd 5 & 6 (2 rnds): 28 sc (28)
Start the next rnd at the back of the foot, adjust the number of sc accordingly.
Rnd 7: 8 sc, [1 sc, dec] x 4, 8 sc (24)
Rnd 8: 6 sc, [1 sc, dec] x 4, 6 sc (20)
Rnd 9: 20 sc
F/O with a long tail for attaching. Stuff the feet.
Arms – Make 2
Start with papaya yarn.
Rnd 1: 6 sc in to a mr (6)
Rnd 2: [inc] x 6 (12)
Rnd 3 – 6 (4 rnds): 12 sc (12)
Rnd 7: [1 sc, dec] x 4 (8)
Rnd 8 – 12 (5 rnds): 8 sc (8)
Change colour to light blue and lightly stuff the hand section only.
Rnd 13 – 17 (5 rnds): 8 sc (8)
Flatten your work and sc in the next 4 sts through both layers to close. F/O and leave a long tail for attaching.
Tail
Start with white yarn.
Rnd 1: 6 sc in to a mr (6)
Rnd 2: [1 sc, inc] x 3 (9)
Rnd 3: 9 sc (9)
Rnd 4: [2 sc, inc] x 3 (12)
Rnd 5: [3 sc, inc] x 3 (15)
Rnd 6: [4 sc, inc] x 3 (18)
Rnd 7: [5 sc, inc] x 3 (21)
Rnd 8: [6 sc, inc] x 3 (24) – make the last st of this round in papaya and change to white for the beginning of the next rnd.
The next 2 rnds are worked using both white and papaya yarn, do not F/O the white until rnd 10 is completed.
The colours to use for each st are indicated as W – white, P – papaya.
Rnd 9: [W x 2 sc, P x 1 sc] x 8 (24)
Rnd 10: [P x 1 sc, W x 1 sc, P x 1 sc] x 8 (24) – F/O the white and continue the tail with papaya.
Rnd 11 & 12 (2 rnds): 24 sc (24)
Rnd 13: [6 sc, dec] x 3 (21)
Rnd 14: 21 sc (21)
Rnd 15: [5 sc, dec] x 3 (18)
Rnd 16: [4 sc, dec] x 3 (15)
Rnd 17: 15 sc (15)
Stuff the tail lightly up to rnd 15 only.
Rnd 18: [3 sc, dec] x 3 (12)
Rnd 19 & 20 (2 rnds): 12 sc (12)
Rnd 21: [2 sc, dec] x 3 (9)
Rnd 22 – 24 (3 rnds): 9 sc (9)
Flatten your work and sc in the next 4 sts through both layers to close. F/O and leave a long tail for attaching.
Headband
The headband is made up of 2 parts (band and bow). The band is worked on both sides of a foundation ch, with the bow worked in rows. To ensure the headband is a suitable fit, try it on the head as you work and adjust accordingly.
Part 1 – Band
Using light blue yarn, ch 48 and start in the 2nd ch from the hook.
Row 1: 46 sc, 3 sc in the last st, working on the other side of the ch, 47 sc (96)
F/O and leave a long tail.
Weave in the starting tail. Using the tail end, connect both ends to create a circle for the band. Secure and weave in the tail.
Part 2 – Bow
Using light blue yarn, work in rows, ch 34 and start from the 2nd ch from the hook.
The ch 1 at the end of each row does not count as a st.
Row 1 – 6 (6 rows): 33 sc, ch 1, turn (33)
Row 7: 33 sc (33)
F/O and leave a long tail to attach parts 1 & 2 together and make the centre of the bow.
Using the tail end from part 2 (the bow), connect both ends together to create a circle.
Bring the tail end out at the centre of the rows.
Connecting Parts 1 & 2
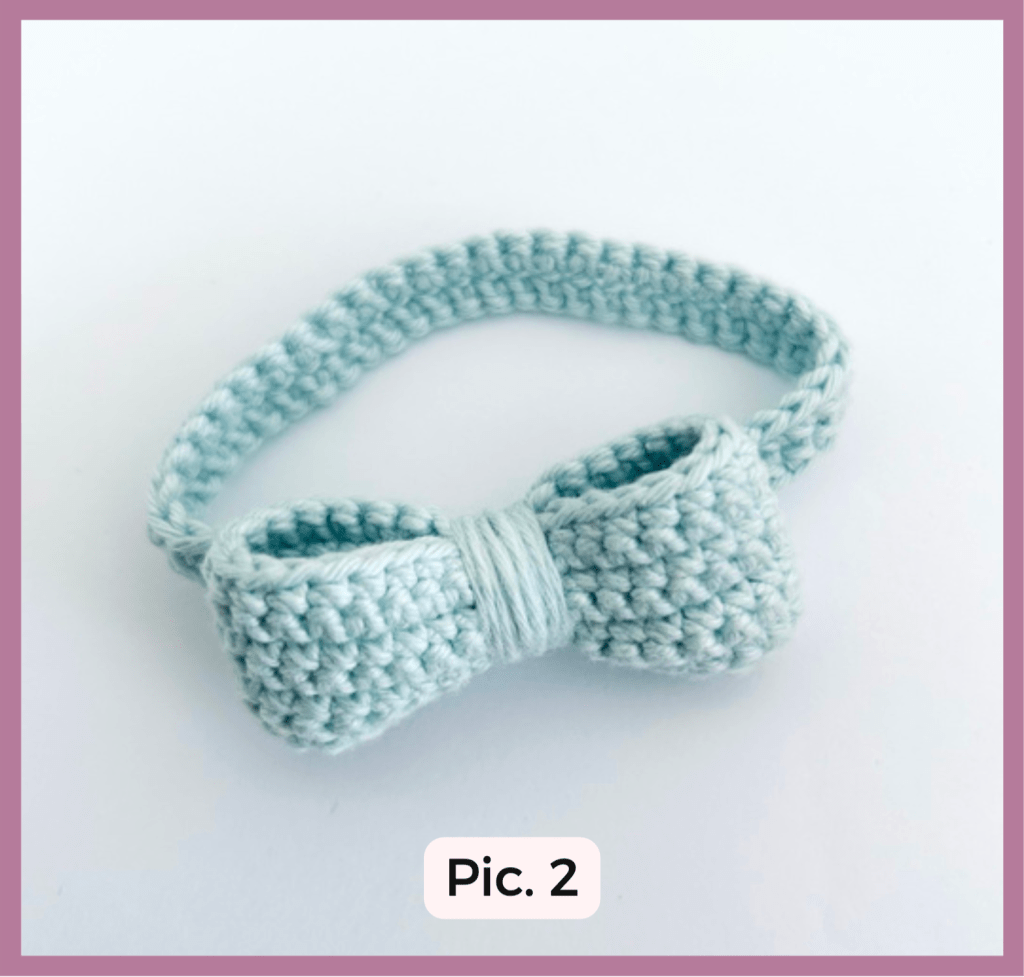
Using the long tail from the bow, make a stitch to connect the bow to the band. Wrap the long tail firmly around the centre of the bow and band several times to form the bow shape. Secure the tail end at the back of the bow and weave it in (Pic. 1 & 2).

Facial Details
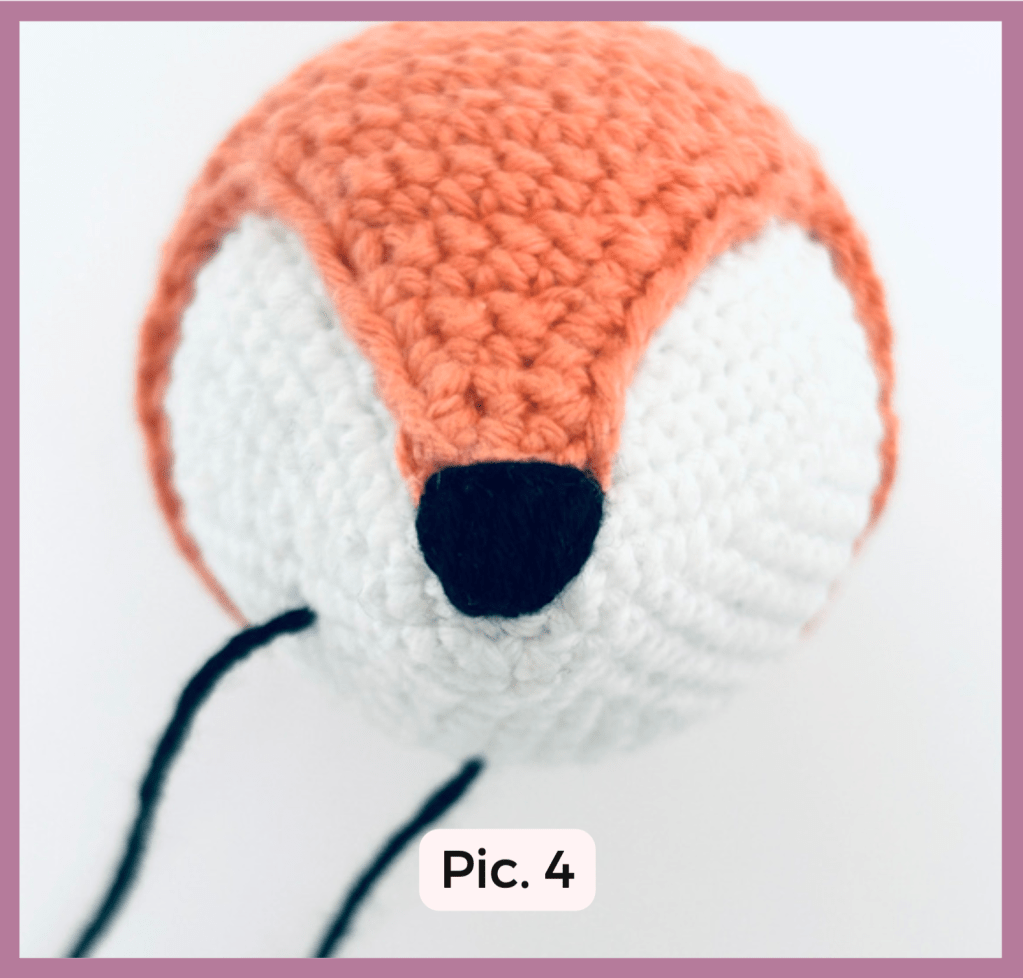
Nose – Using black sport weight yarn, embroider the nose going from the centre of the mr on the head and into the BLO of the 4 sts at the tip of the snout. Make several sts until you have a full nose. To finish, make a st across the top of the sts and tip of the snout. Continue the thread to make the eyes (Pic. 3 & 4).

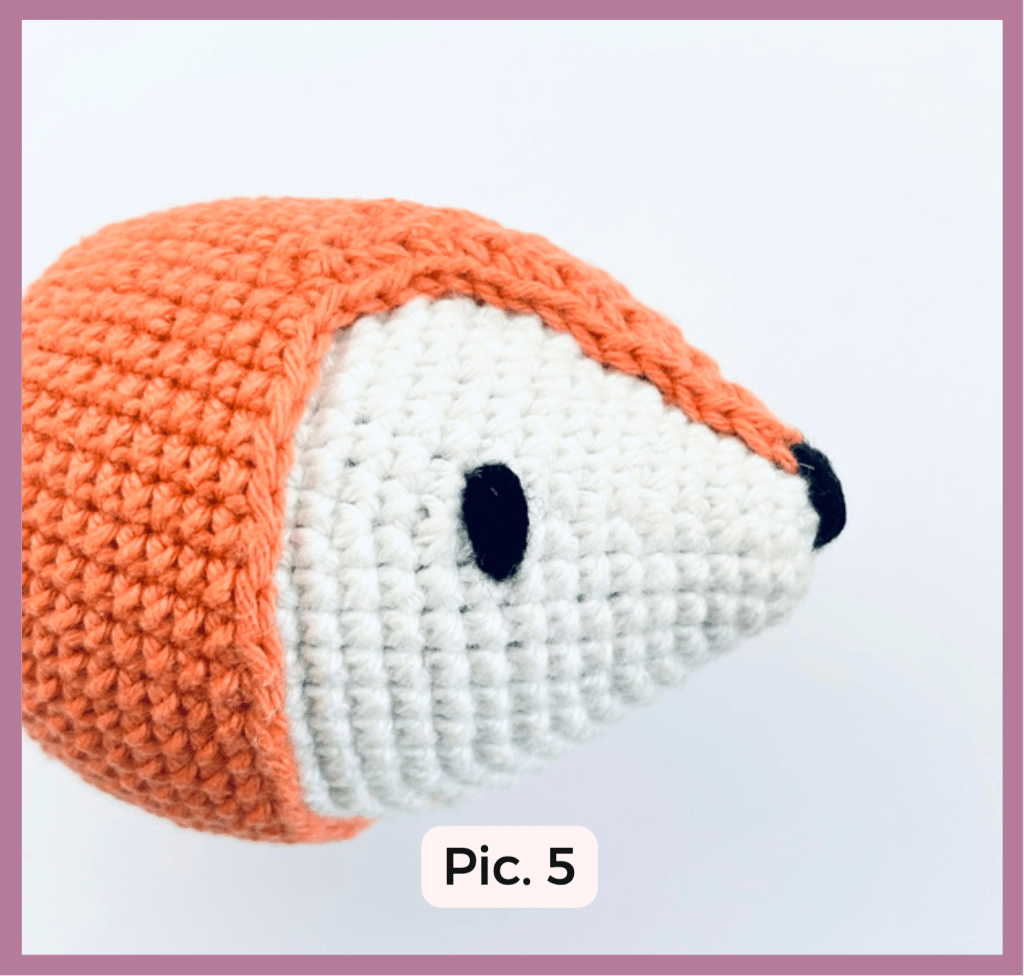
Eyes – Mark the eyes out on each side of the face between rnds 11 & 12, 2 sts high and approximately 4 sts down from the edge of the snout.
Using the yarn thread from the nose, embroider the main black part of the eye until you have reached the desired thickness. Secure and weave in the tail (Pic. 5).
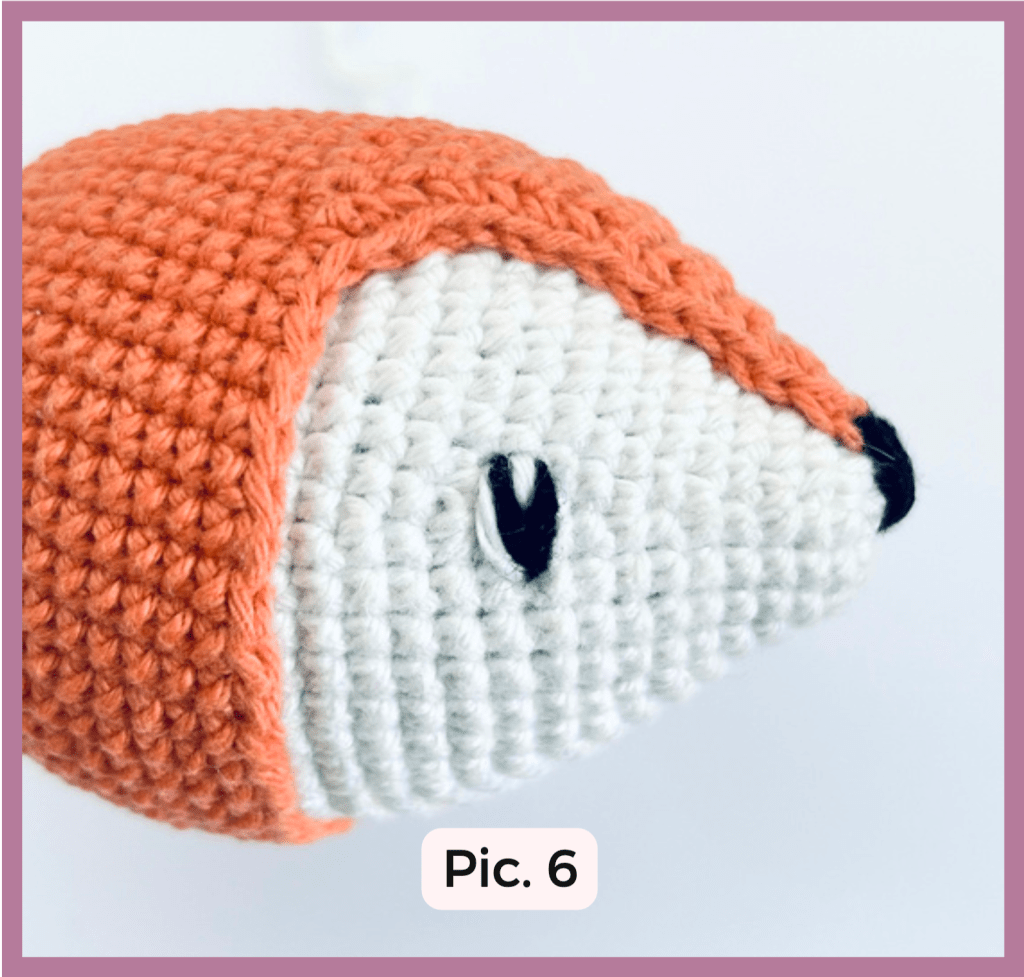
Using a length of white DK yarn, make the outer white edge of the eye and the white spec. Secure and weave in the tail (Pic. 6).
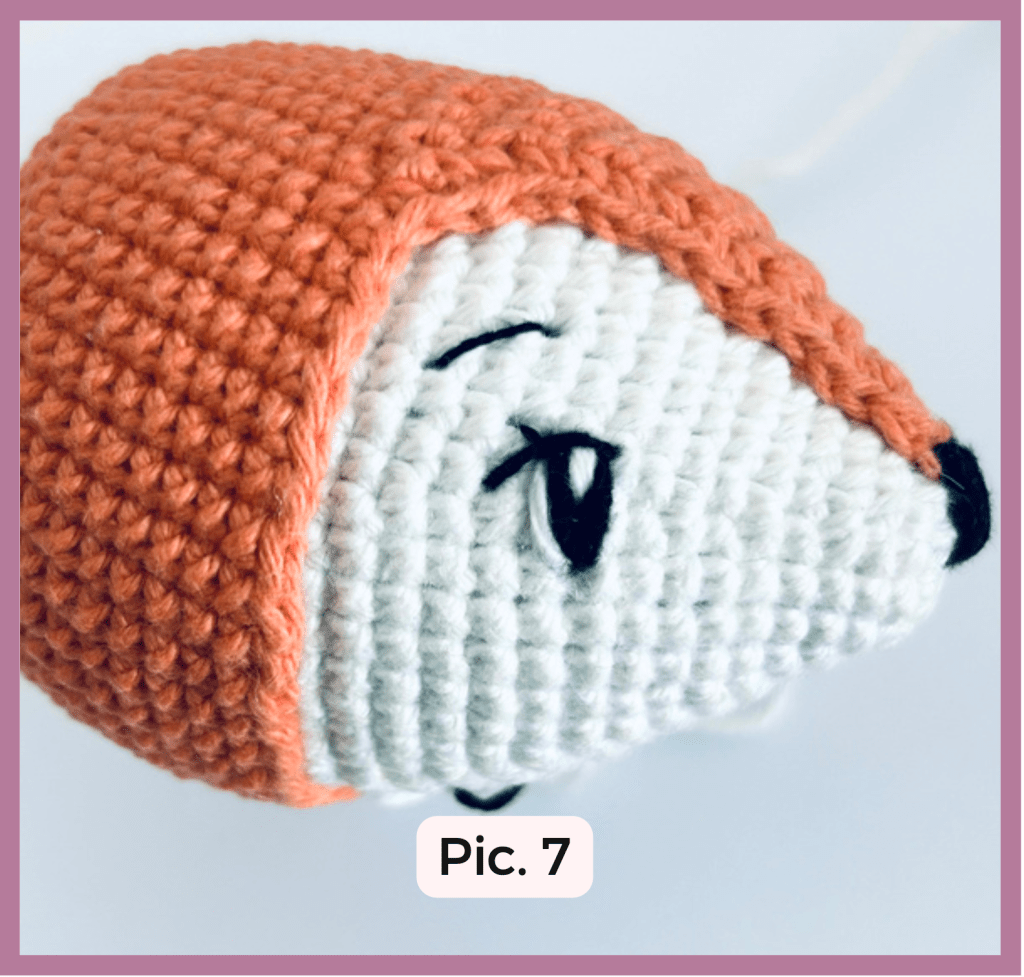
Using a length of black embroidery thread to make the eyeline above the top of the eye with 2 sts. Then make the eyelash one st above the eyeline.
Using the same length of thread, embroider the eyebrows 2 sts above the eye and 2 sts wide. Secure and weave in the tail (Pic. 7).
Assembly
Head – Attach the head so it is slightly tilted forward, from rnd 15 of the cap to rnd 13/14 of the inner part of the head.
Ears – Attach the ears between rnds 10 – 11 on the cap, 10 sts apart.
Legs – Attach the legs over rnds 6 – 13 of the body with 5 sts apart counting in rnd 7.
Arms – Attach the arms on each side of the body between rnds 26 – 27, 10 sts apart at the front.
Tail – Attach the tail over rnds 7 – 10 at the back centre of the body. The tail should sit to one side once attached.
Headband – Place the head band on Pippi’s head, sitting to one side.
Congratulations! Your Pippi the Fox is now finished!
I hope you have enjoyed creating my pattern and thank you so much for choosing Pippi the Fox as your project! I would love to see your version of Pippi; please make sure you tag me on your Instagram posts using @sarahshooksandloops #sarahshooksandloops so that I don’t miss them! Thank you x
Copyright 2023 ‘Pippi the Fox’ pattern by @sarahshooksandloops All rights reserved. The ‘Pippi the Fox’ pattern is designed and written by Sarah Wright for Sarah’s Hooks & Loops and is protected by copyright laws.
This pattern is for personal use only. My pattern (whole or in part) cannot be reproduced, translated, altered, distributed, resold, shared for free or used for any form of commercial purposes unless authorised by the designer. You are welcome to sell any finished items in small volume that you personally create from this pattern.


