
Hello lovelies!! It is time to make your Mimi Rattle! I hope you are as excited as I am!! This is a modification of the paid Mimi the Bunny Comforter pattern available in my Etsy/Ravelry shops.
So very thankful for my talented friend Katie of Crocheting4Sanity for testing this sweet pattern for me! I can’t wait to see all of your beautiful creations. Please don’t forget to tag me on Instagram so we can enjoy together, and build our community one project at a time! Happy Crocheting, friends!
***Please read through entire pattern modification before beginning***
This pattern is written in US terminology
Abbreviations
Rnd – round
ch X – chain X amount of stitches
MR – magic adjustable ring (If you need explanation, there are a ton of free videos available on YouTube)
st(s) – stitch(es)
sl st – slip stitch
sc – single crochet
dec – sc2tog (you may also use an invisible decrease, more popular in amigurumi, I have a video example available on my Instagram feed.)
inc – 2 sc in same stitch
F/O – Fasten off.
Safety Note
Remember that safety is first! These are designed for our sweet babes to enjoy, so please make sure you are using baby safe items. Always include notes for choking hazards when using small parts.
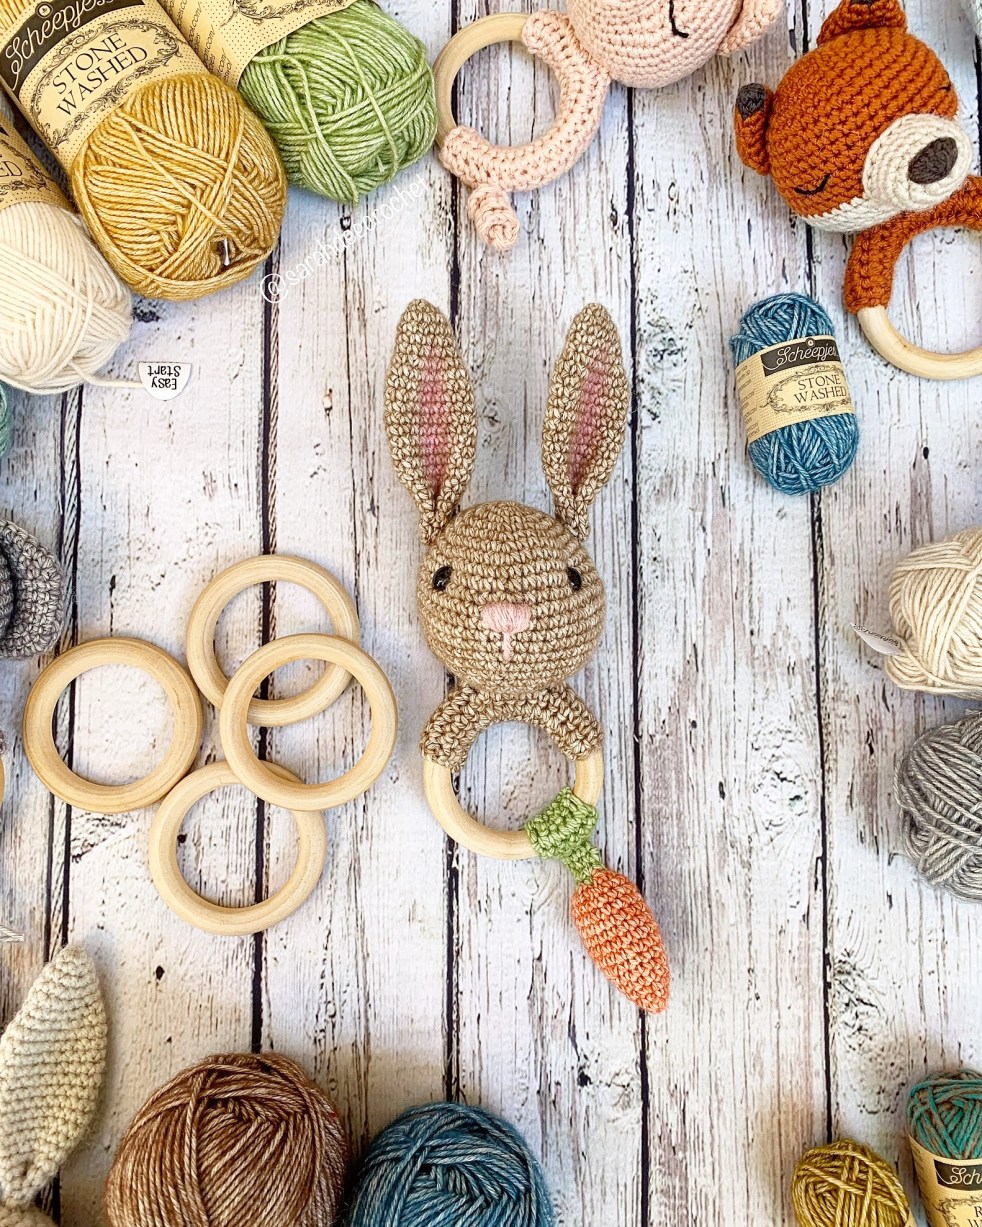
The yarn I am using for this example is Scheepjes Stonewashed in Boulder Opal, Coral and Canada Jade.
Materials
- Bunny head up to rnd 7 and 2 completed ears from the Mimi the Bunny Comforter Pattern available in my Etsy/Ravelry.
- 2.75mm crochet hook
- Stitch marker
- Scissors
- Yarn needle
- 10mm safety eyes
- 70mm or 72mm baby safe wooden/silicone ring. I bought mine from Hobbii
- Rattle insert – I would recommend these from Amazon
- Small amount of green and orange yarn for carrot.
- Small amount of Mimi yarn color.
- Small amount of fiberfill, or your choice of stuffing
- Pink crayon (Optional)
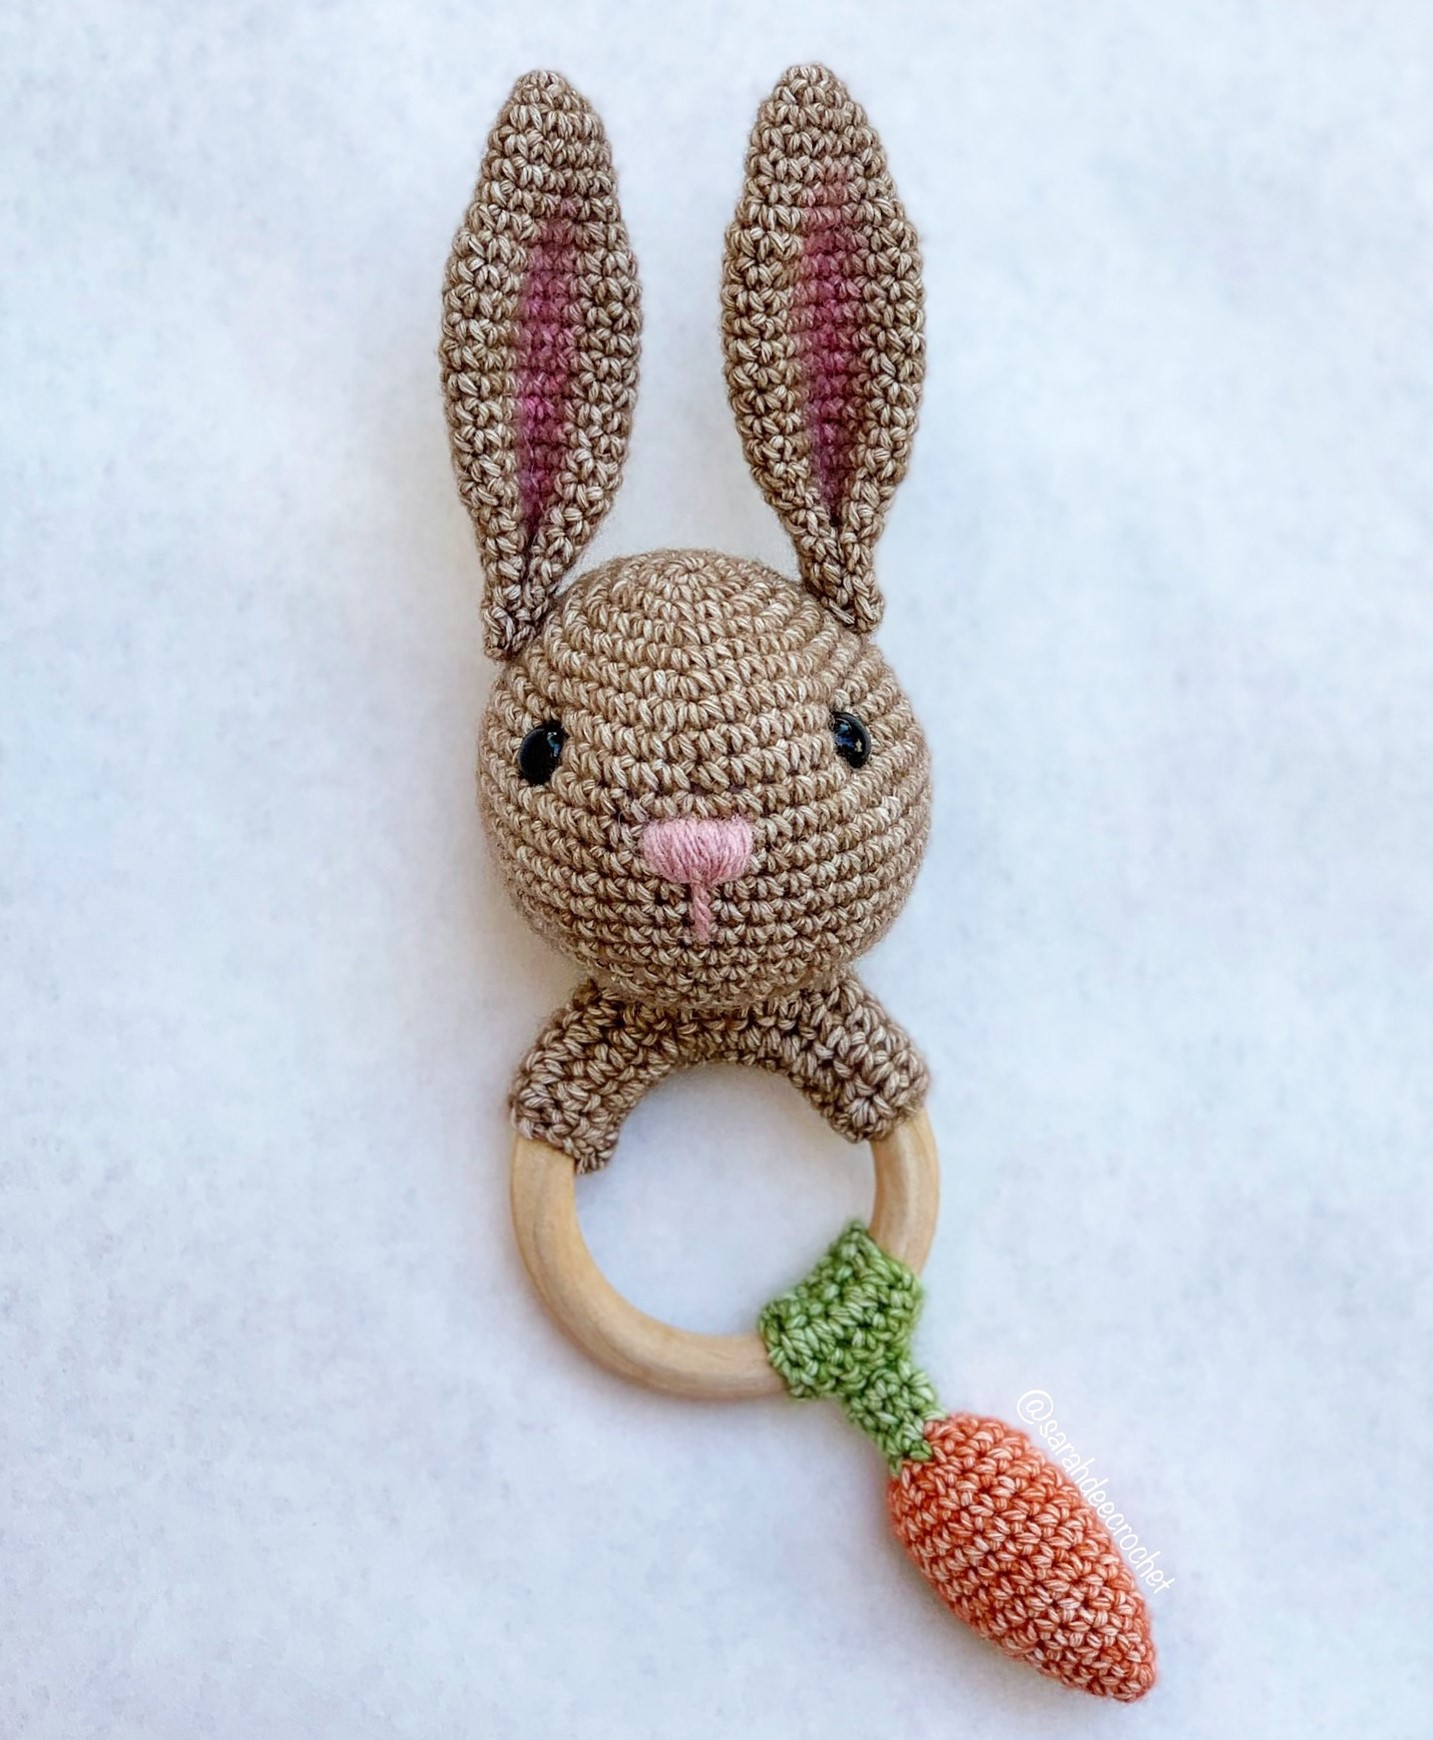
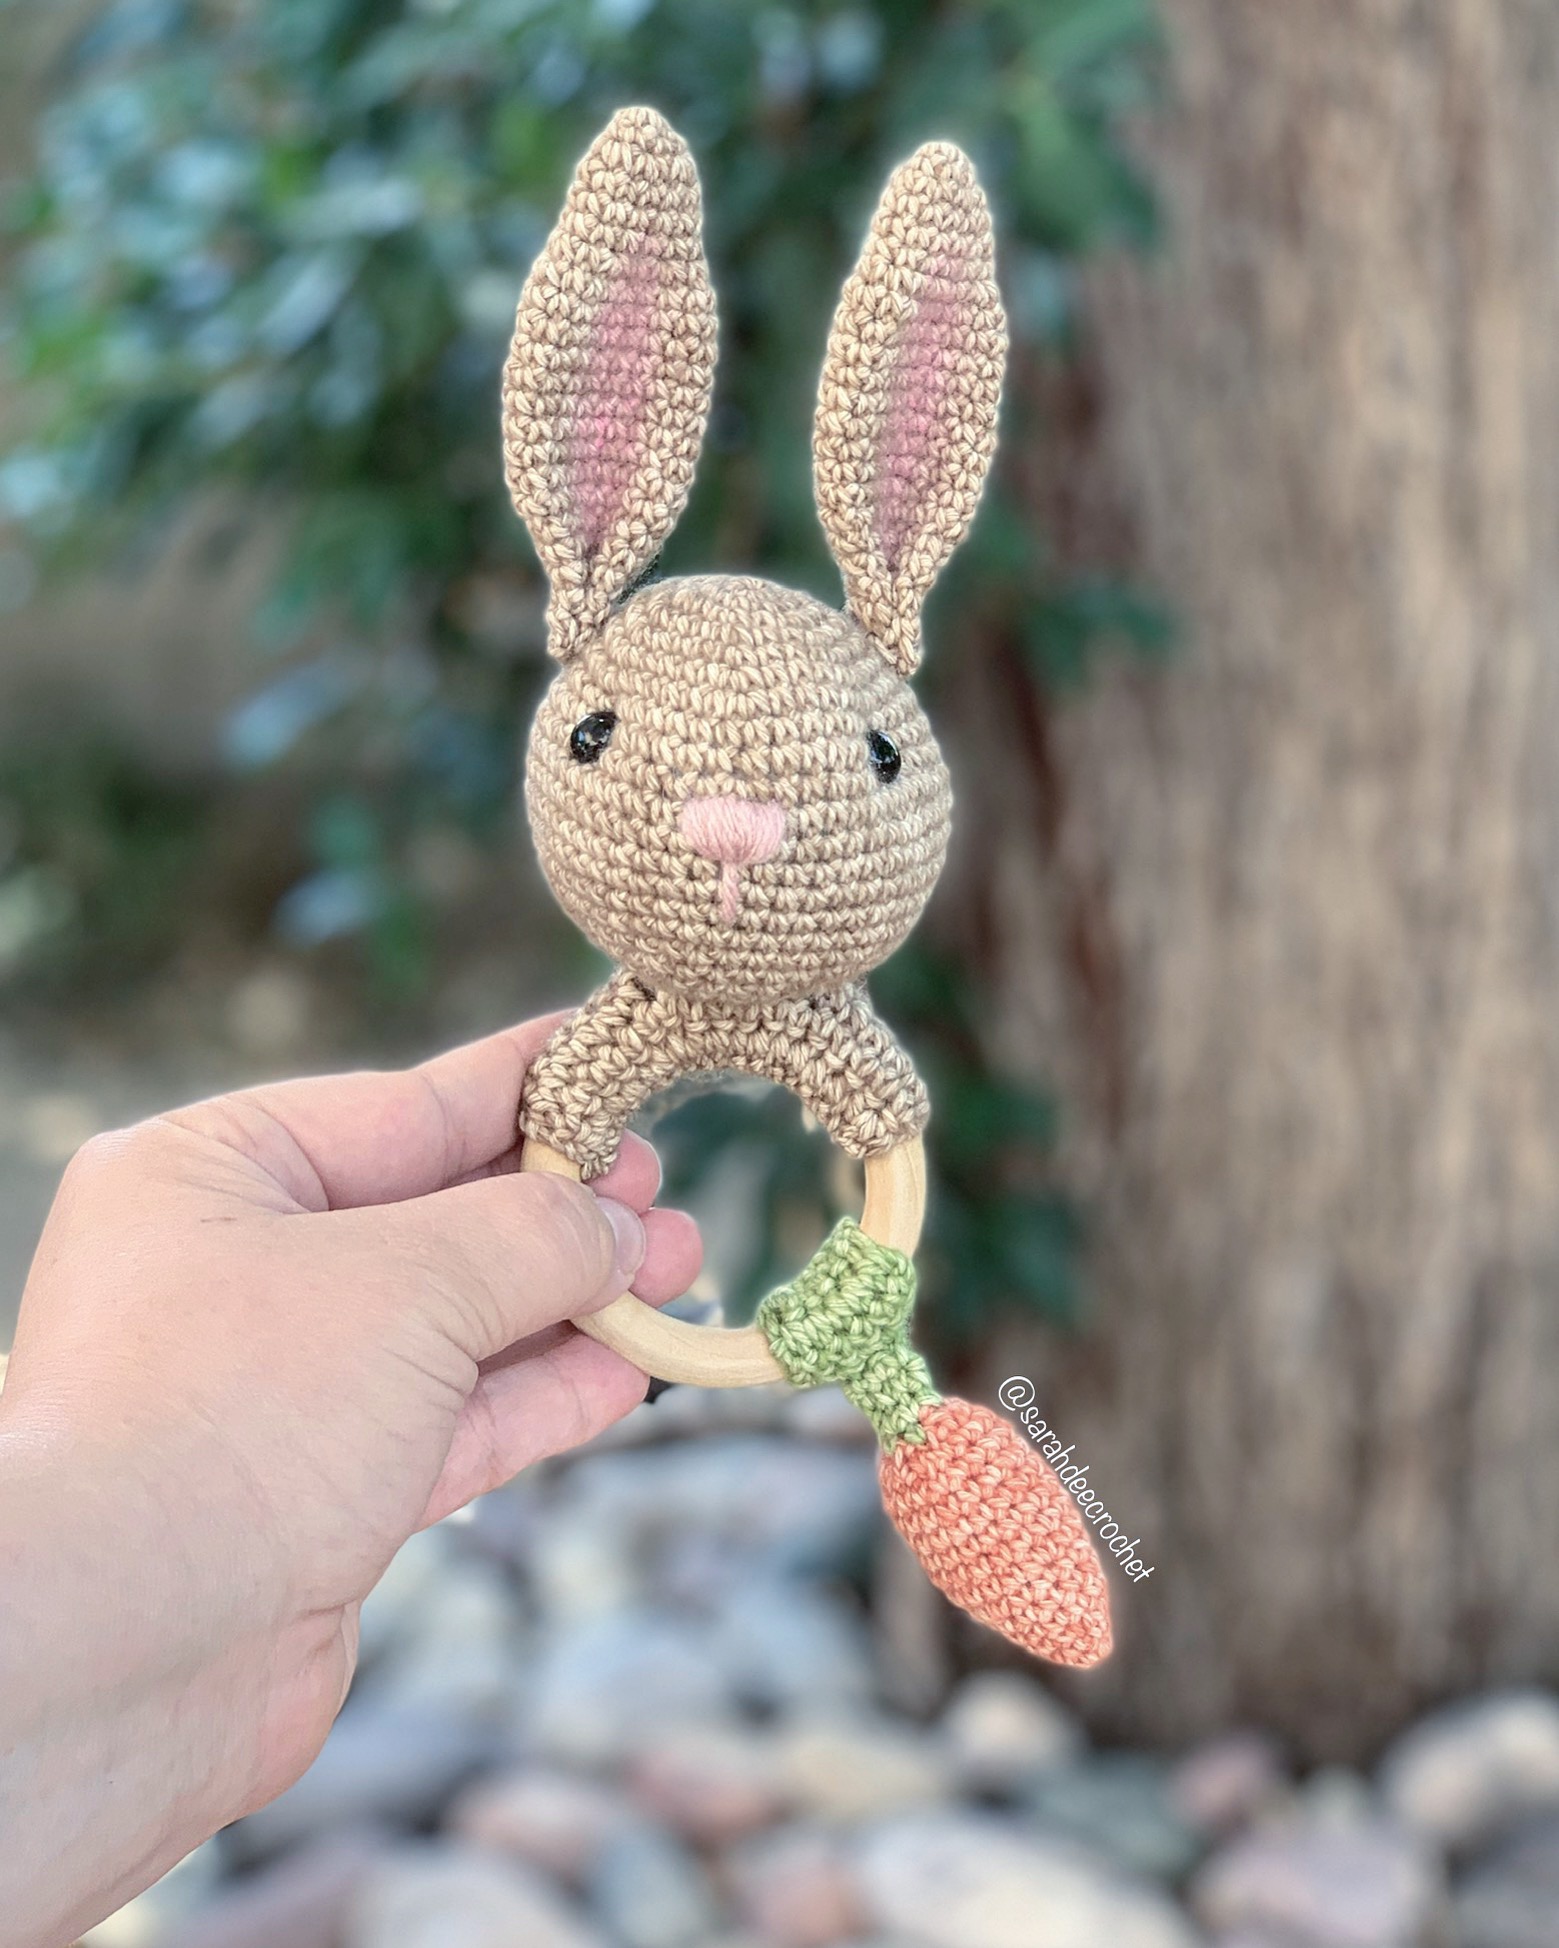
Modifications to Mimi the Bunny Head
I added a few rows to the head, to accommodate for adding the safety eyes. Your pattern for the Mimi head will change after round 7.
Rnd 8: [6 sc, 1 inc] x 6 (48)
Rnd 9-16: 1 sc in each st around (48)
Add safety eyes, centered on the face between rounds 9 & 10, approximately 15 sts apart. Do not add the backs on the eyes until after adding the indents of the face. To add indents, use about 12 inches of yarn in same color as Mimi. (You will not see this bit in the end.) Double the yarn on the needle, insert from back to front through the same stitch as the safety eye. Insert needle back through the sc above the stitch where the safety eye is inserted, and pull to reduce slack. Repeat on second eye, pull tight. Tie yarn together on the inside of the head. Take care not to pull them too close together, as this is just to add a bit of features to Mimi’s face. Add the backs to the safety eyes and continue stuffing the head firmly. Take care to add extra stuffing around the yarn you have tied.
Rnd 17: [6 sc, dec] x 6 (42)
Rnd 18: [5 sc, dec] x 6 (36)
Rnd 19: [4 sc, dec] x 6 (30)
Make sure to add your rattle, before you close. Stuff until the last round.
Rnd 20: [3 sc, dec] x 6 (24)
Rnd 21: [2 sc, dec] x 6 (18)
Rnd 22: [1 sc, dec] x 6 (12)
Rnd 23: dec x 6 (6)
F/O and leave 18 inch tail for sewing.
Nose is embroidered over rounds 11 & 12. Add the line down the nose for detail from round 12-15.
Modifications to Mimi the Bunny Ears
I used a wax crayon to give the ears a bit of pink color. Pinch, and sew the ears together before sewing to head, over rounds 6 & 7. They should rest on the side of the head.
Bunny Fabric Around Ring
Starting with Mimi color
Ch 19.
Row 1: Sc in second ch from hook, and in the next 17 ch st (18) do not ch 1, turn
Rows 2-6: 18 sc across, do not ch 1 at the turn. F/O and leave 8 in tail.
This is meant to be quite a snug fit around your ring without stretching the stitches, you may need to adjust the number of rows, depending on the thickness of your ring. Sew animal head to center of this fabric, using the tail from the end of your Mimi head. Use straight pins to hold it in place. Then sew fabric closed, around the ring, with a whip stitch. Seam should be on the inside of the ring. Sew in ends.


Carrot
Starting in orange
Rnd 1: 6 sc in a MR
Rnd 2: 1 sc in each st (6)
Rnd 3: 1 inc in each st (12)
Rnd 4-6: 1 sc in each st (12)
Rnd 7: [1 sc, inc] x 6 (18)
Rnd 8-13: 1 sc in each st (18)
Start stuffing the carrot, continue to add stuffing until you close.
Rnd 14: [1 sc, dec] x 6 (12)
Change to green
Rnd 15: dec x 6 (6)
Rnd 16: 1 sc in each st (6)
Rnd 17: Fold in half, 3 sc across both sides to close the tail. (3)
F/O and leave 6 in tail. Sew to center of fabric before sewing to ring.
Carrot fabric around ring
Starting with green
Ch 7.
Row 1: Sc in second ch from hook, and in the next 5 ch (6) do not ch 1, turn
Rows 2-6: 6 sc across, do not ch 1 at the turn. F/O and leave 6 in tail.
This is meant to be a snug fit around your ring without stretching the stitches, you may need to adjust the number of rows, depending on the thickness of your ring. Sew closed, around the ring, with a whip stitch. Seam should be on the inside of the ring. Sew in ends.
Congratulations! You have finished Mimi the Rattle Modification! Please feel free to contact me with any questions or concerns, you may have.
Thank you for your support, and I hope you have enjoyed this pattern as much as I did designing it for you!
Don’t forget to tag me on Instagram with your makes @sarahdeecrochet
Please note that this pattern is for personal use only. You may make as many items as you wish for yourself or as gifts. You may sell the item that you make from this pattern, but I ask that you please refer back to me as the designer. Please do not share, reproduce or sell this pattern, online or in print.
Discover more from SarahDee Crochet
Subscribe to get the latest posts sent to your email.

