

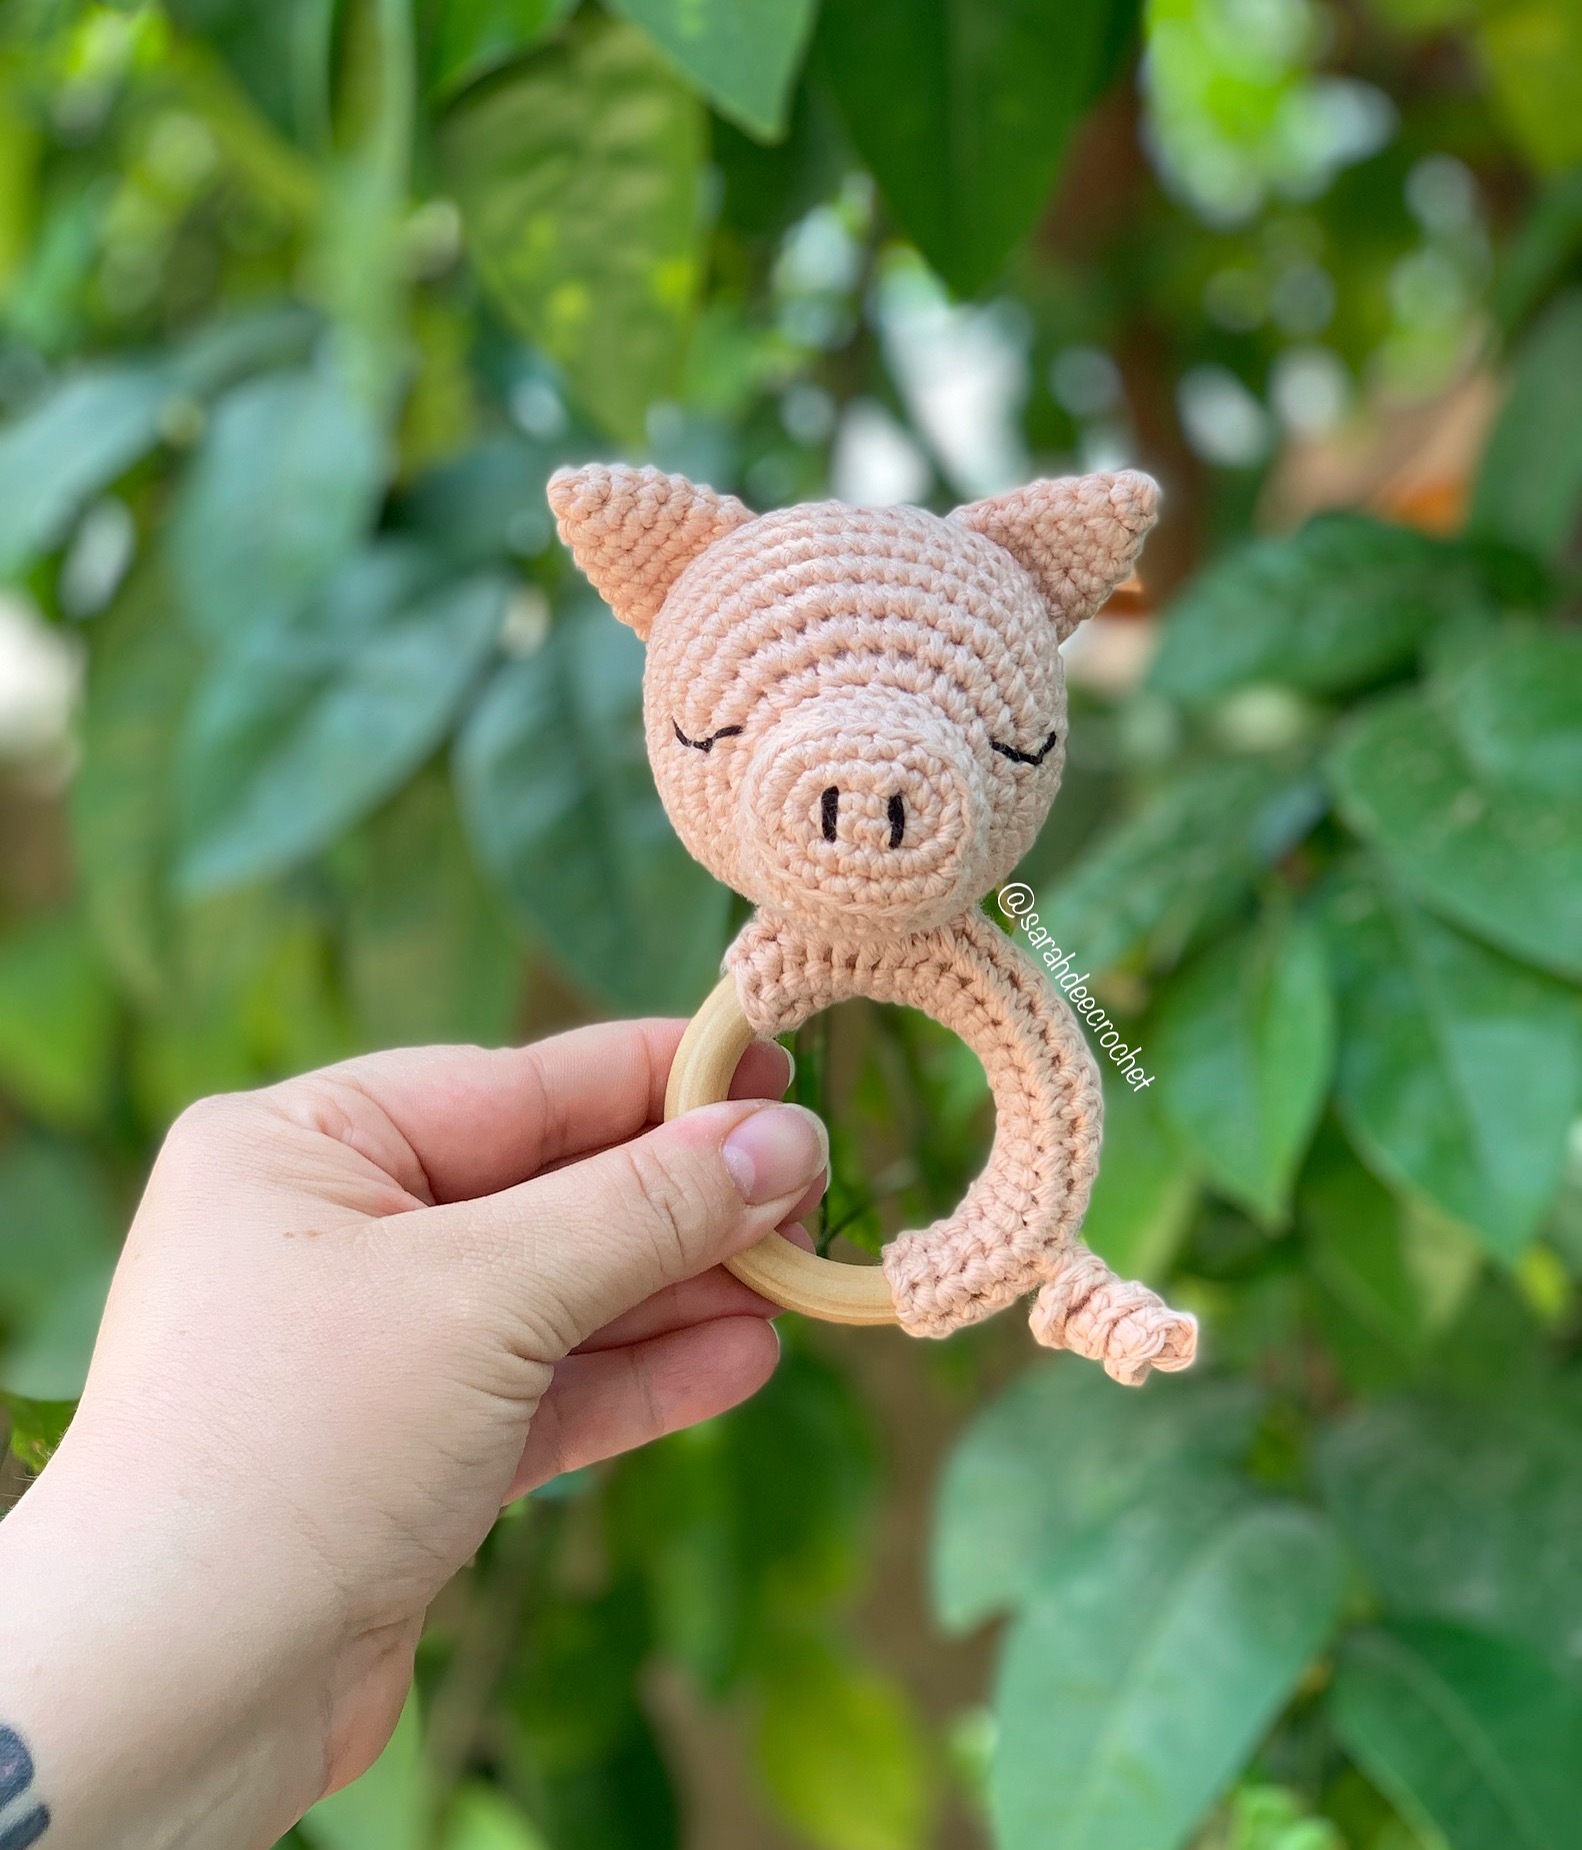
This Lil Piggy definitely stole my heart! He is one my of my favorite rattle mods! I love his sweet little curly tail! My Almost 2 year old, has decided that he is the owner of this one. So he will get a lot of loves. hehe!
Thank you again for all the love shown for this little guy. I can not wait to see the different piggies coming!
Happy crocheting, friends!
This pattern is written in US terminology and is a modifications of the paid Gustav the Piggy Comforter pattern, available in my Etsy/Ravelry shops.

***Please read through entire pattern before beginning***
Pattern is in US terminology
Abbreviations
chX – chain X amount of stitches
st(s) – stitch(es)
sl st – slip stitch
sc – single crochet
F/O – Fasten off. Yarn over and pull through. Snip yarn tail.
Safety Notes
Remember that safety is first! These are designed for our sweet babes to enjoy, so please make sure you are using baby safe items. Always include notes for choking hazards when using small parts.
Materials
- Completed head and ears from Gustav the Piggy Comforter Pattern available in my Etsy/Ravelry shops.
- 3.5mm crochet hook
- Stitch marker
- Scissors
- Yarn needle
- 70mm or 72mm baby safe wooden/silicone ring. I bought mine from Hobbii
- Rattle insert (I would recommend these from Amazon)
- Small amount of yarn in piggy color
Yarn I am using for this example is I love this Cotton in the color Warm Blush. You will need to add your rattle insert into the center of the piggy head before closing.
Fabric around ring
Starting with Piggy color and a 3.5mm hook
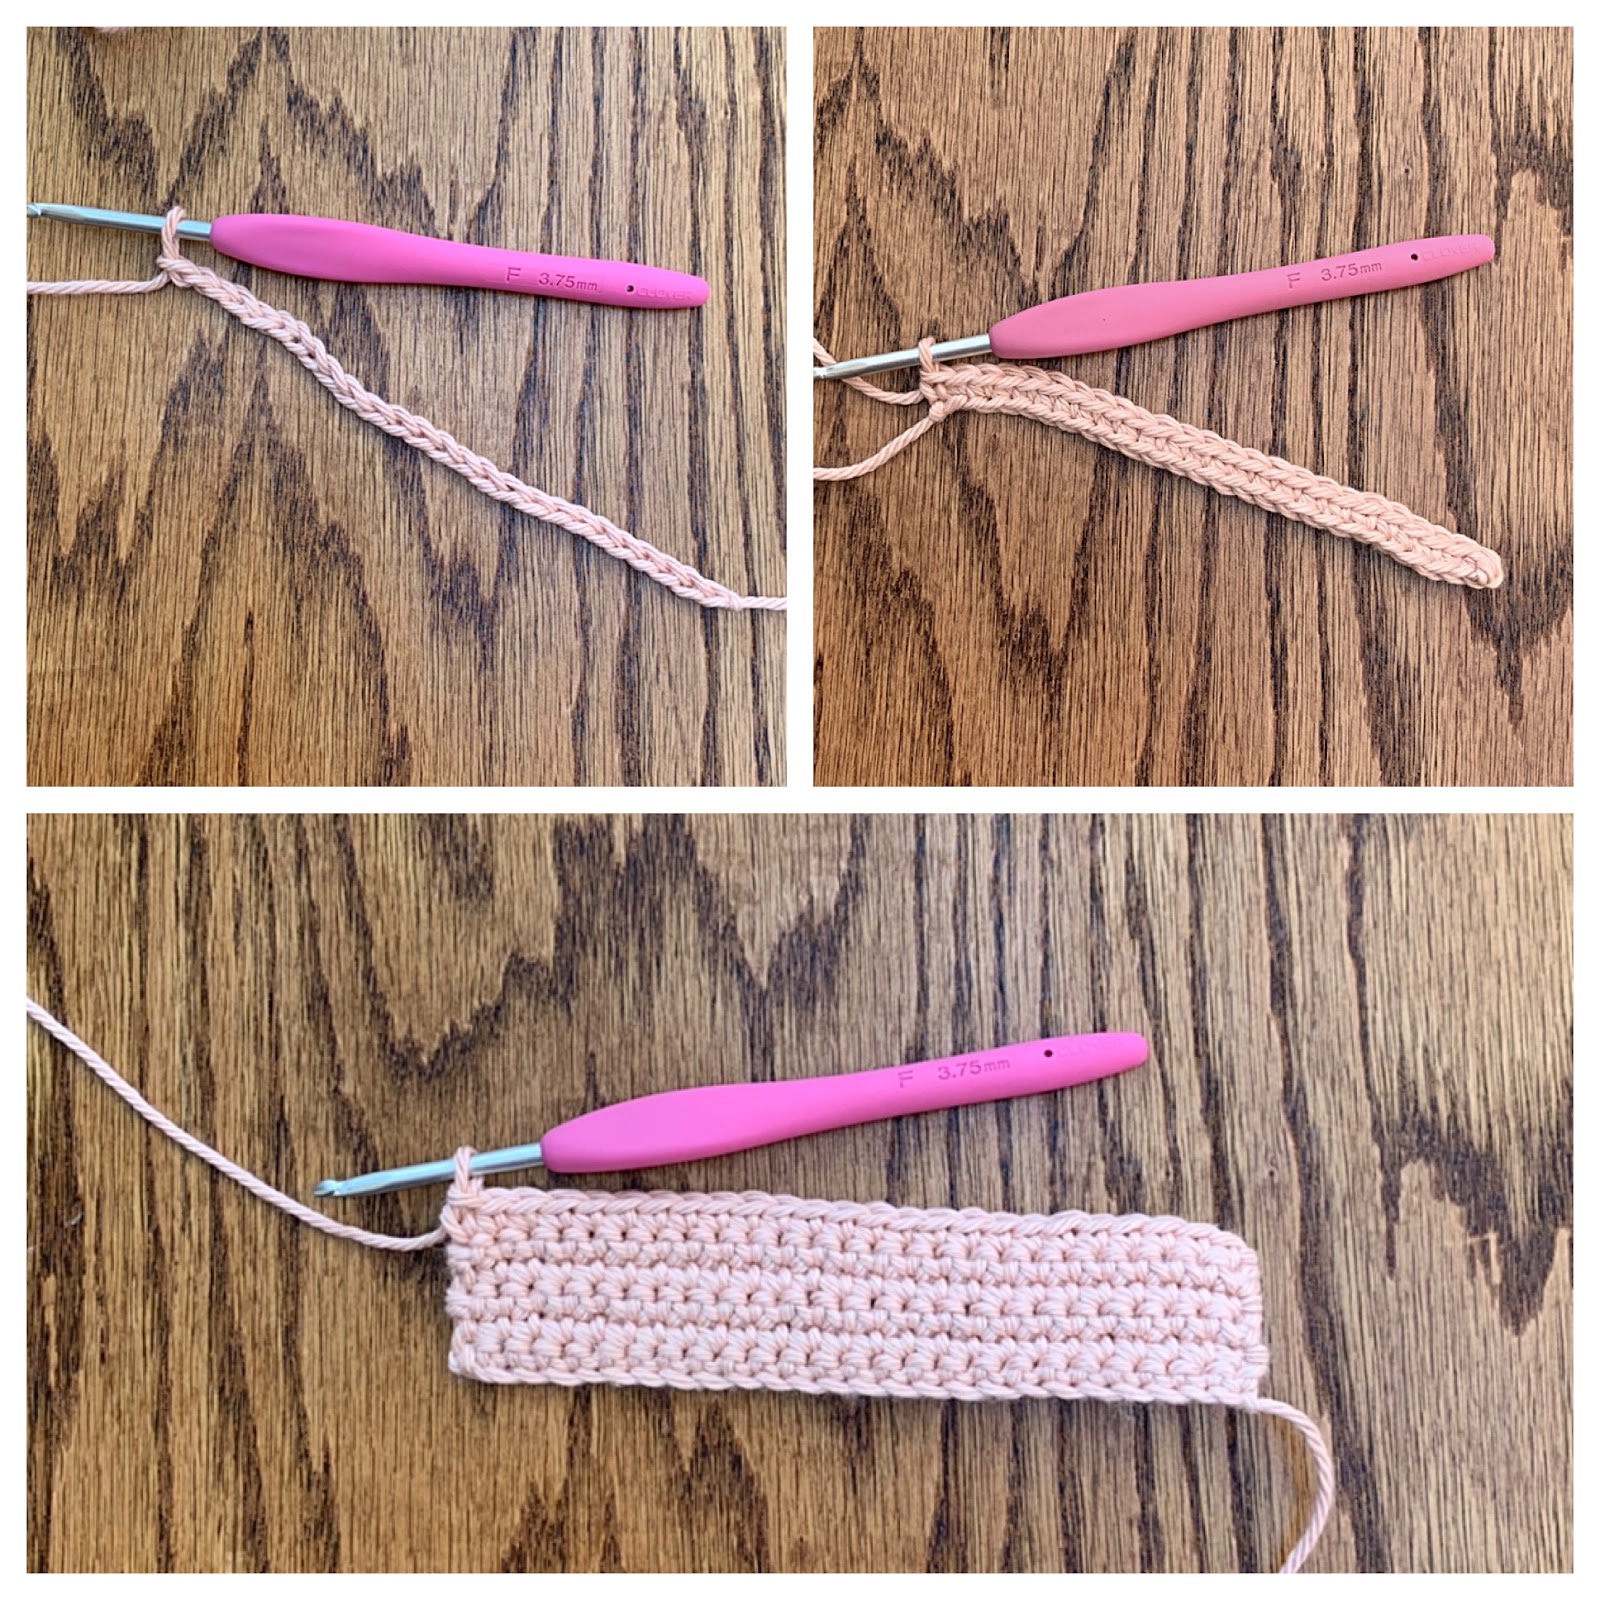
Ch 26.
1. Sc in second ch from hook, and in the next 24 ch st (25) do not ch 1, turn
2-6. 25 sc across, do not ch 1 at the turn. F/O and leave 8 in tail.
This is meant to be a snug fit around your ring without stretching the stitches, you may need to adjust the number of rows, depending on the thickness of your ring. Sew piggy head to the fabric about 4 or 5 stitches in, using the tail from the end of your piggy head. Use straight pins to hold it in place, while you sew. Then sew closed, around the ring, with a whip stitch. Seam should be on the inside of the ring. Sew in ends.
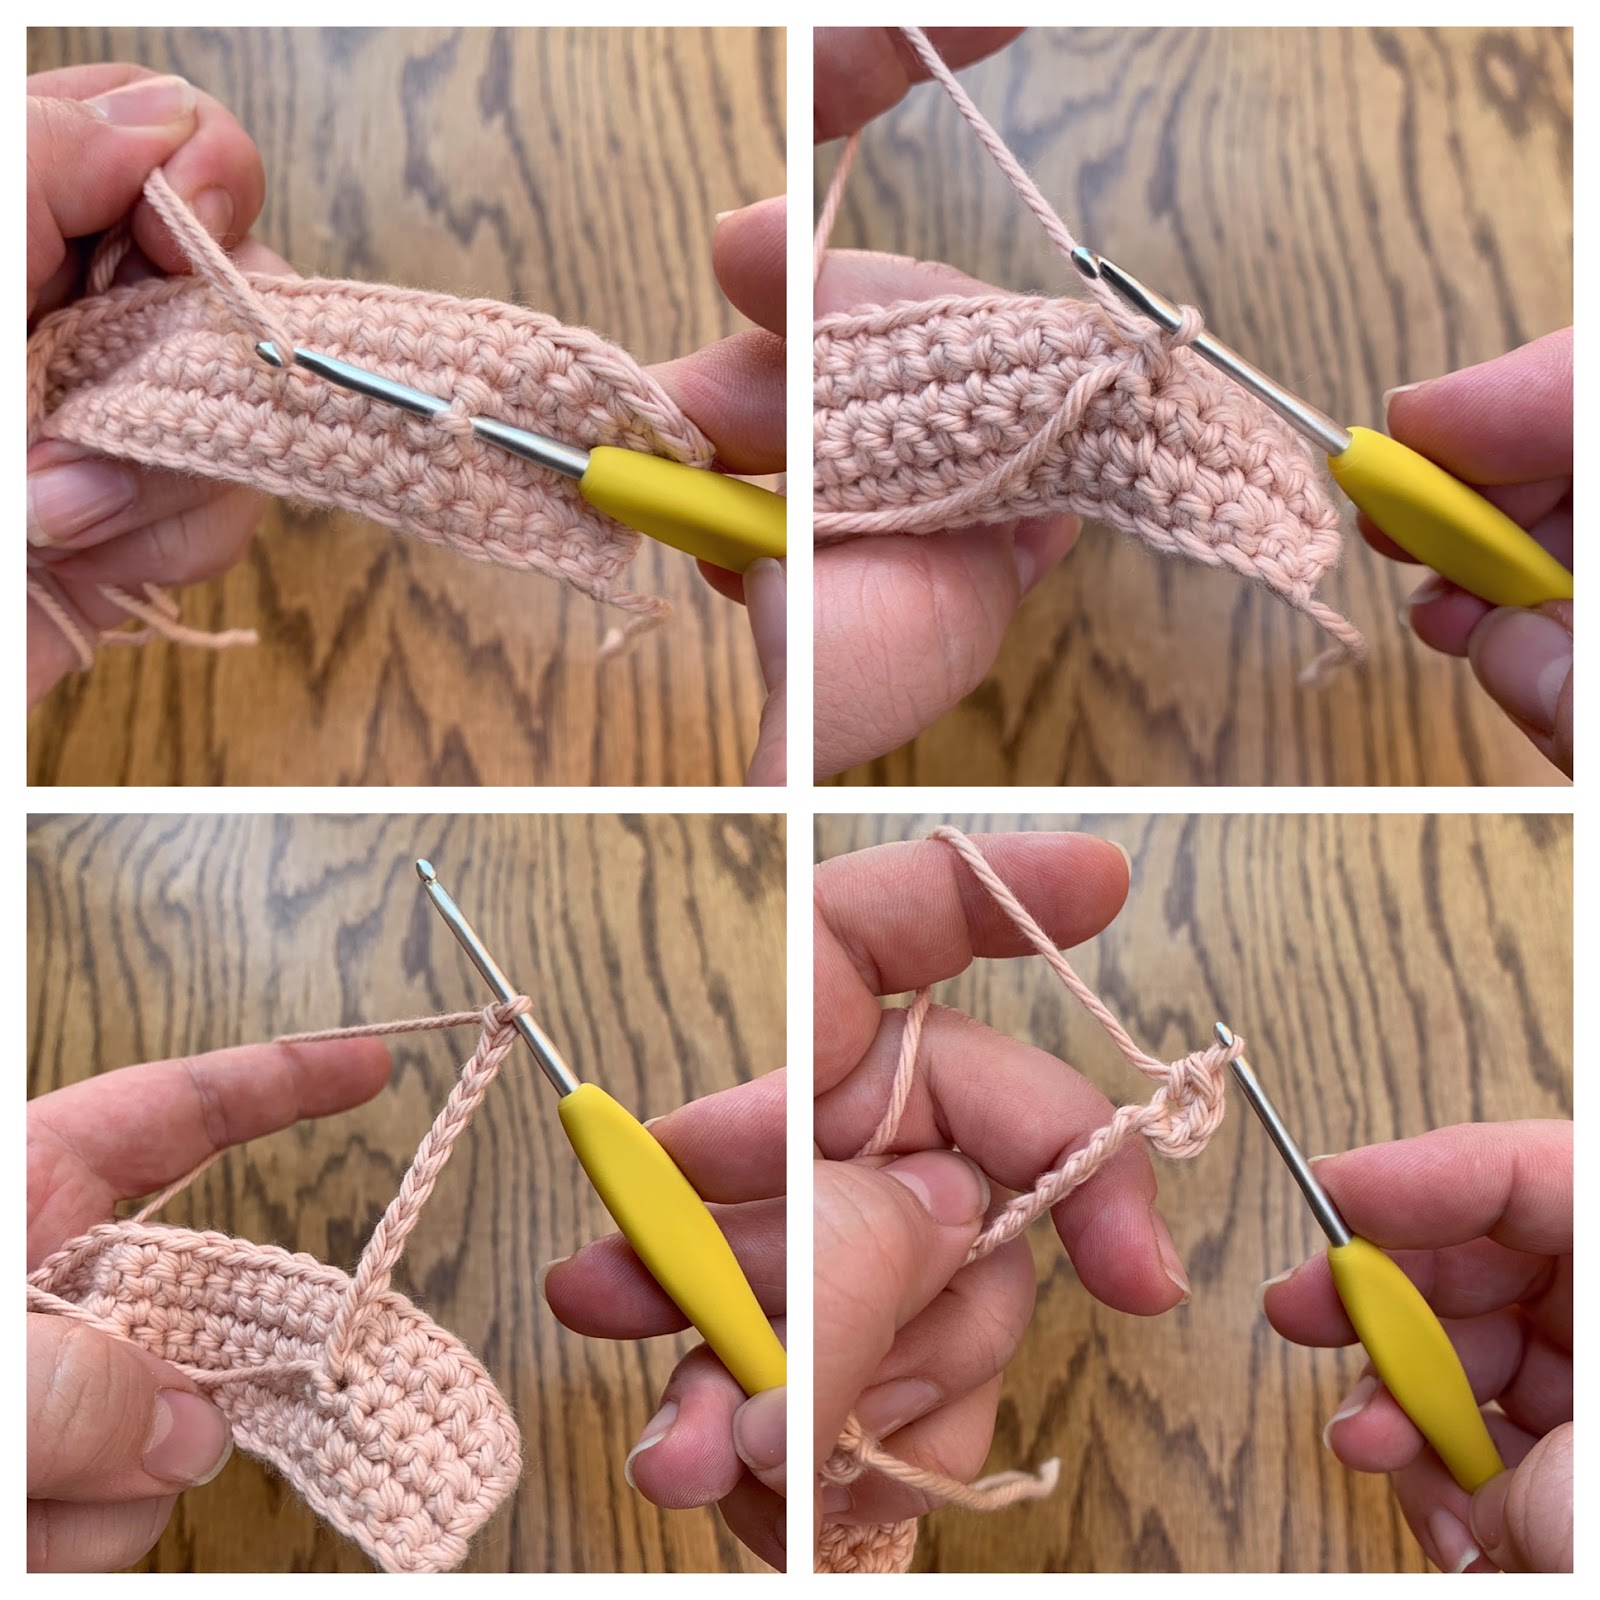
Adding the tail
Starting with 2.75mm hook
In the center stitch, in the center row, about 5 sts in from the end, pull up a loop. Make sure you are working on the same side of the fabric as the head.
With the working yarn, ch 12. 3sc in the 2nd ch from hook, and every ch stitch. (33)
St st into the next ch st in the fabric we made, to F/O. Sew in ends.
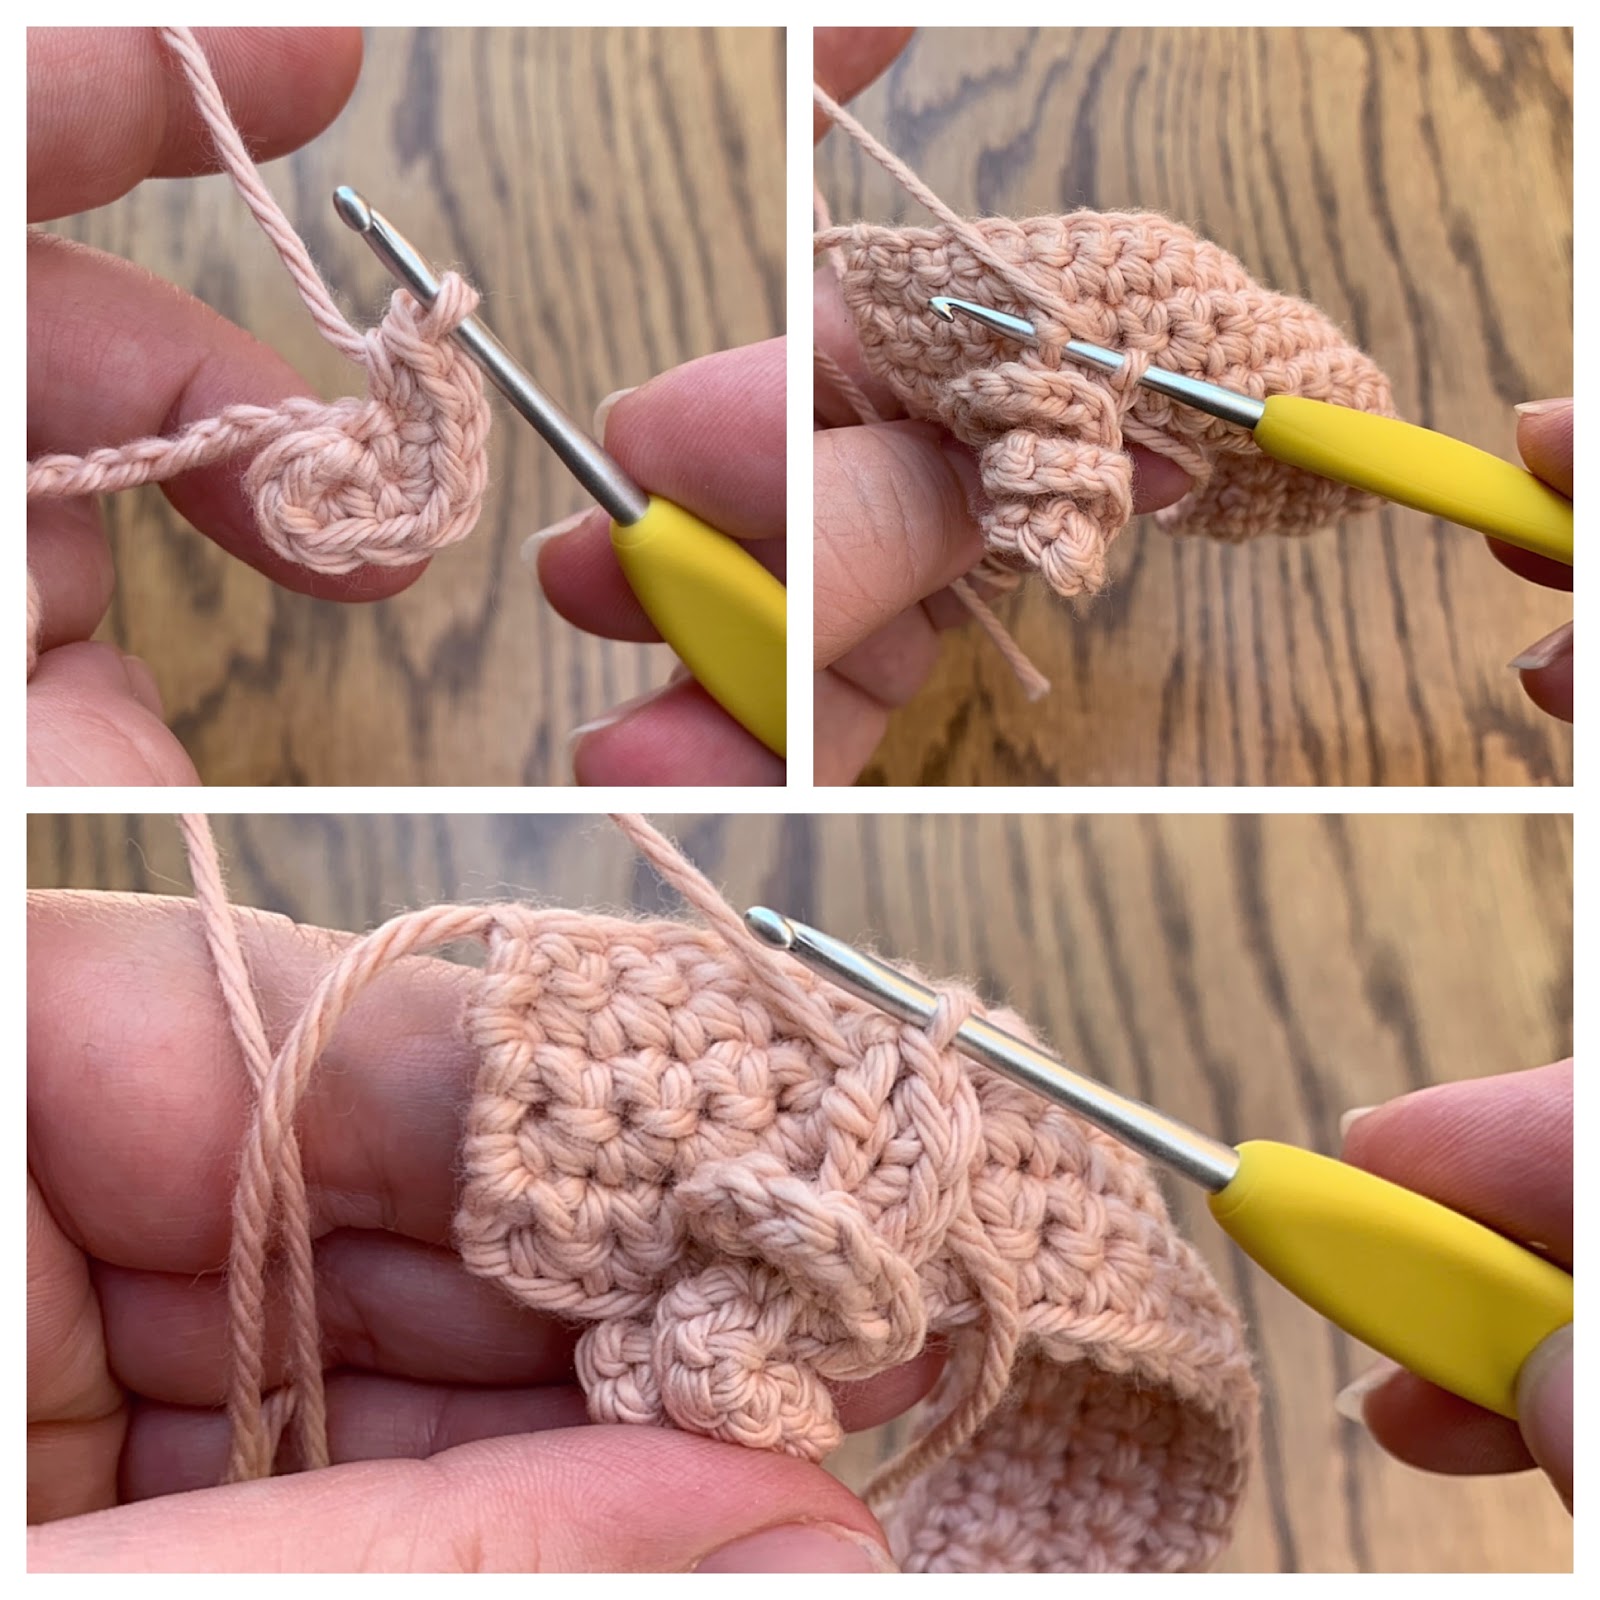
Sew fabric closed, around the ring, with a whip stitch. Seam should be on the inside of the ring. Sew in ends.
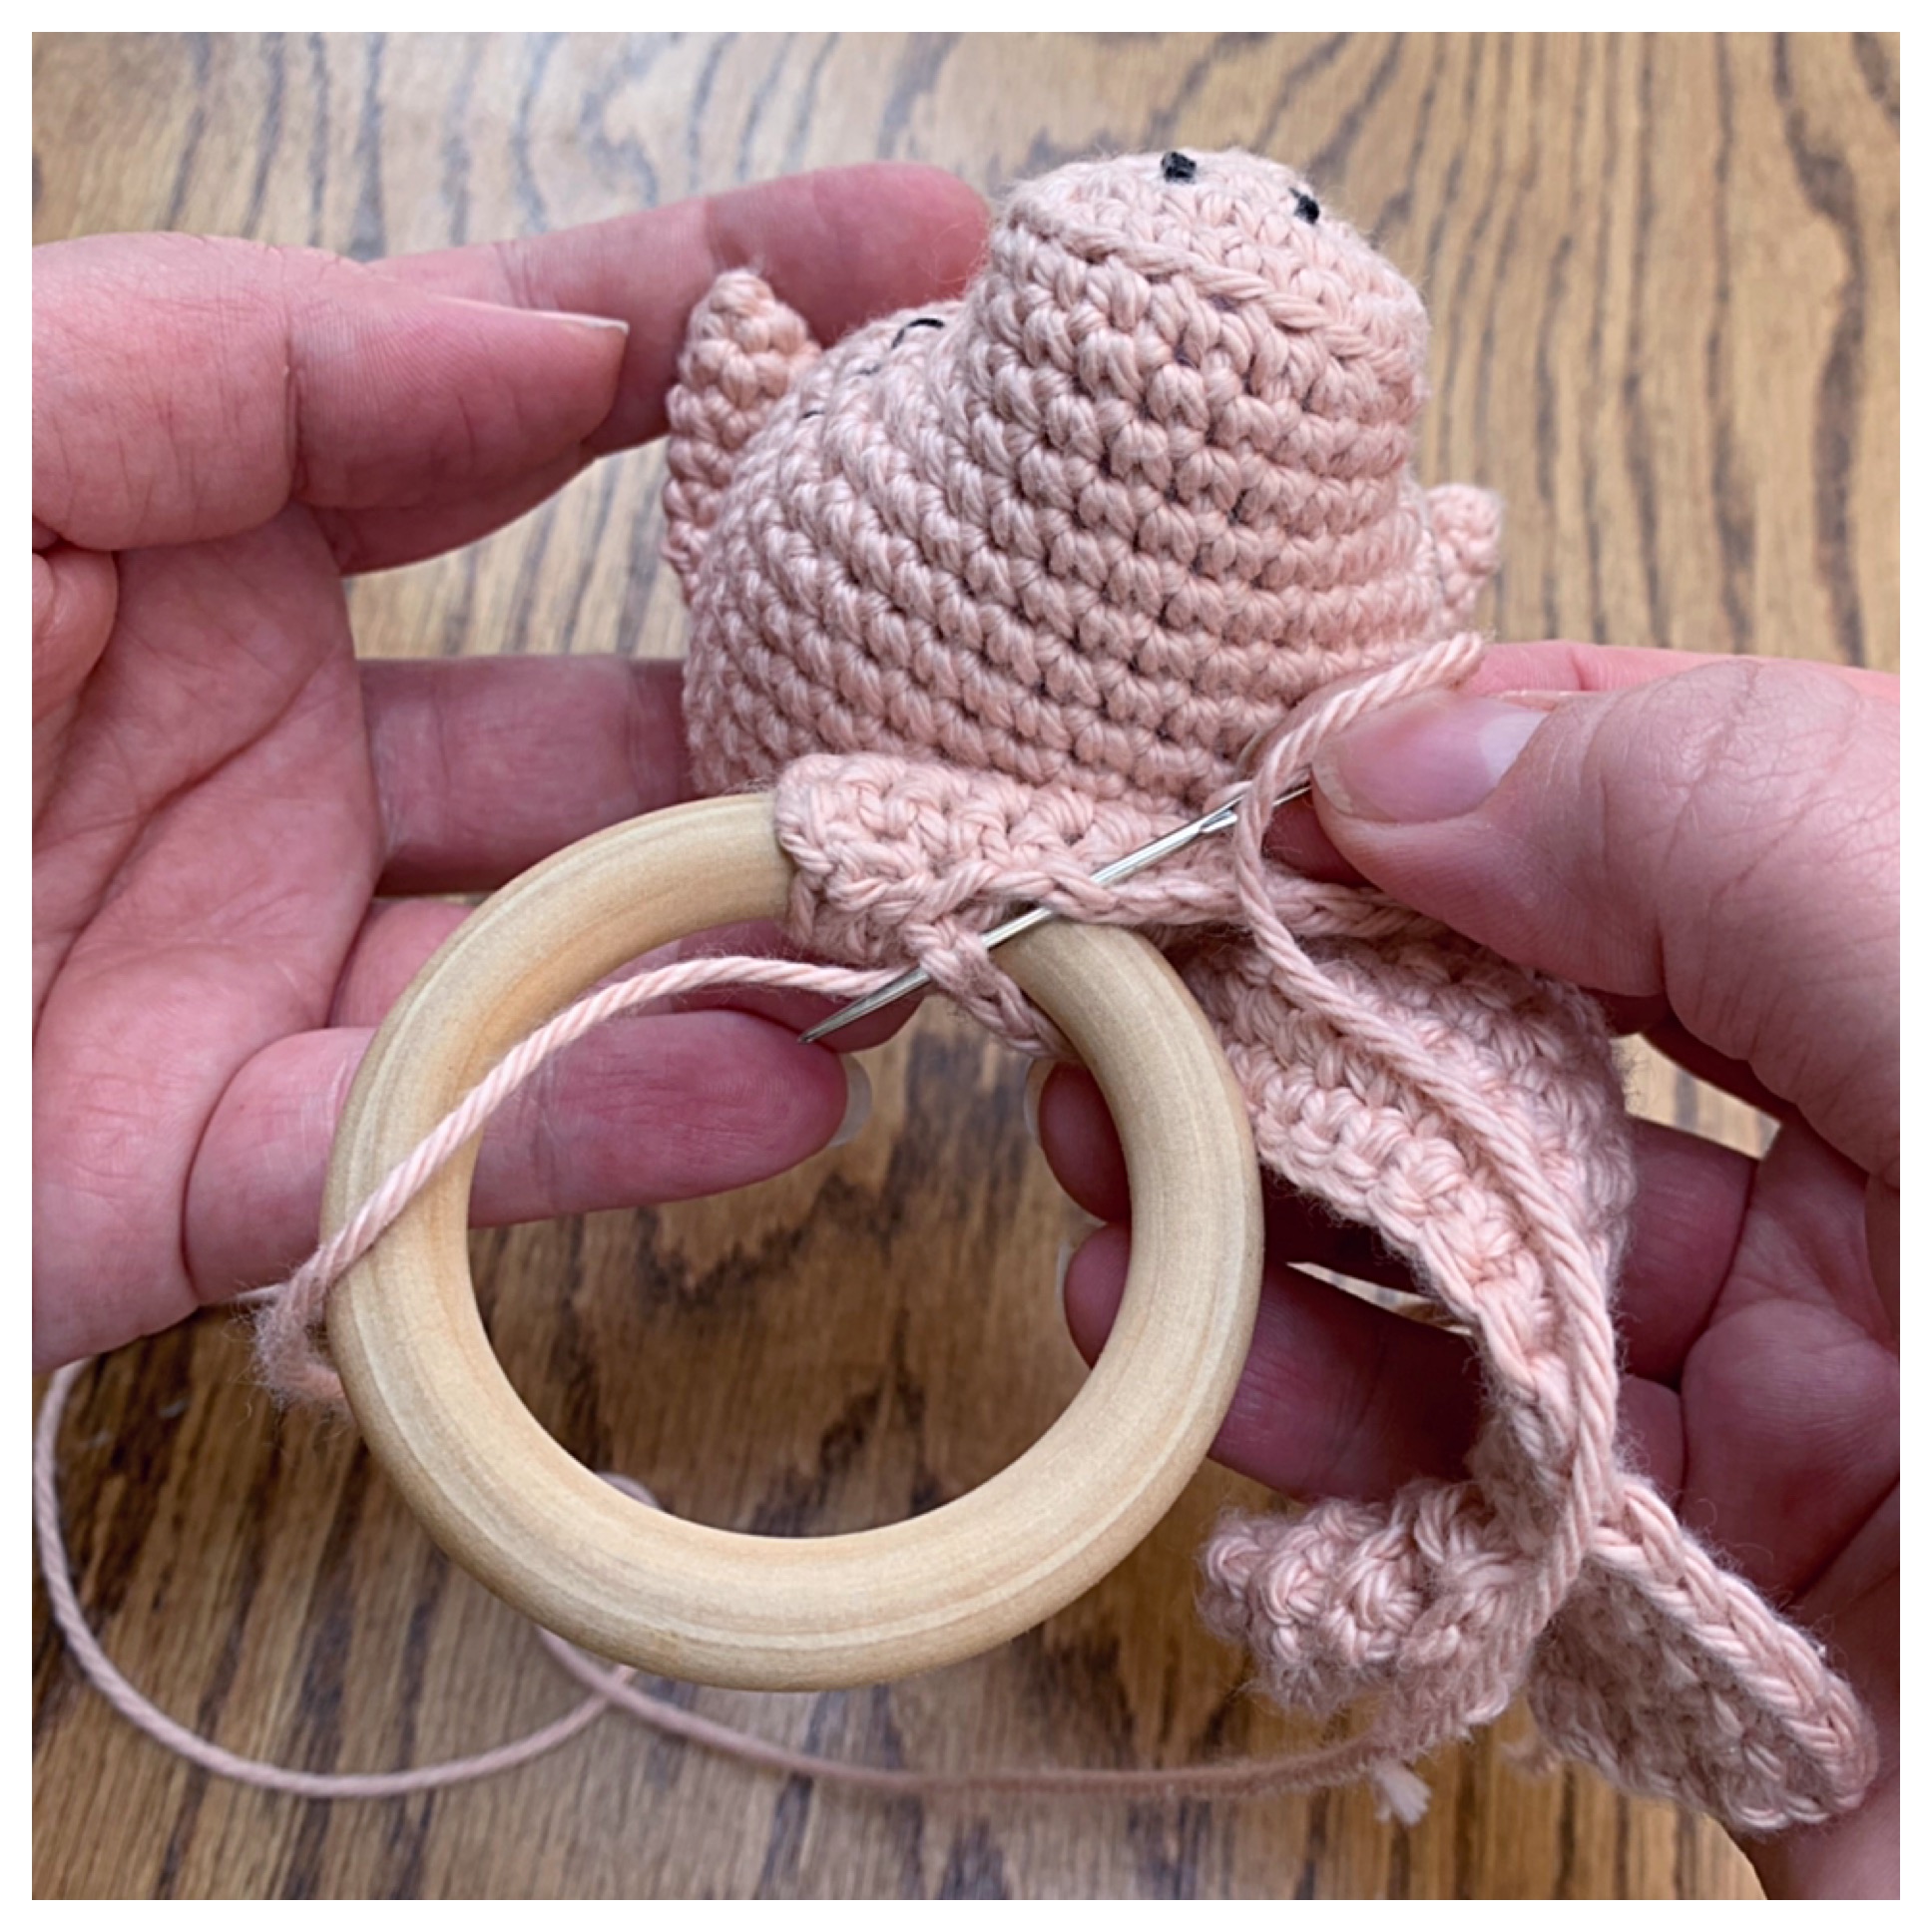
Congratulations! You have finished This Lil Piggy rattle modification!! Please feel free to contact me with any questions or concerns, you may have.
Thank you for your support, and I hope you have enjoyed this pattern as much as I did designing it for you!
Tag me on Instagram with your makes @sarahdeecrochet
Please note that this pattern is for personal use only. You may make as many items as you wish for yourself or as gifts. You may sell the item that you make from this pattern, but I ask that you please refer back to me as the designer. Please do not share, reproduce or sell this pattern, online or in print. Thank you for your support!
Discover more from SarahDee Crochet
Subscribe to get the latest posts sent to your email.

