
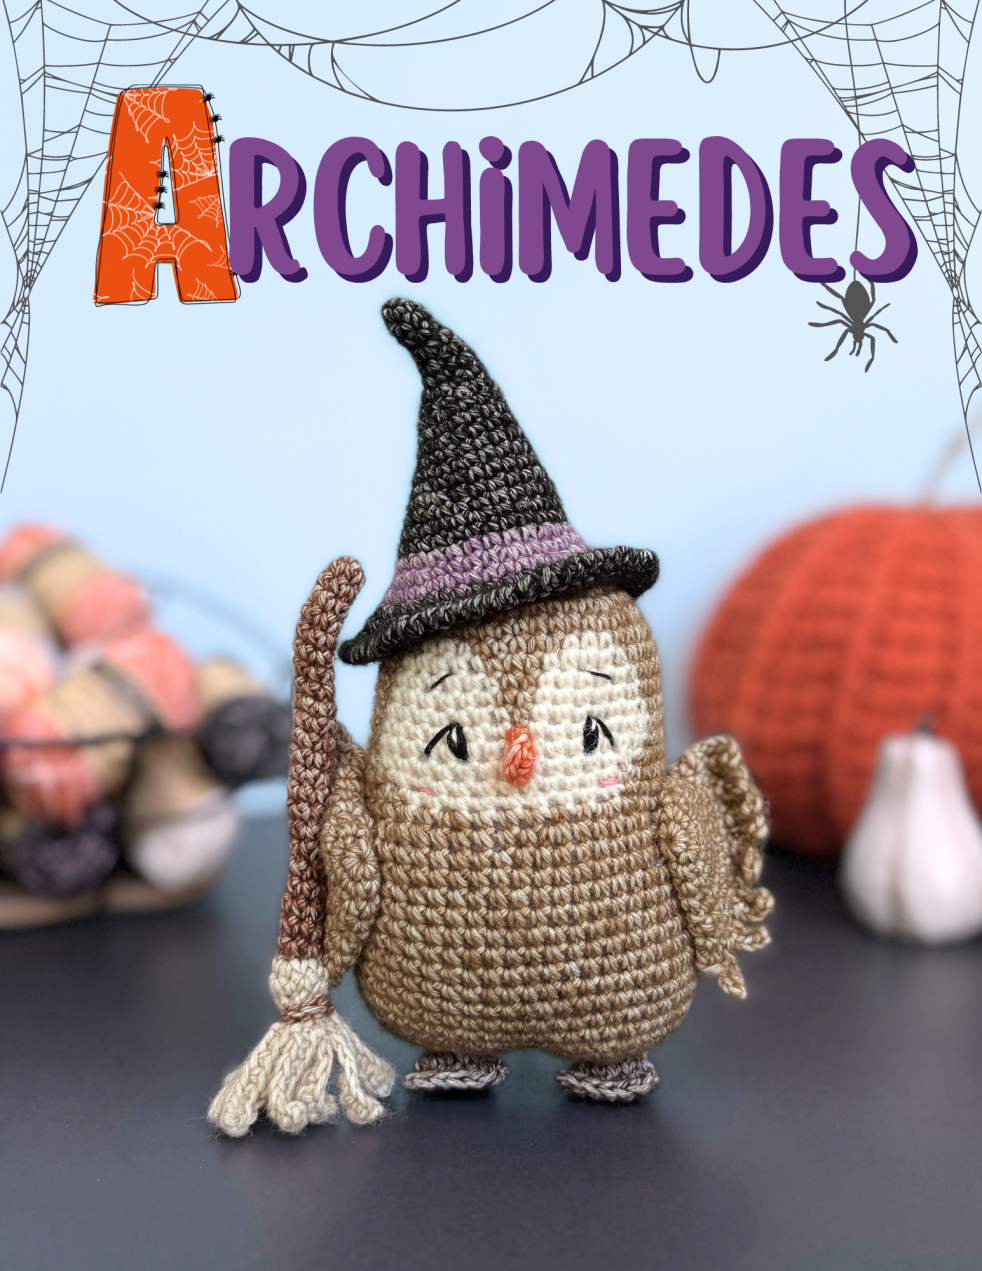
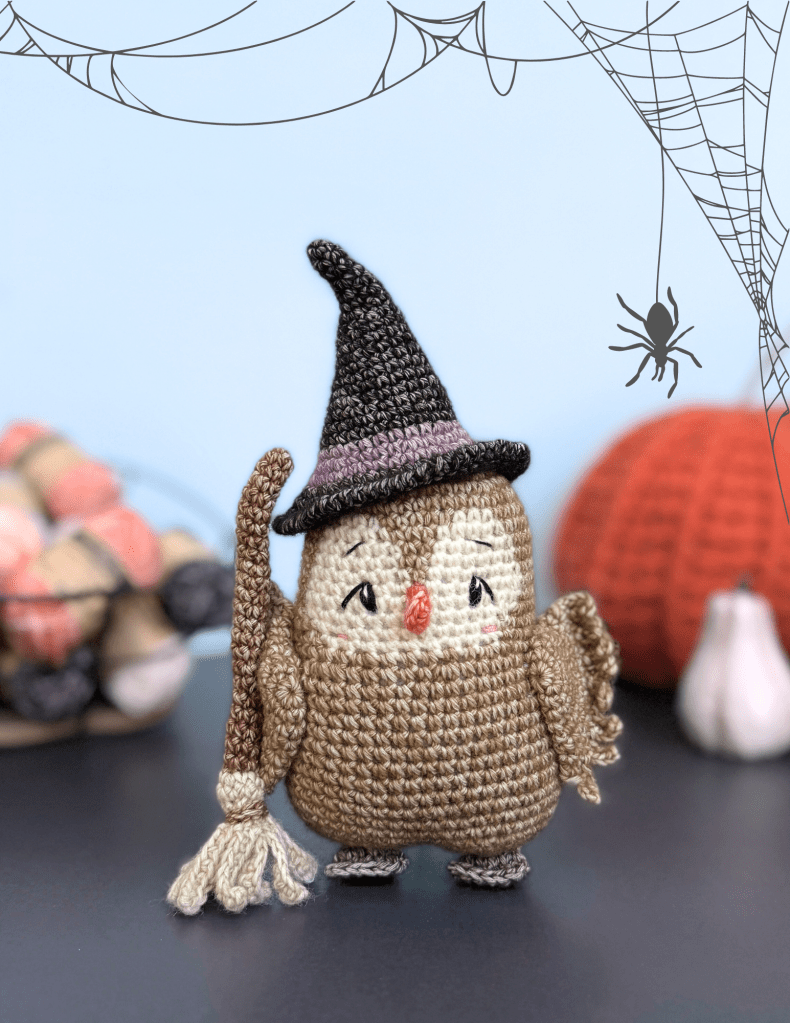
Welcome, fellow crafters! Today, I’m thrilled to share a delightful crochet pattern that’s perfect for the upcoming spooky season: meet Archimedes, the whimsical owl who’s ready to cast a spell in your home. Adorned with a charming witch hat and equipped with a mini broom, Archimedes is not just a crochet project; he’s a delightful companion for all your Halloween festivities!
Just like Blossom the Skunk, I originally made Archimedes for an Instagram CAL, but you all loved him so much I knew I had to share him here. Thank you for your ongoing support of my designs!
Don’t forget to use the hashtag #sarahdeecrochet to join the awesome gallery of projects!
I added ad-free, PDFs of this pattern in my Etsy, Ravelry, and Amigurumi.com shops!
Materials
- 2.75mm hook
- Stitch marker or scrap yarn for running stitch marker
- Scissors
- Weaving needle
- T-Pins
- Yarn
- Polyfill
- Black, white & pink embroidery thread
Yarn Used
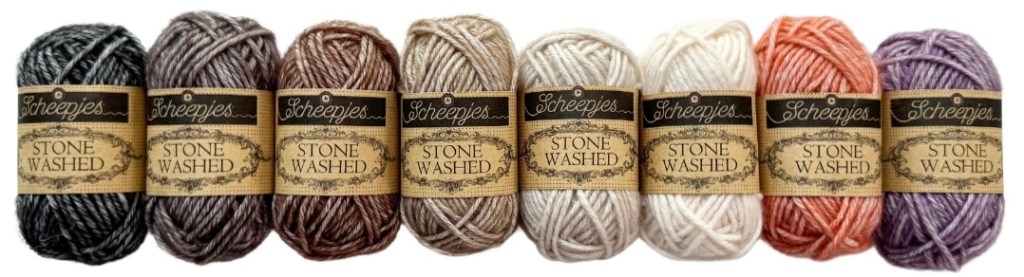
Scheepjes Stonewashed
Black Onyx(7g)
Obsidian(3g)
Brown Agate(3g)
Boulder Opal(28g)
Axinite(4g)
Moonstone(4g)
Coral(1g)
Deep Amethyst(5g)
Learn more about Stonewashed Regular and Stonewashed XL
Abbreviations
Rnd – round
chX – chain X amount of sts
MR – magic adjustable ring
st(s) – stitch(es)
sl st – slip stitch
sc – single crochet
hdc – half double crochet
dec – invisible decrease
inc – increase
crab st – sc from left to right, also known as reverse sc
BLO – back loop only
FLO – front loop only
FO – fasten off
Notes
The pattern is in US terminology and is made in continuous rounds. Take care to always move the stitch marker up to the last stitch at the end of each round. Stitch count is in ( ) at the end of each round. Make sure to have the correct number of stitches before moving on.
Legal
This pattern is for personal use only. You may sell the items that you make from this pattern, but I ask that you please refer back to ©️SarahDeeCrochet as the designer. Altering, reproducing, or selling this pattern, online or in print is strictly prohibited. This pattern is protected by international copyright laws.
Alright! Let’s get stitching and conjure up some crochet magic together!
Owl Body
Starting with Boulder Opal
Rnd 1: 6sc in a MR (6)
Rnd 2: inc x 6 (12)
Rnd 3: [sc, inc] x 6 (18)
Rnd 4: [sc, inc, sc] x 6 (24)
Rnd 5: [3sc, inc] x 6 (30)
Rnd 6: [2sc, inc, 2sc] x 6 (36)
Rnd 7: [5sc, inc] x 6 (42)
Rnd 8: sc in each st (42)
This is where we start the color work. The color (B for Brown and W for White) is listed before the stitches. Sometimes the dec sts will be worked over both colors. Sometimes you will have an inc next to a dec, this will help with the way the color placement lays. Carry the yarn with floats whenever possible. If you are unable to carry the yarn, cut at each color change and knot the ends together inside the work.
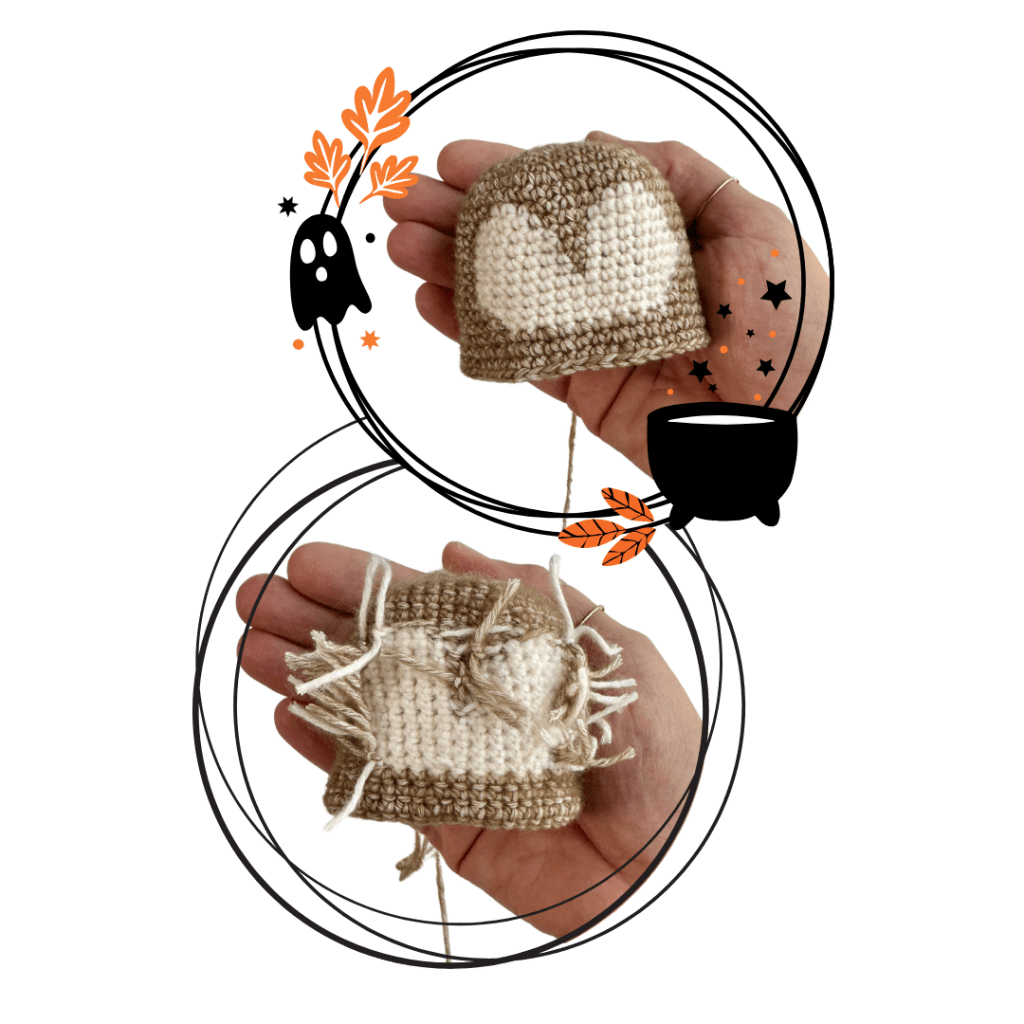
Rnd 9: B-16sc W-3sc B-5sc W-3sc B-15sc (42)
Rnd 10: B-15sc W-5sc B-3sc W-5sc B-14sc (42)
Rnd 11-12: B-15sc W-6sc B-2sc W-6sc B-13sc (42)
Rnd 13-14: B-15sc W-7sc B-sc W-7sc B-12sc (42)
Rnd 15: B-15sc W-15sc B-12sc (42)
Rnd 16: B-14sc, inc W-dec, 11sc, dec B-inc, 11sc (42)
Rnd 17: B-17sc W-12sc B-13sc (42)
Rnd 18: B-2sc, dec, [5sc, dec] x 2 W-5sc, dec, 3sc B-[dec, 5sc] x 2 (36)
FO White yarn. Continue with the body.
Use Boulder Opal from here on
Rnd 19: [5sc, inc] x 6 (42)
Rnd 20: [3sc, inc, 3sc] x 6 (48)
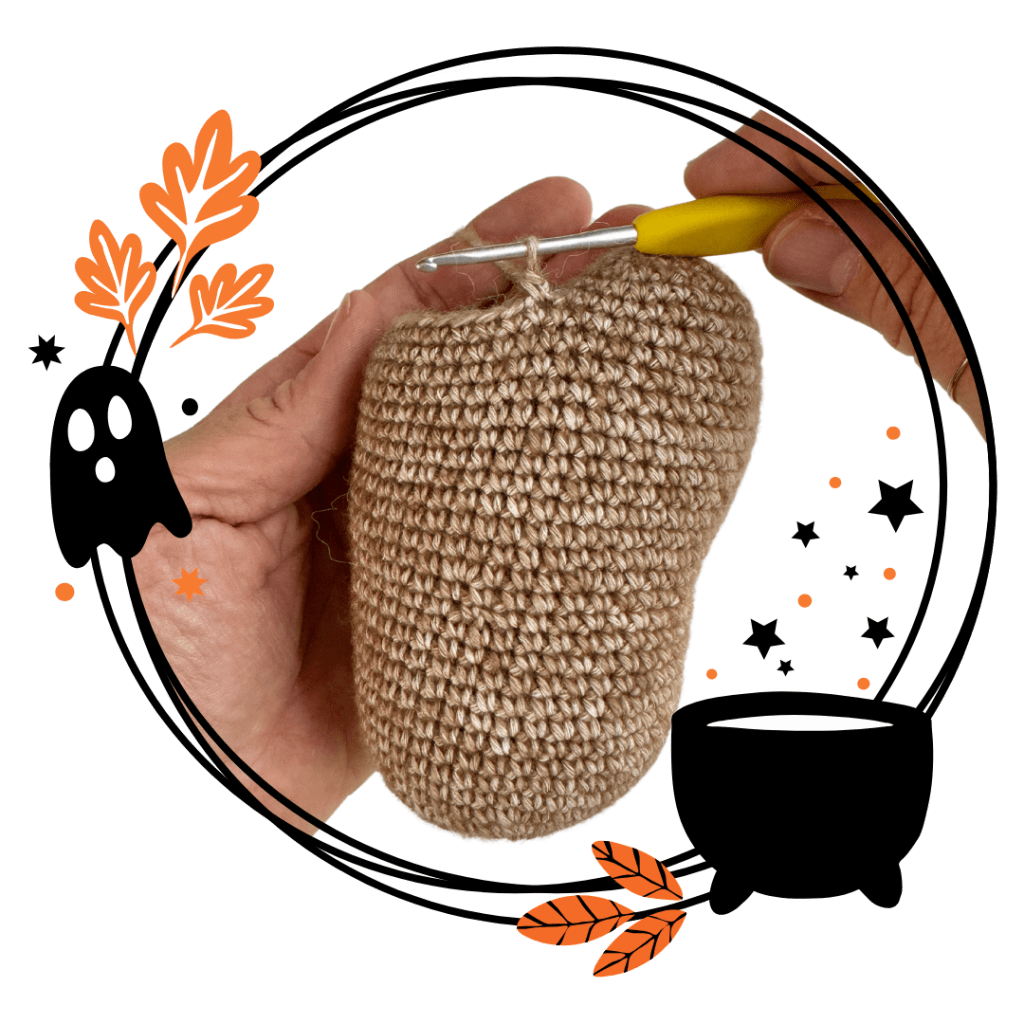
Rnd 21-31: sc in each st (48)
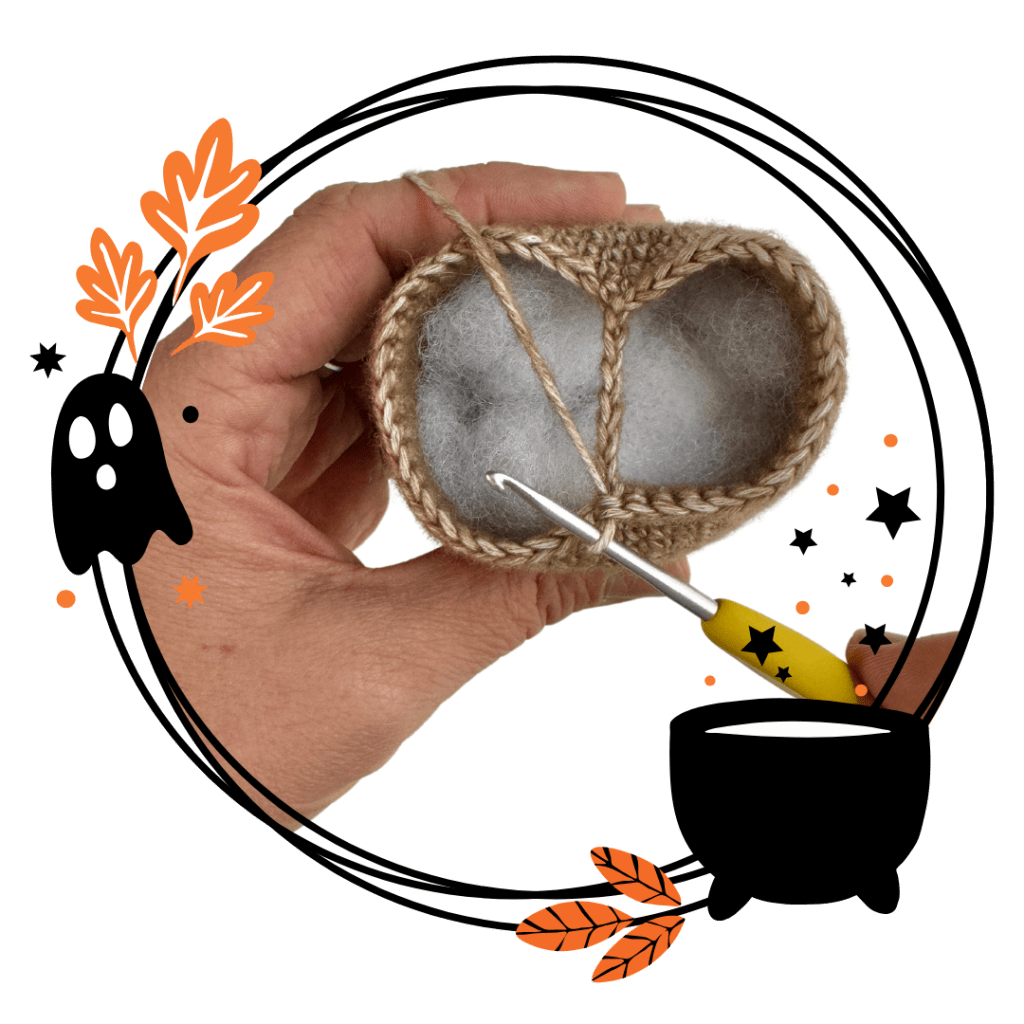
Add or remove some sc to get to the middle of the back. Fold the body in half and use the color work of the face to help you find the middle of the body. Place your st marker. Start stuffing the body, continue stuffing until the last rnd.
Rnd 32: ch6, skip 24sc, 24sc (30)
Double check your placement, and make sure the ch6 is in the exact middle of the body. The ch6 now count as sts.
Rnd 33: 6sc across BLO of the ch6, [sc, dec, sc] x 6 (24)
Rnd 34: [sc, dec, sc] x 6 (18) Rnd 35: [sc, dec] x 6 (12)
Rnd 36: dec x 6 (6)
Sl st into the next st to FO. Close the hole by weaving your tail through the FLO of the remaining 6sts, and pull to close.
Adding 2nd Leg
Rnd 1: With a sl knot on your hook, sc into the first st, to the left of the first leg, on the back of the body, 23sc (30) The ch6 still counts as sts. Place your st marker.
Rnd 2: 6sc across the other side of the ch6, [sc, dec, sc] x 6 (24)
Rnd 3: [sc, dec, sc] x 6 (18)
Add final stuffing, continue stuffing until the last rnd.
Rnd 4: [sc, dec] x 6 (12)
Rnd 5: dec x 6 (6)
Sl st into the next st to FO. Close the hole by weaving your tail through the FLO of the remaining 6sts, and pull to close. There may be a natural gap where the legs split, you can sew it closed with a piece of yarn.
Wings x 2
Using Boulder Opal
Rnd 1: 6sc in a MR (6)
Rnd 2: inc x 6 (12)
Rnd 3: [3sc, inc] x 3 (15)
Rnd 4: sc in each st (15)
Rnd 5: [4sc, inc] x 3 (18)
Rnd 6: [2sc, inc] x 6 (24)
Rnd 7: sc in each st (24)
Rnd 8: [3sc, inc] x 6 (30)
Fold the wing in half and work through both sides for rnd 9. Do not stuff the wings.
Rnd 9: [sc, ch4, starting in the 2nd ch from hook, sc in each ch, sl st into the next st] x 7. You should have one st left to work, ch4, starting in the 2nd ch from hook, sc in each ch, sl st into the last st.
FO and cut yarn, leave a tail for sewing to the body.
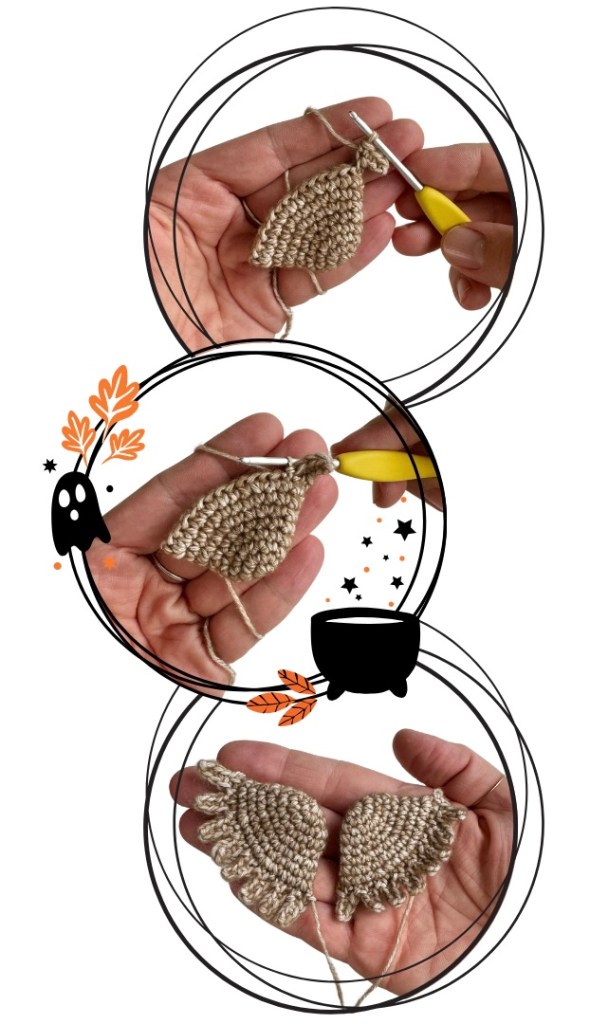
Make sure you have 8 feathers across the bottom of each wing.
Feet x 2
Using Obsidian
Rnd 1: 6sc in a MR (6)
Rnd 2: inc, 5sc (7)
Rnd 3: sc in each st (7)
Rnd 4: inc, 6sc (8)
Rnd 5: inc, 7sc (9)
Rnd 6: inc, 8sc (10)
Rnd 7: [4sc, inc] x 2 (12)
Do not stuff.
Rnd 8: 6hdc across both sides to close.
FO and cut yarn, leave a long tail. Weave the tail through the back of the foot for sewing.
Beak
Using Coral
Rnd 1: 2sc, hdc, 2sc in a MR (5)
Do not join. FO and cut yarn, leave a tail for sewing.
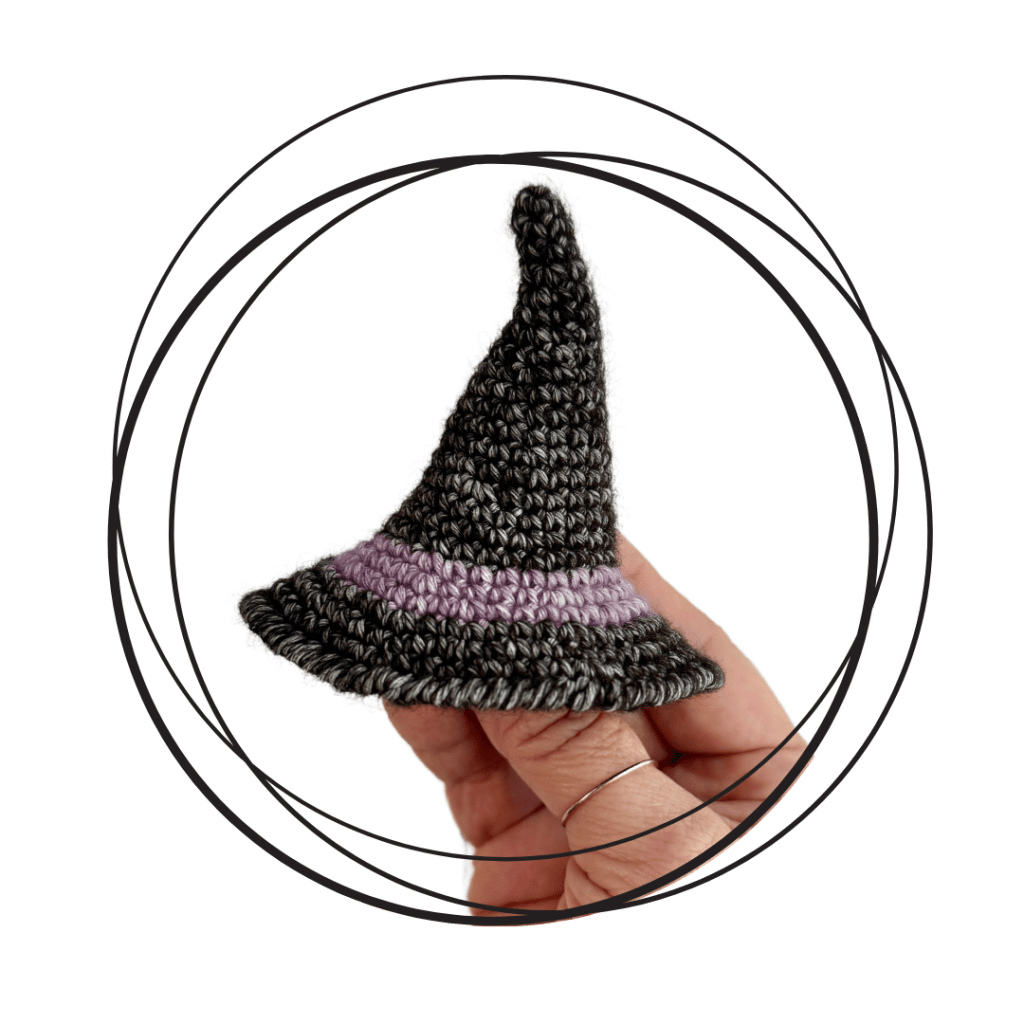
Hat
Starting with Black Onyx
Rnd 1: 5sc in a MR (5)
Rnd 2: sc in each st (5)
Rnd 3: inc, 4sc (6)
Rnd 4: sc in each st (6)
Rnd 5: inc, 5sc (7)
Rnd 6: inc, 6sc (8)
Rnd 7: inc, 7sc (9)
Rnd 8: inc x 3, 6sc (12)
Rnd 9: sc in each st (12)
Rnd 10: [sc, inc] x 3, 6sc (15)
Rnd 11: sc in each st (15)
Rnd 12: [sc, inc, sc] x 3, 6sc (18)
Rnd 13: sc in each st (18)
Rnd 14: [3sc, inc] x 3, 6sc (21)
Rnd 15: sc in each st (21)
Rnd 16: [2sc, inc, 2sc] x 3, 6sc (24)
Rnd 17: sc in each st (24)
Rnd 18: [5sc, inc] x 3, 6sc (27)
Rnd 19: sc in each st (27)
Change to Deep Amethyst
Rnd 20: [3sc, inc, 3sc] x 3, 6sc (30)
Rnd 21: [2sc, inc, 2sc] x 6 (36)
Rnd 22: [5sc, inc] x 6 (42)
Change to Black Onyx
Rnd 23: [3sc, inc, 3sc] x 6 (48)
Rnd 24: [7sc, inc] x 6 (54)
Rnd 25: [4sc, inc, 4sc] x 6 (60)
Rnd 26: crab st in each st around (60)
Sl st into the first st to join. FO and cut yarn, leave a tail for sewing to the head.
Broom
Note** Our tension might be different. You may need to adjust your rnds for preferred length.
Starting with Brown Agate
Rnd 1: 5sc in a MR (5)
Rnd 2: inc, 4sc (6)
Rnd 3-24: sc in each st (6)
Change to Axinite
Rnd 25: Working through FLO – [sc, inc] x 3 (9) Rnd 26: sc in each st (9) Rnd 27: [2sc, dec] x 2, sc (7) *Optional* Add pipe cleaner to the broom.
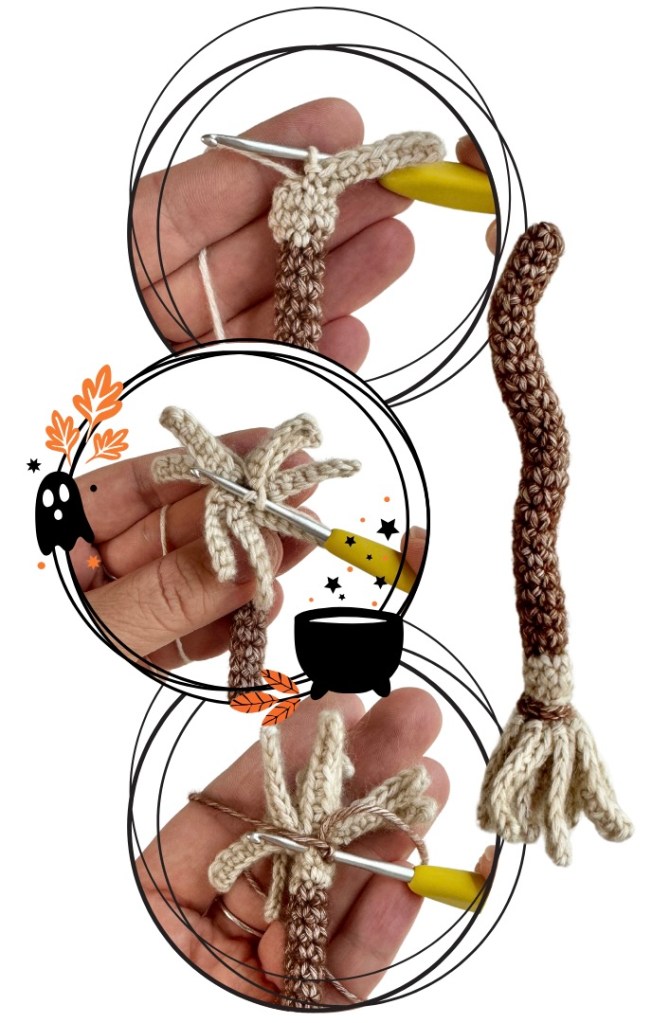
Rnd 28: [Ch 8, starting in the 2nd ch from hook, sc in each ch st, sl st into the FLO of the next st on the broom] x 7
Rnd 29: [Ch 8, starting in the 2nd ch from hook, sc in each ch st, skip 2 BLO sts from Rnd 28, sl st into the 3rd] x 2 Leave the last st unworked.
FO, cut yarn and hide the end inside of the broom. You should have 9 “bristles” to the broom.
Using Brown Agate
Surface sl st in each st on Rnd 27 of the broom. (7)
Don’t be afraid to pull your sl sts tight, this will help shape the broom. FO, cut yarn and hide ends inside of the broom.
Assembly
Use straight pins to hold all pieces together while you sew.
Sew the wings to the sides of the body between Rnds 18-28, approximately 2 sts away from the Moonstone color work on either side of the face. Leave the feathers free of sewing.
Sew the feet to the bottom of each leg.
Sew the beak to the head, over Rnds 14-16.
Add a small amount of stuffing to the hat and sew to the head, angled slightly to the side.
Sew the broom to a wing, making sure to level the bottom of the broom with the feet.
Embroidery
Embroider the eyes over Rnds 14&15, approximately 3 sts away from either side of the beak.
Embroider the eyebrows over Rnd 11.
Embroider the cheeks between Rnds 17&18.
Need embroidery help? Watch my video to tutorial for small eyes!
Congratulations! You have finished your owl! Please don’t forget to share on your Instagram account using #sarahdeecrochet
This post contains affiliate links that help support these free patterns at no extra cost to you.
Discover more from SarahDee Crochet
Subscribe to get the latest posts sent to your email.


One thought on “Archimedes Owl”