

Sometimes an idea won’t let go.
This little star bauble is one of those projects.
I sat down with no big plan other than a very real fear that if I didn’t get the idea out of my brain right then, it would disappear forever. You know the feeling… the one where inspiration is buzzing and you either listen to it immediately or risk losing it to the chaos of everyday life. So I grabbed my hook, reached for Scheepjes Twinkle, and let myself play.
And just like that, this beautiful crochet star came to life.
Scheepjes Twinkle was the perfect choice for this design. The subtle shimmer adds just enough magic without overpowering the stitches, letting the shape of the star really shine. It has that soft glow that catches the light in the loveliest way: simple, elegant, and a little bit special.
I shared a quick peek in my Instagram stories, not thinking much beyond hey, this turned out cute. But then my inbox absolutely blew up. Messages started rolling in asking for the pattern, the yarn, the details… and that’s when I knew this star needed to be shared quickly.
So here we are.
This pattern is one of those designs that came straight from the heart, made in a moment of creative urgency and joy. I didn’t want to overthink it, or tuck it away for “someday.”
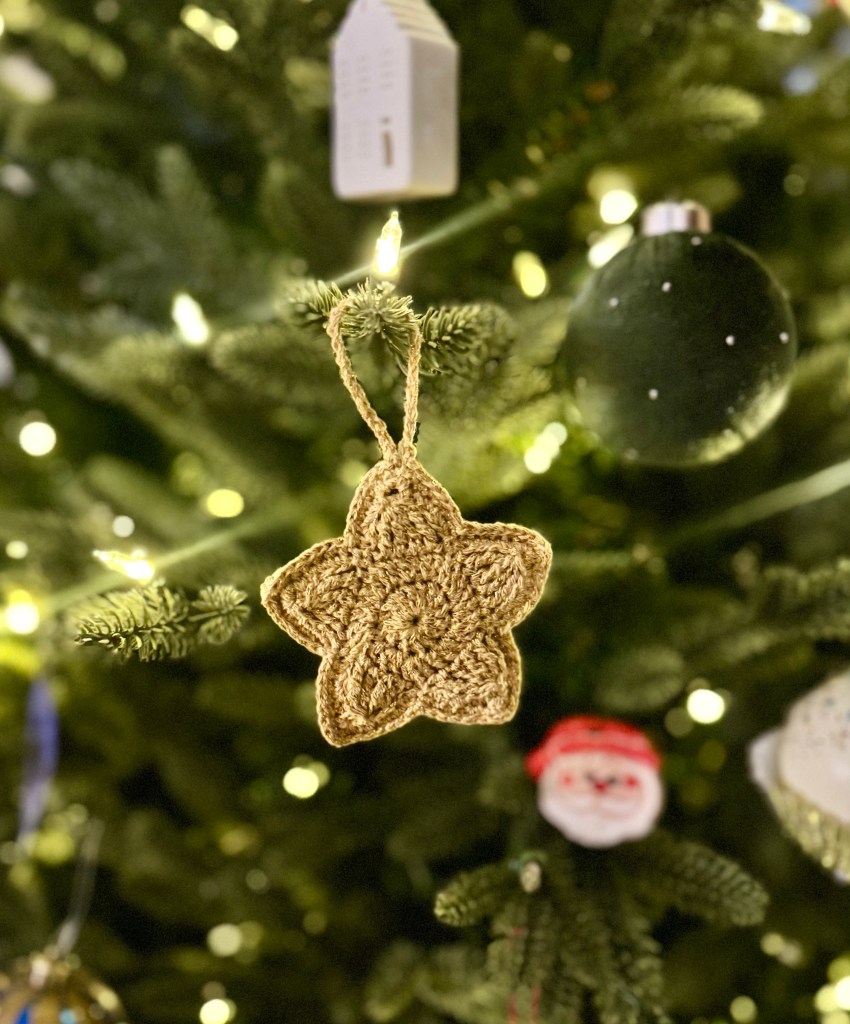
You can use it as a decoration, a gift topper, an ornament, or a little bit of handmade magic just because!
Thank you for always showing up with so much enthusiasm and support. Your excitement is what turns a spark of an idea into something real and I’m so happy this star found its way from my head, to my hook, and finally to you.
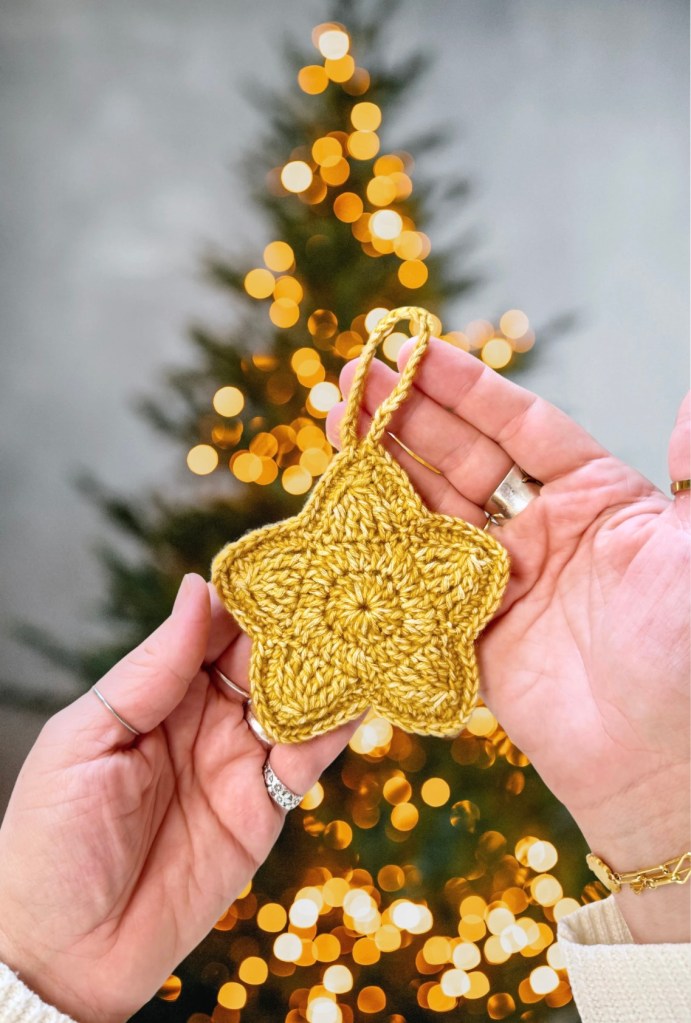
The star made of Twinkle measures approximately 3inches/7.5cm. The star made of Stonewashed is approximately 4inches/10cm.
Notions
- 2.75mm/3.75mm crochet hook
- Scissors
- Tapestry needle
- Card stock or cardboard
Yarn Used
Scheepjes Twinkle – 941
When using Twinkle, use a 2.75mm hook.
Scheepjes Stonewashed – Yellow Jasper
When using Stonewashed, use a 3.75mm hook. The sample photos are made using Stonewashed for stitch clarity.
Did you know that Scheepjes is now on Amazon? You can find your favorite yarns here!
Abbreviations
Rnd – round
chX – chain X amount of stitches
sp(s) – space(s)
st(s) – stitch(es)
sl st – slip stitch
sc – single crochet
dc – double crochet
tr – treble crochet
dtr – double treble crochet
yo – yarn over
BLO – back loop only
FO – fasten off
Specialty Stitches
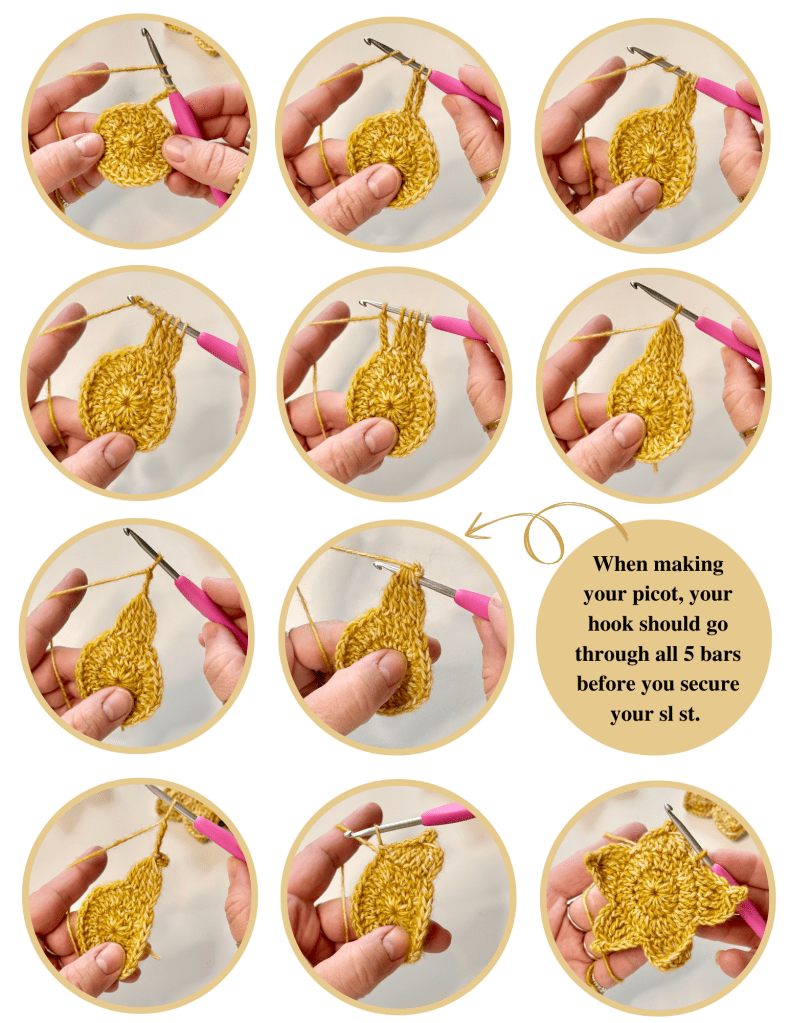
picot – ch3, sl st into the front bars of the previous st. Reference photos below..
MC – Mixed Cluster. Reference photos below.
This is a 4-stitch decreasing cluster that has 2 different stitches to help create the right shape.
Condensed instructions: Dtr in next st (partially worked), tr in next 2 sts (both partially worked), dtr in next st (partially worked), yo, pull through all loops.
Extended instructions: Yo 3 times, insert hook into next st, yo, pull up a loop, (yo, pull through 2 loops) x 3; yo 2 times, insert hook into next st, yo, pull up a loop, (yo, pull through 2 loops) x 2; yo 2 times, insert hook into next st, yo, pull up a loop, (yo, pull through 2 loops) x 2; yo 3 times, insert hook into next st, yo, pull up a loop, (yo, pull through 2 loops) x 3, yo, pull through all loops.
*Note* When making your partially worked sts to make the cluster decrease, the amount of time you yo, is the same amount of time you will pull through 2 loops before moving on to the next step. Example, when you yo 3 times, you will yo and pull through 2 loops, 3 times.
Notes
Please read through entire pattern before beginning. Pattern is in US terminology. This pattern is worked in rounds. Stitch count is in ( ) at the end of each row.
This pattern has not been tested, so if you see a silly mistake don’t be afraid to let me know!
Legal
This pattern is for personal use only. You may sell the items that you make from this pattern, but I ask that you please refer back to ©️SarahDeeCrochet as the designer. Altering, reproducing, or selling this pattern, online or in print is strictly prohibited. This pattern is protected by international copyright laws.
Pattern
Make 2
Pattern Notes: [sc, ch1] counts as a dc, only at the beginning of the round, throughout the pattern.
Ch4, join in the first ch made to create a ring.
Rnd 1: Working into the ring. Sc, ch1, 14dc. Join with a sl st into the ch1. (15)
Rnd 2: Starting in the next st. Sc, ch1, dc in the same st, 2dc in each st around. Join with a sl st into the ch1. (30)
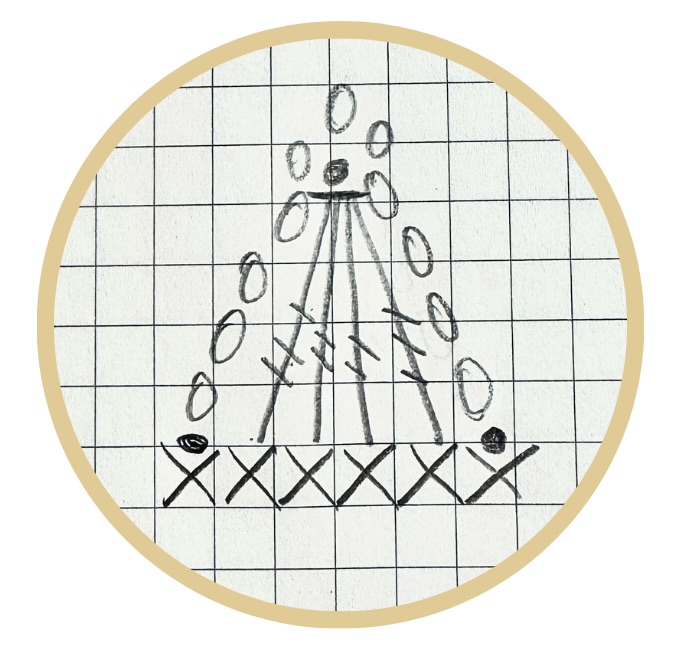
Rnd 3 is where we form the points of the star. This is a combination of ch sts, a mixed cluster stitch(MC), and a picot. Reference the photos below and the written instructions in the Specialty Stitches section for clarity. When making your picot, your hook should go through all 5 bars before you secure your sl st.
Rnd 3: [Ch4, MC, picot, ch4, sl st in the next 2 sts] x 5. On the last st, you will join to the sl st from the previous rnd. (5 points made.)
Below is a rough chart repeat for Rnd 3.
Rnd 4: [Sc in each of the 4ch through BLO, sc in the top of the cluster through BLO, [sc, ch2, sc] in the picot sp, sc in each of the 4ch through BLO, sc in the sl st through BLO, sl st into both loops of the the sl st from the previous rnd] x 5.
FO and cut yarn on the first star made and sew in your ends. Do not FO the second star.
Before you join, use a piece of card stock or cardboard and cut out a star shape that is a cm smaller than your star on each side. This will help our star maintain it’s shape and add a bit of weight.
Joining the 2 stars: Holding the stars with the WS facing each other, and the star with the working yarn facing you. Line up the stitches and sc through each side, the points will get [sc, ch1, sc]. On the third point, [sc, ch25, sc] to create the loop for hanging on the tree. Add your star made of card stock or cardboard. Continue sc through each side and [sc, ch1, sc] in the last two points. Join with a sl st to the first sc made. Cut yarn and sew in the end.

Please don’t forget to tag SarahDeeCrochet and Scheepjes, as well as use #sarahdeecrochet and #scheepjes when you share your projects! ©️SarahDeeCrochet2025 All Rights Reserved.
This post may contain affiliate links that help me support my family, and bring you more free patterns, like this, at no extra cost to you!
Discover more from SarahDee Crochet
Subscribe to get the latest posts sent to your email.


Hi! I had to try this as soon as I saw it! I struggled a little with my interpretation of the directions but your photos were so helpful! I am so proud of myself! I am going to make another and stitch them together for an ornament. Thank you for sharing this adorable little star! Rita Smith p.s. I used lion brand 24/7 cotton yarn. It is a great yarn for this star!
[image: PXL_20251219_005223168.MP.jpg]
LikeLike
I am glad you were able to understand even if it was a bit of a struggle. This is my first time making a pattern like this so I really appreciate this feedback! Thank you so much!
LikeLike