

Hey lovely friends! I was so overwhelmed with the response on the Munches CAL! As a thank you, I decided to release Mini Munches for you to add to your collection! This little guy is a quick project that can be worked up in an afternoon! Great for Market season! Minimal sewing too! (Say whaaaat?!) The arms and legs are crocheted on as we work, so all you have to sew are the ears and snout! Seamless patterns are amazing, am I right?
I also have a video on my YouTube Channel that will help you sew your snout on like a pro, so please give that a watch if you have any questions!
Don’t forget to use the hashtag #MiniMunches so everyone can see your adorable bears!
Happy crocheting, my friends!!
Abbreviations
Rnd – round
chX – chain X amount of stitches
MR – magic adjustable ring (If you need more explanation, there are a ton of free videos available on YouTube)
st(s) – stitch(es)
sl st – slip stitch
sp – space
sc – single crochet
hdc – half double crochet
dec – sc2tog (you may also use an invisible decrease, more popular in amigurumi, I have a video example available on my Instagram feed.)
inc – 2 sc in same stitch
5dc-bobble – dc5tog – Yarn over, insert hook into stitch, yarn over and pull through (3 loops on hook), yarn over and pull through 2 loops. Leave the remaining loops on hook. Repeat the previous step four more times so that you have five half-complete double crochet stitches worked into the same stitch. There will be six loops on the hook. Yarn over and pull through all six loops. This closes your 5dc-bobble crochet stitch. Do not ch. 1, when you crochet into the next stitch, it will secure your bobble.
F/O – Fasten off.
Materials
- 2.75 mm crochet hook for bear
- Stitch marker
- Scissors
- Yarn needle
- Yarn – More details below
- 6 mm safety eyes
- Fiberfill, or your choice of stuffing
- Black embroidery thread for nose.
Notes
Bear is made in continuous rounds. Take care to always move up stitch marker, at the end of each round. Stitch count is in ( ) at the end of each row. Take care to have the correct number of stitches before moving onto the next round. Make sure you are always working on the outside of the animal. Your crochet stitches should be facing the “right way” when finished. Smaller pieces may curl inward, but you can use the end of your crochet hook to push it out to the working side.
Yarn/colors I used for example photos
I use a 2.75 mm hook. The smaller hook helps to maintain an even stitches without having to change tension.
For this example I am using Scheepjes Stonewashed in Brown Agate, Axinite, Larimar and Coral
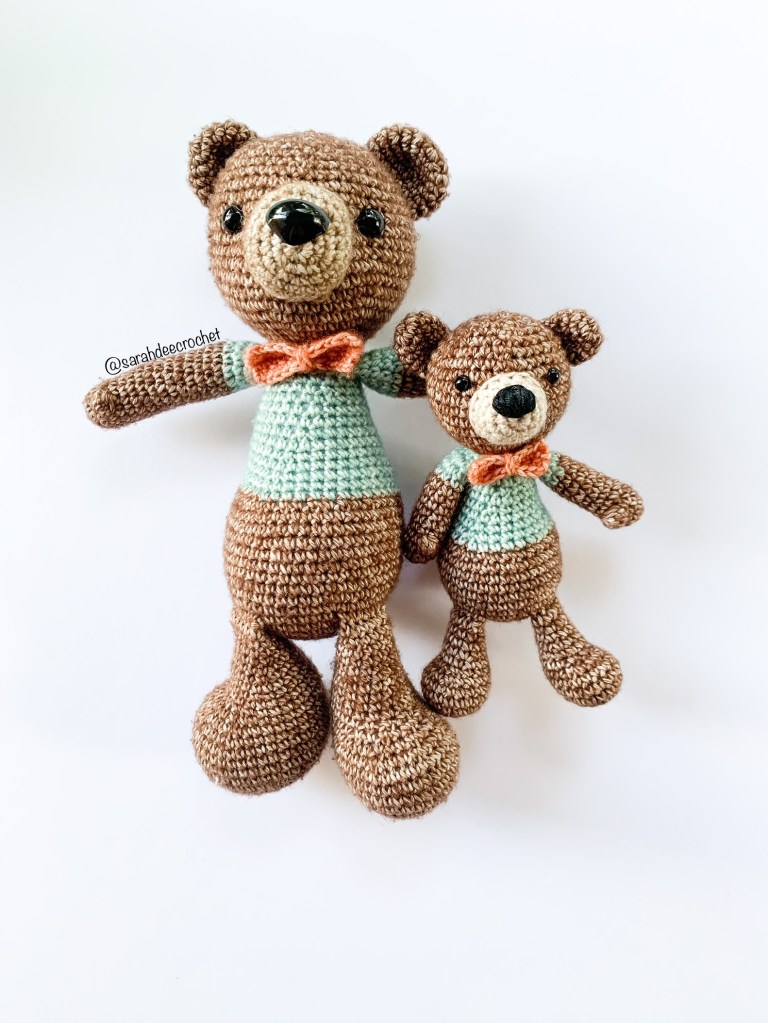
Below is a size comparison of Munches vs. Mini Munches
***Please read through entire pattern before beginning***
Pattern is in US terminology
Pattern
Legs x 2
Using Brown Agate
Rnd 1: 6 sc in a MR
Rnd 2: 1 increase in each st (12)
Rnd 3: [1 sc, 1 inc] x 6 (18)
Rnd 4-6: sc in each st (18)
Rnd 7: [1 sc, dec] x3, 9 sc (15)
Rnd 8: dec x 3, 9 sc (12)
Rnd 9: [4 sc, dec] x2 (10)
Rnd 10: sc in each st (10)
Begin stuffing the foot. Continue stuffing as you crochet, leave last few rounds unstuffed.
Rnd 11: [3 sc, dec] x 2 (8)
Rnd 12-13: sc in each st (8)
Sl st into the next st to F/O. Cut yarn tail.
Arms x 2
Starting with Brown Agate
Rnd 1: 6 sc in a MR
Rnd 2: [1 sc, inc] x 3 (9)
Rnd 3: sc in each st (9)
Rnd 4: 8 sc, 5dc-bobble (9)
Rnd 5-11: sc in each st (9)
Change to Larimar
Rnd 12-13: sc in each st (9)
Rnd 14: 4 sc, dec, 3 sc (8)
Sl st into the next st to F/O. Cut yarn tail. Stuff lightly, leaving the last three rounds unstuffed.
Ears x 2
Using Brown Agate
Rnd 1: 6 sc in a MR (6)
Rnd 2: 1 inc in each st (12)
Rnd 3-4: sc in each st (12)
Rnd 5: [4 sc, dec] x 2 (10)
Sl st in next st to F/O. Cut yarn, leaving a long tail for sewing to the head. Sewn over rounds 33-36 down the side of the head.
Snout
Using Axinite
Rnd 1: 6 sc in a MR (6)
Rnd 2: 1 inc in each st (12)
Rnd 3: [3 sc, inc] x 3 (15)
Rnd 4-5: sc in each st (15)
Sl st into next st to F/O. Leave a long tail for sewing.
Embroider nose over rounds 2 and 3 of the snout, before sewing to the bear. Snout is sewed to head, centered between the eyes, over rounds 28-33. Stuff firm before sewing.
Body
Starting with Brown Agate
Rnd 1: 6 sc in a MR
Rnd 2: 1 inc in each st (12)
Rnd 3: [sc, inc] x 6 (18)
Rnd 4: [2 sc, inc] x 6 (24)
Rnd 5: [3 sc, inc] x 6 (30)
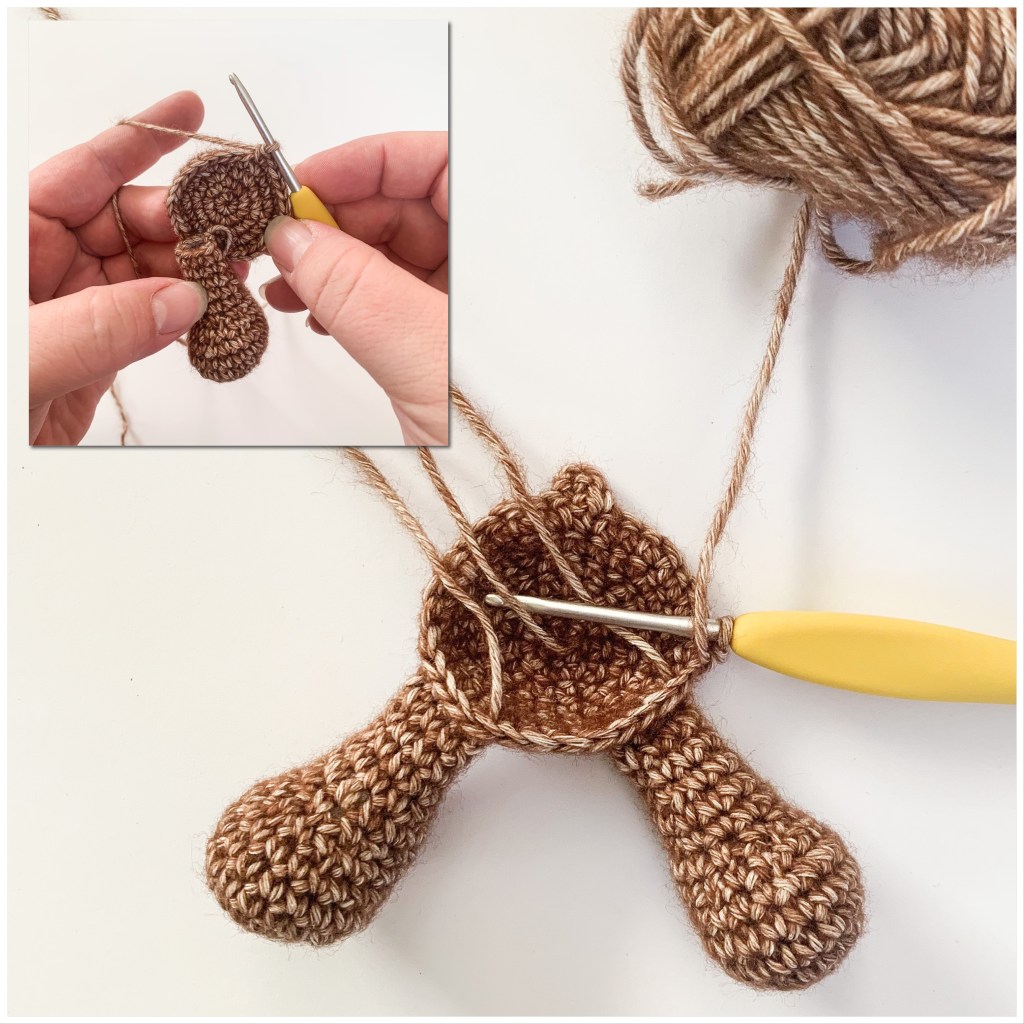
Rnd 6: Attaching the legs and adding tail. Make sure to keep the yarn tails from both legs on the inside of the body. 4 sc through the leg and next 4 st of the body, 4 sc, 4 sc through the 2nd leg and next 4 st of the body, 9 sc, ch 3, sc in 2nd ch from hook, hdc in last ch, 9 sc (30)

Rnd 7: [4 sc, inc] x 6 (36)
Rnd 8-12: sc in each st 36)
Rnd 13: [dec, sc] x 6, 9 sc, Change to Larimar, 9 sc (30)
Rnd 14: [8 sc, dec] x 3 (27)
Rnd 15: [7 sc, dec] x 3 (24)
Rnd 16: [6 sc, dec] x 3 (21)
Rnd 17: sc in each st (21)
Rnd 18: [5 sc, dec] x 3 (18)
Rnd 19: sc in each st (18)
Rnd 20: [4 sc, dec] x 3 (15)
Start stuffing the bear firmly, continue stuffing until the last round.
Rnd 21: 14 sc, sc through the first arm and next stitch of the body (15)
Rnd 22: 3 sc through arm and next 3 sts of the body, 4 sc, 4 sc through the 2nd arm and next 4 stitches of the body, 4 sc (15) Depending on tension, you may need to adjust the placement of the arms by a stitch or two. Take care to have the 4 stitches between the arms, centered on body and that they line up with the legs.
Rnd 23: [3 sc, dec] x 3 (12)
Change to Brown Agate
Rnd 24: sc in BLO of each st (12)
Starting the head
Rnd 25: 1 inc in each st (24)
Rnd 26: [3 sc, inc] x 6 (30)
Rnd 27: [4 sc, inc] x 6 (36)
Rnd 28-34: sc in each st (36)
Rnd 35: [4 sc, dec] x 6 (30)
Place safety eyes between rnds 32 and 33, 8 or 9 sts apart. Be sure of placement before adding backs.

Rnd 36: [3 sc, dec] x 6 (24)
Rnd 37: [2 sc, dec] x 6 (18)
Add extra stuffing to the head.
Rnd 38: [sc, dec] x 6 (12)
Rnd 39: dec x 6 (6)
Sl st into next st to F/O. Cut yarn and weave tail through front loops only of the remaining sts, pull tightly to close. Take care not to break the yarn. Bury yarn tail in head and snip excess.
Bow Tie
Ch 8.
Row 1: Starting in the 2nd ch from hook, sc 7 Do not ch 1, turn
Row 2: 3 sc, ch 1, sk 1, 3 sc Do not ch 1, turn
Row 3: 7 sc
F/O and snip yarn, leaving approx. 10 inches for sewing to bear.
Center of Bow Tie
Ch 4.
F/O and tie around bow tie fabric before sewing to bear.
Congratulations! You have finished your Mini Munches!! Please tag me on Instagram with your projects at @sarahdeecrochet using the hashtag #MiniMunches.
If you have any questions or concerns, please message me on Instagram or contact me here!
Please note that this pattern is for personal use only. You may make as many items as you wish for yourself or as gifts. You may sell the item that you make from this pattern, but I ask that you please refer to me as the designer. Please do not share, reproduce or sell this pattern, online or in print. Thank you for your continued support!

©2019 Sarah Prather of SarahDeeCrochet All rights reserved.
Discover more from SarahDee Crochet
Subscribe to get the latest posts sent to your email.


One thought on “Mini Munches Crochet Pattern”